When we were building our house I knew that I wanted to have a giant Chalkboard Wall. I have always loved the idea of having one not only as a place for the kids to doodle, but also to make signs for the special birthday person, or to write a special scripture or saying, or as a great place to hang Christmas cards across in December. We put it right across from our stairs and I knew it would be the perfect spot! 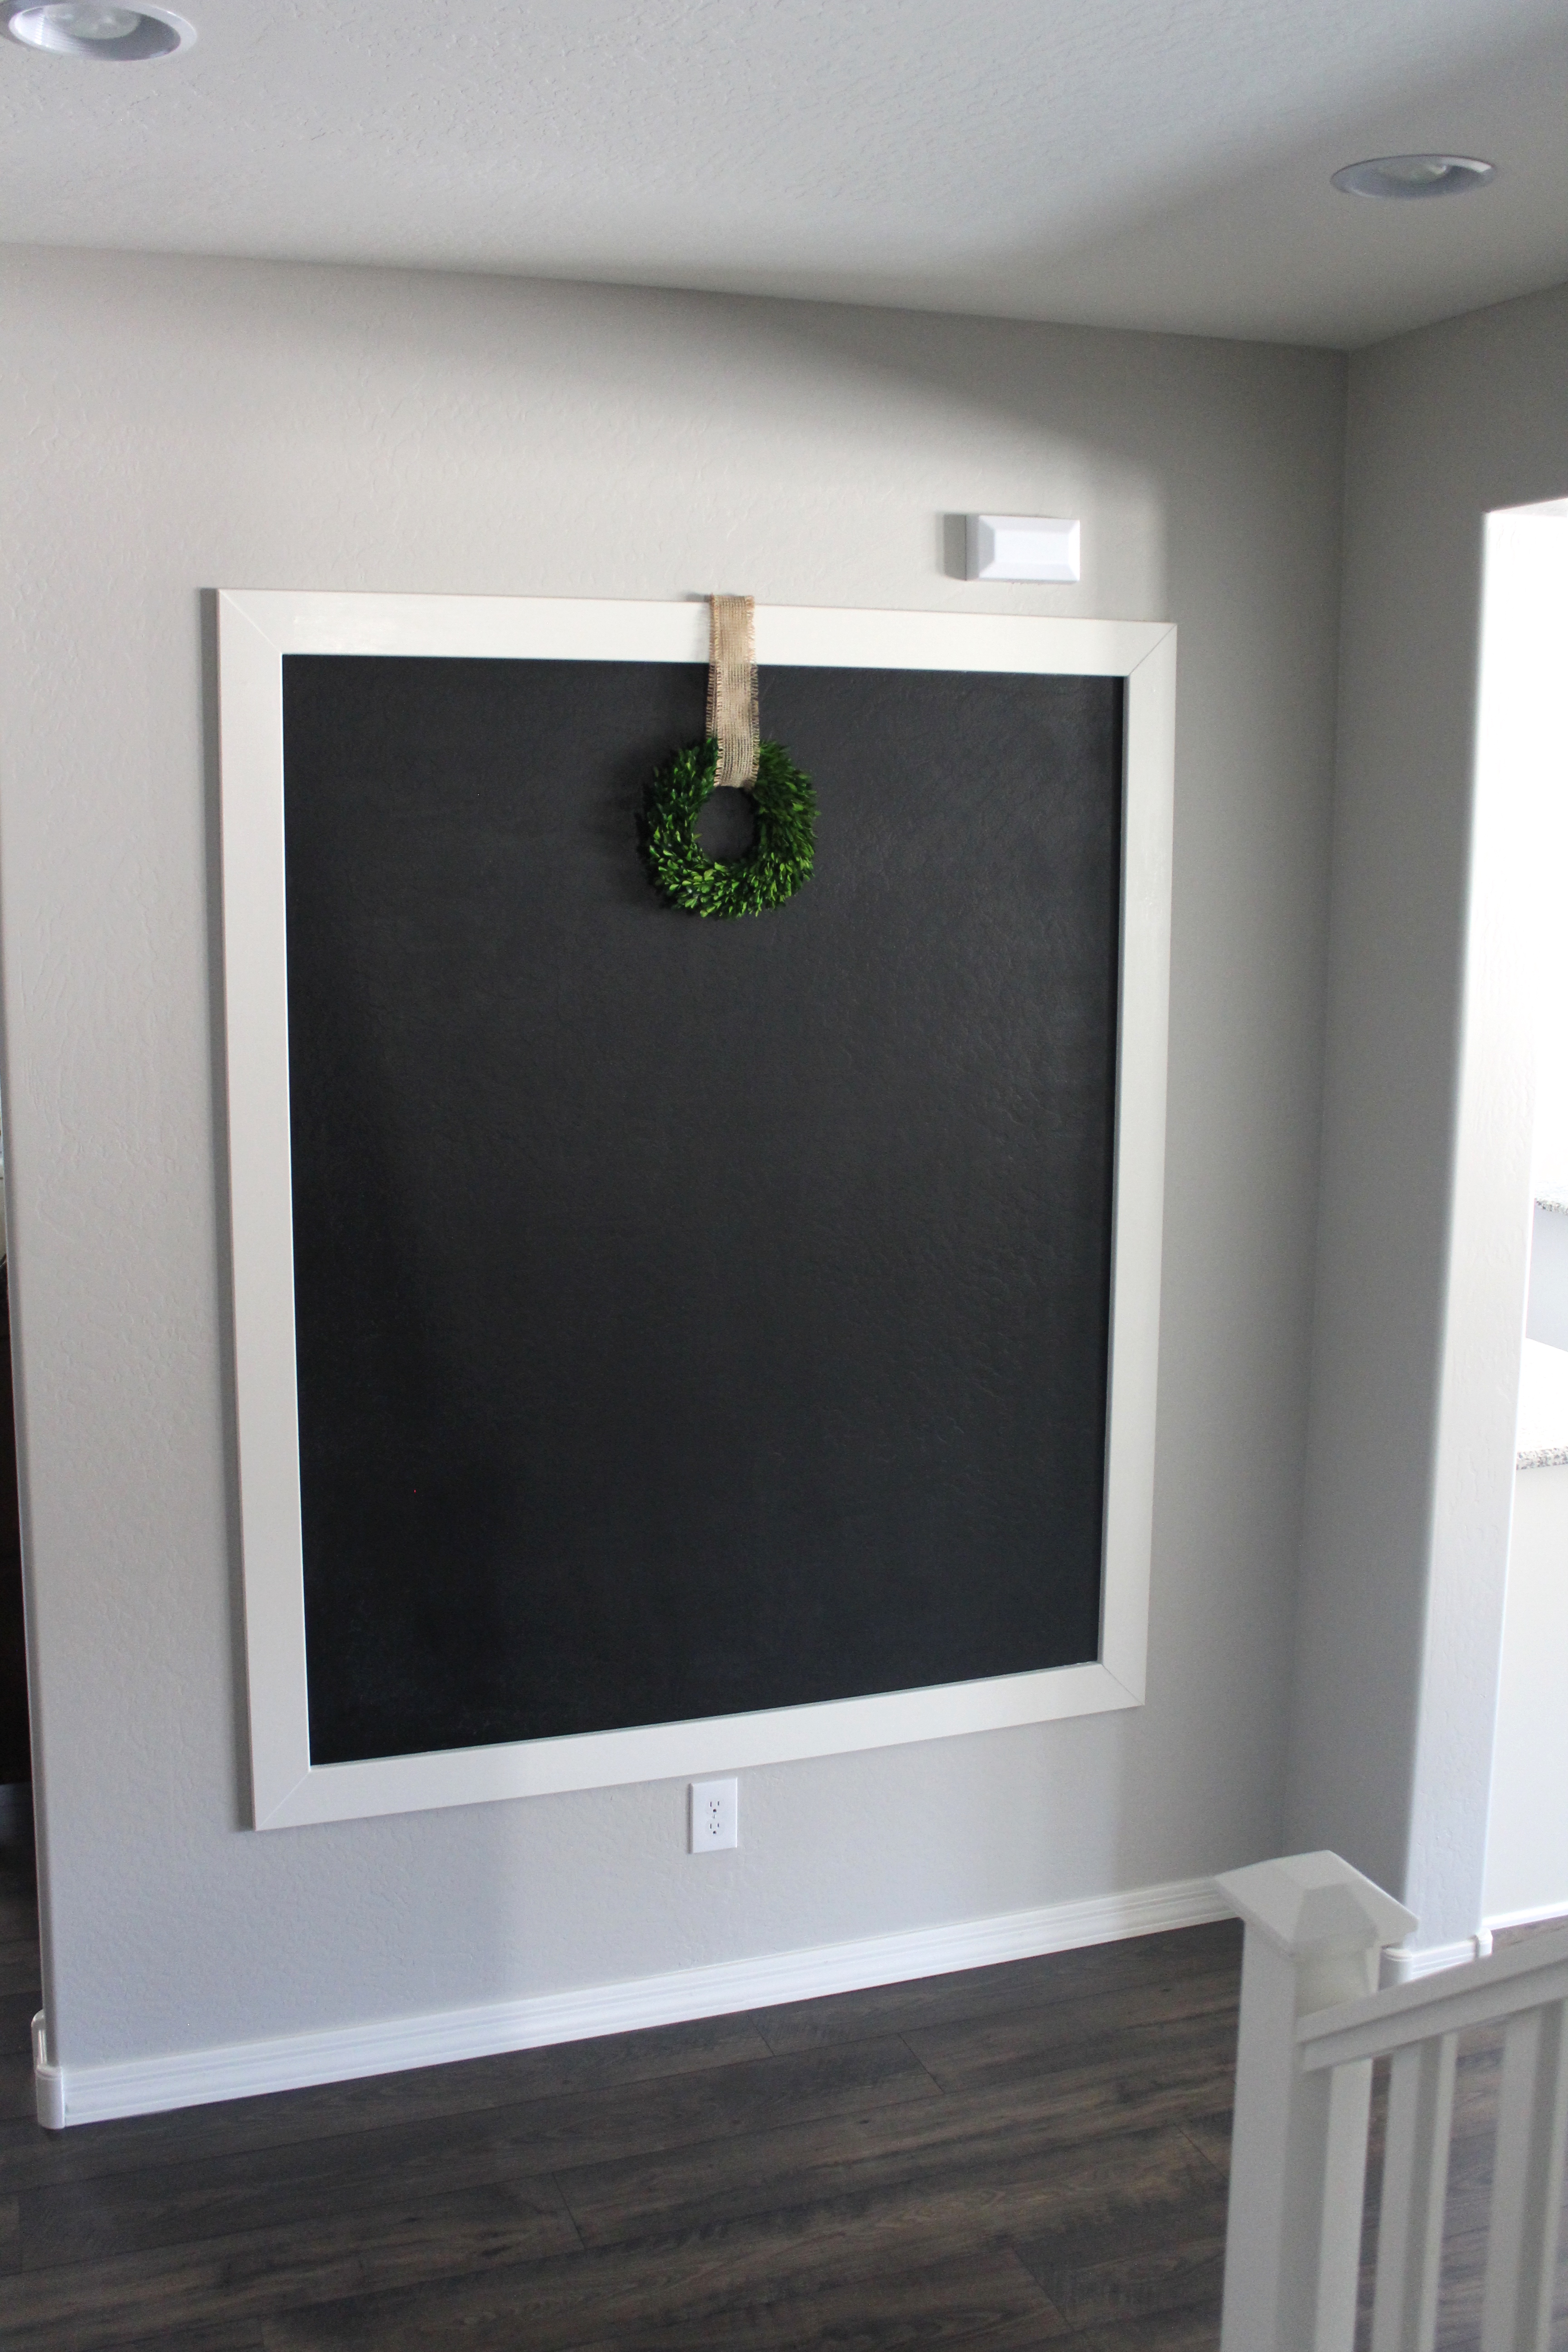
Rather than just paint the entire wall in chalkboard paint I wanted to give it a definite framed out border. I thought that would make a really cute focal point. If you have been thinking about making a chalkboard wall you totally should! They are perfect for filling up any kind of large wall space and it was a really pretty simple cheap project.

So we are in no way DIY experts around here but I thought I would share what we did, and used, if you are interested!
Affiliate links are included below for some items.
DIY Chalkboard Wall
Supplies:
3 1/2 inch x 3/4 inch white wood trim (we purchased ours at Home Depot)
2 inch finish nails
Paint for wood trim (we used Sherwin Williams Dover White gloss as that matches all our other trim)
Miter Saw – we just borrowed our neighbors!
Wood Glue (optional)
Electric Sander (optional)
foam roller
Directions
We started by measuring out approximately how big we wanted the chalkboard and then we marked it with painters tape because I am a visual person. We made sure we left enough room to add our wood trim border all around so it would not hit the doorbell above and the electrical outlet below. The inside of our chalk board measures about 4 1/2 ft x 5 1/2 ft. 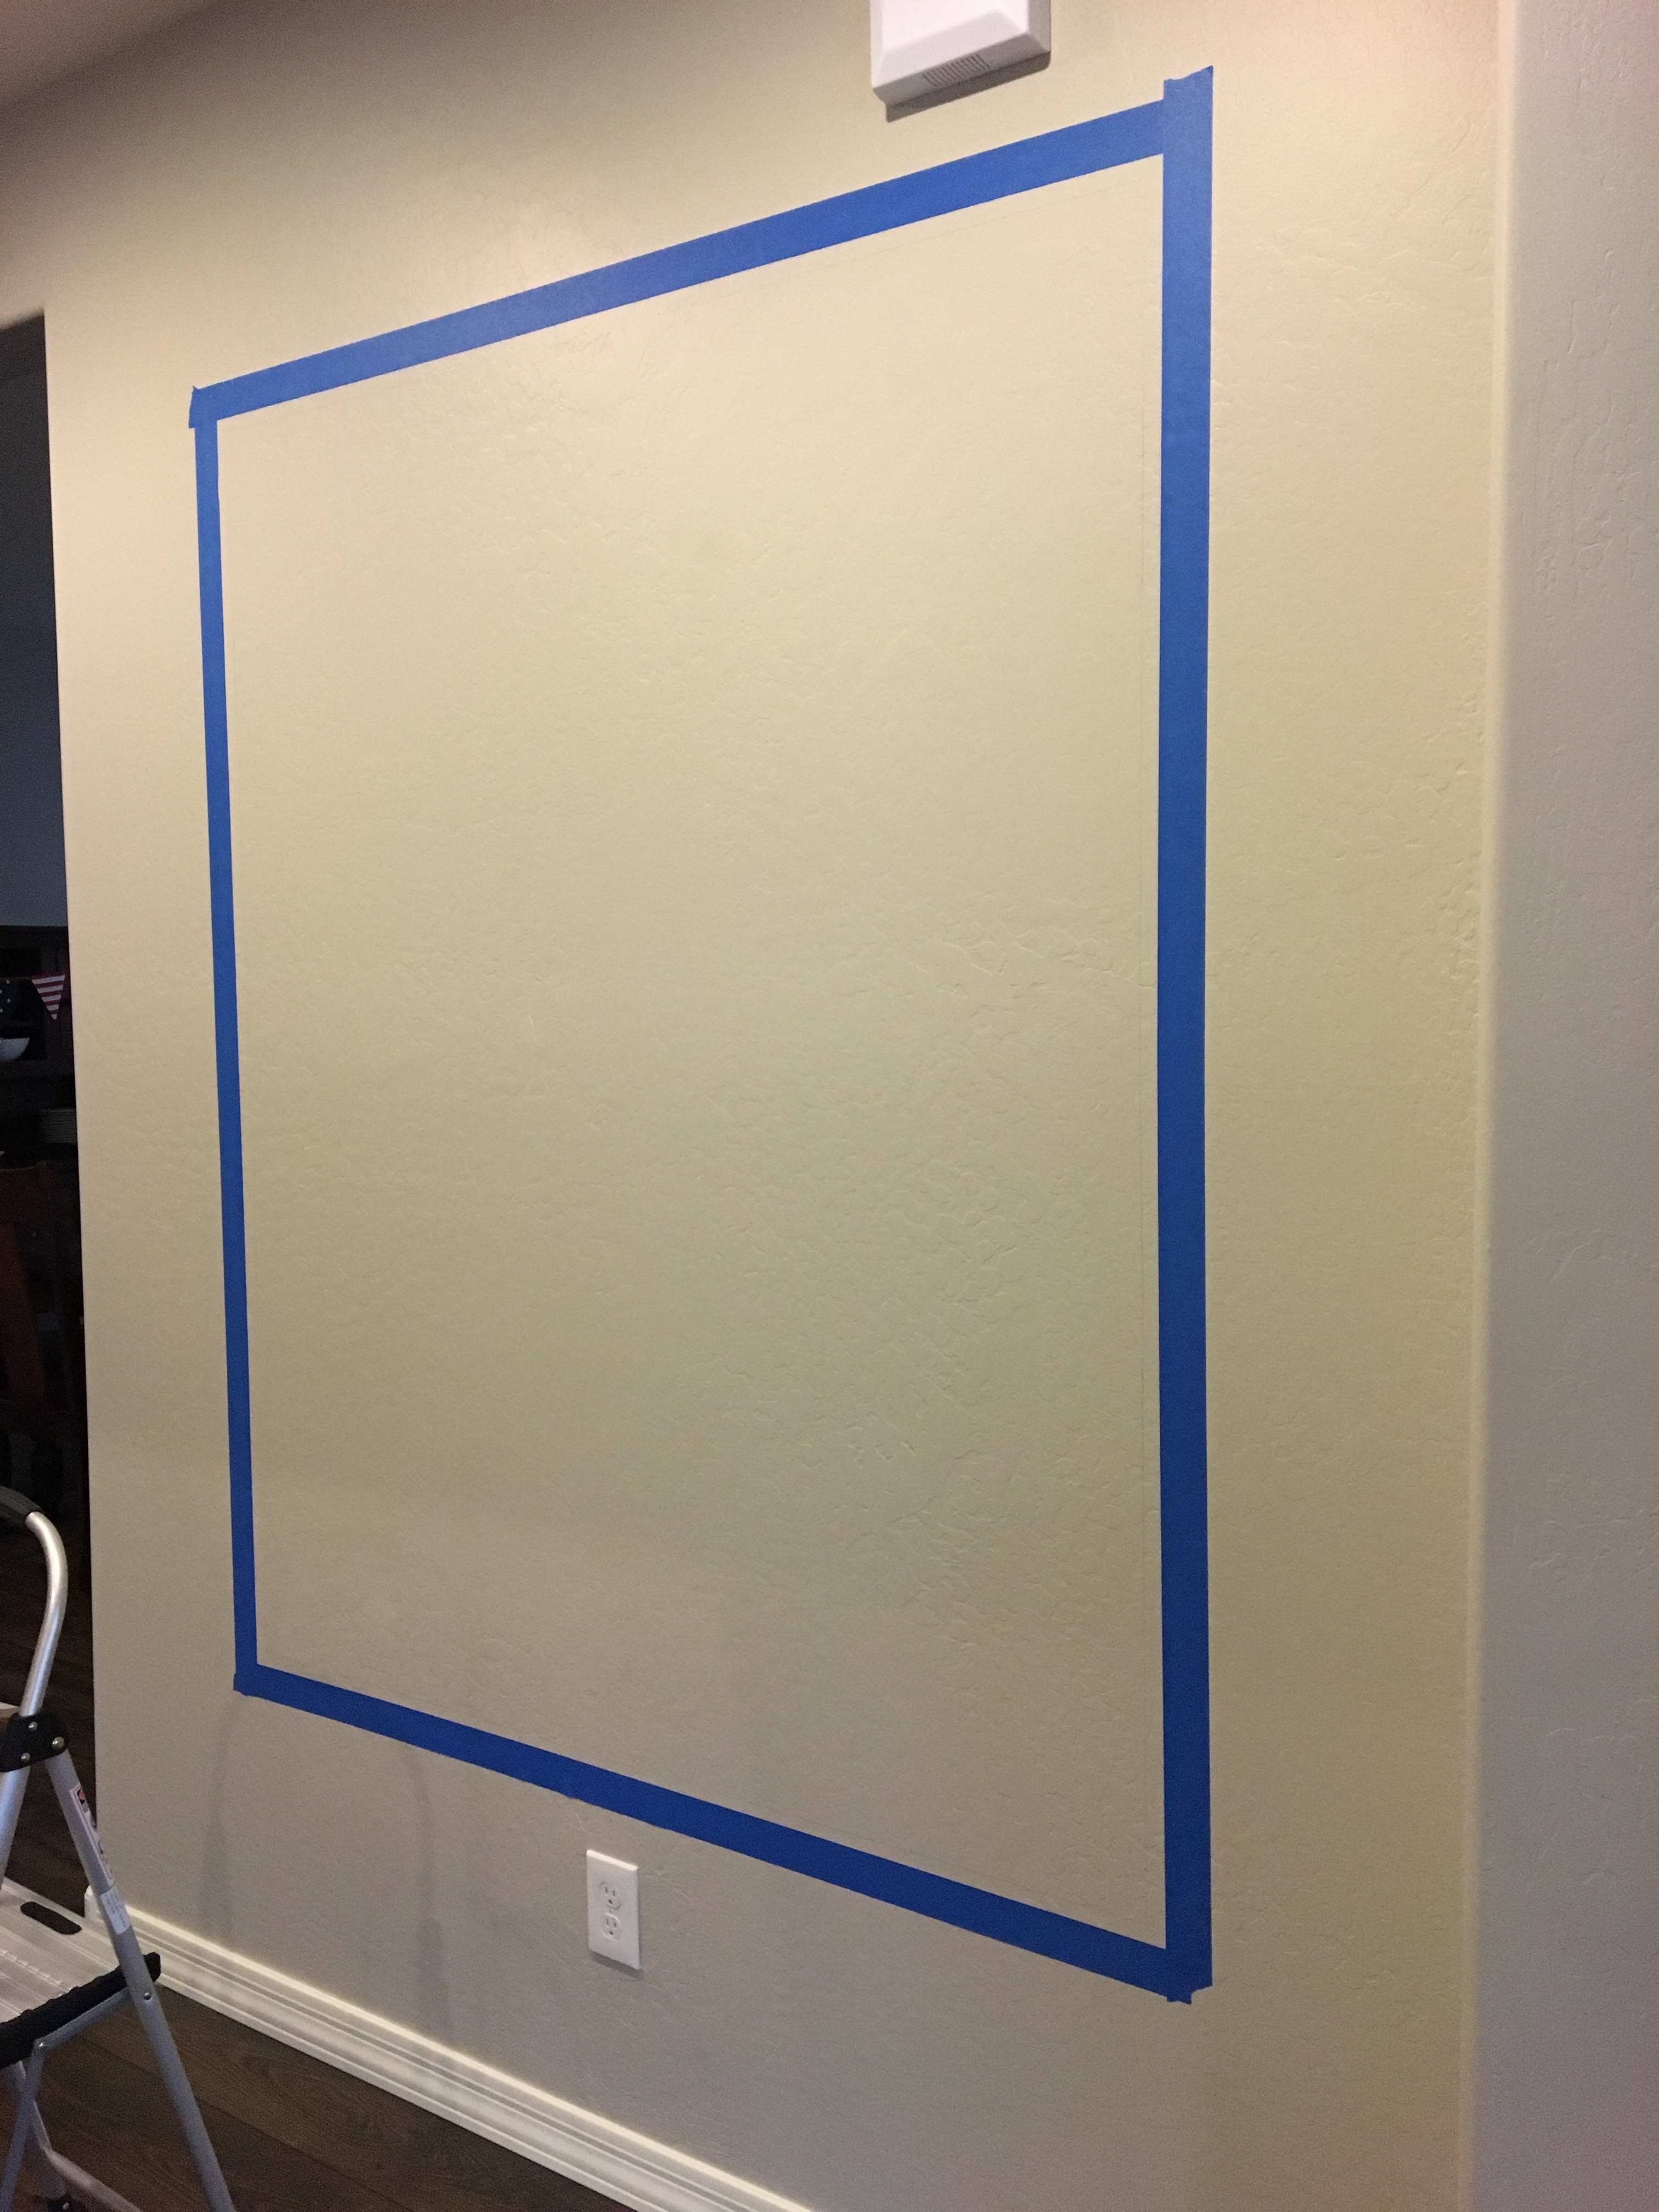
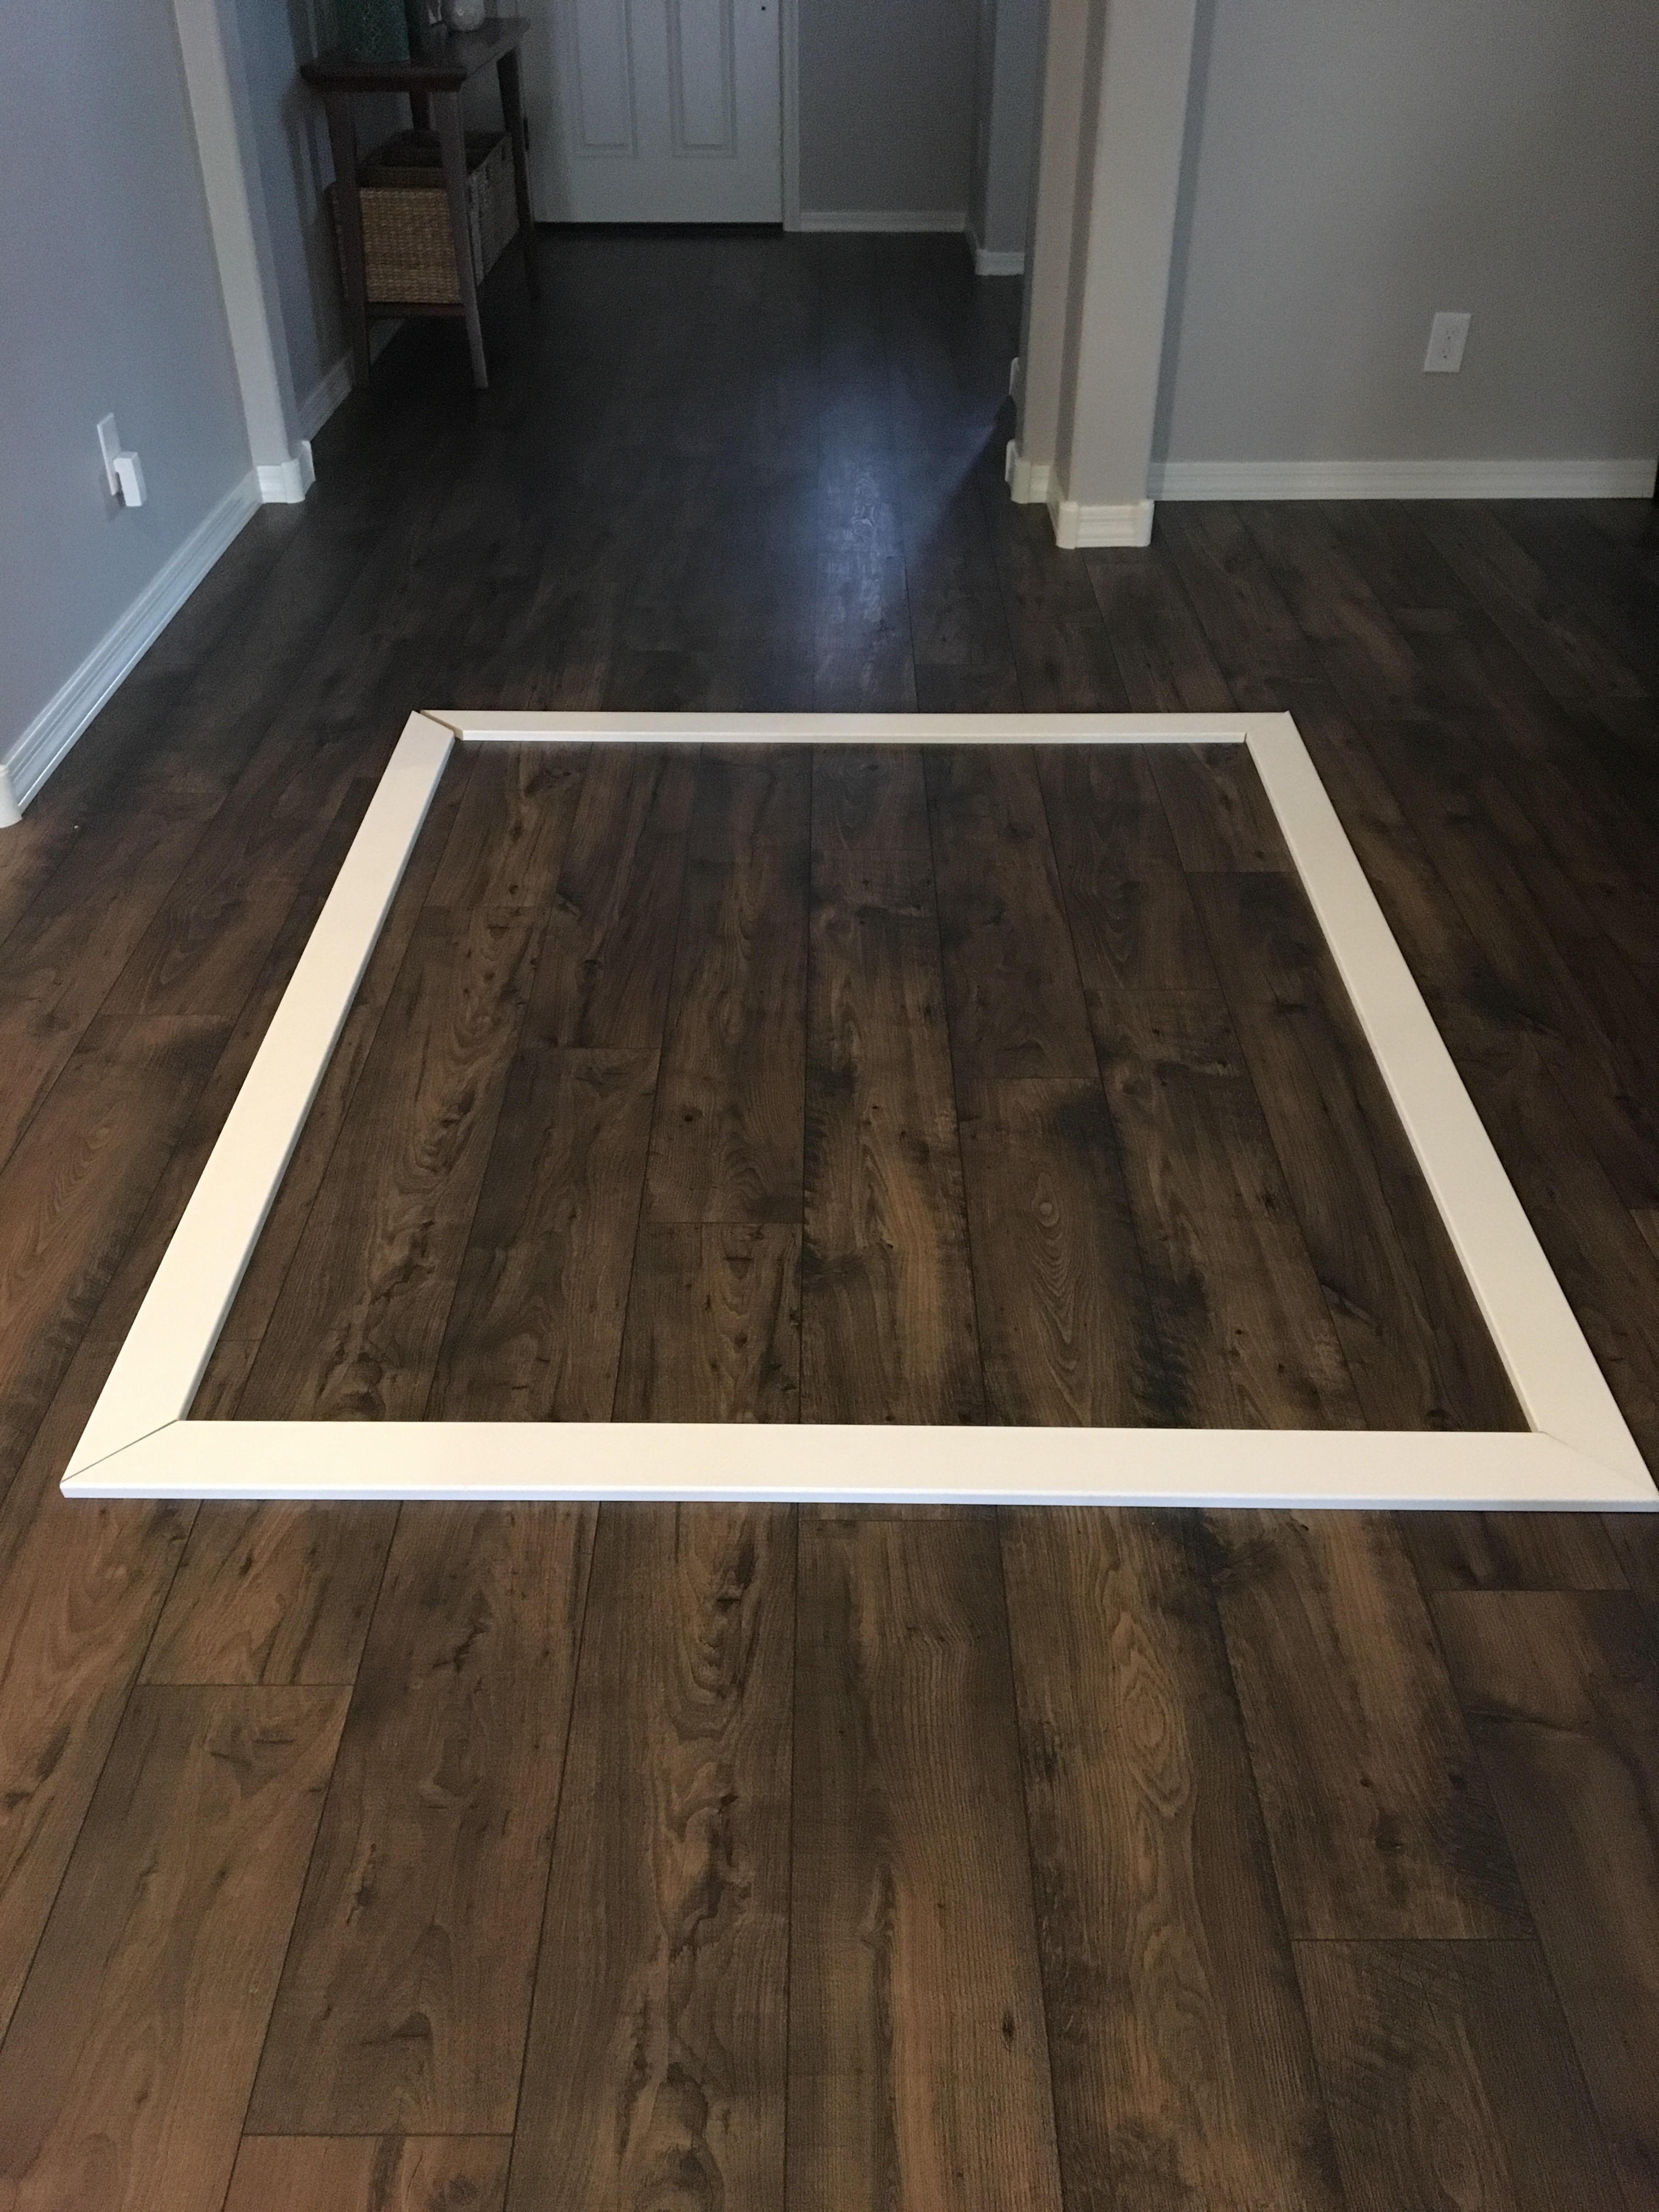
When we went to Home Depot we found the white trim for around the edge in 2 sizes. 10 foot boards and 6 foot boards. We decided to get one 10 foot board and cut it in half for our two shorter sides, and we purchased two 6 foot boards for our longer sides. So now we had two 5 foot boards and two 6 foot boards. We wanted to cut 45 degree angles at the end of each board so when put together they would line up nice and neat. When you cut the 45 degree angels that takes off about 3 inches on each side so that would roughly give us our 4 1/2 x 5 1/2 feet for the inside of our chalkboard. We did not have to be perfectly exact with our space so we were fine to be off an inch or so.
We placed them on the floor to make sure everything matched up. We just had a little tweaking to do but we knew we would fill in any gaps with wood filler.
Now that we had the boards all cut we remeasured our inside chalkboard space just to make sure on the size and then we re-taped it off for painting. I forgot to picture this next step but because we have lots of texture on our walls we did use an electric sander to smooth out the wall before painting. It didn’t take the texture completely away but it definitely helped to not make the wall so bumpy. 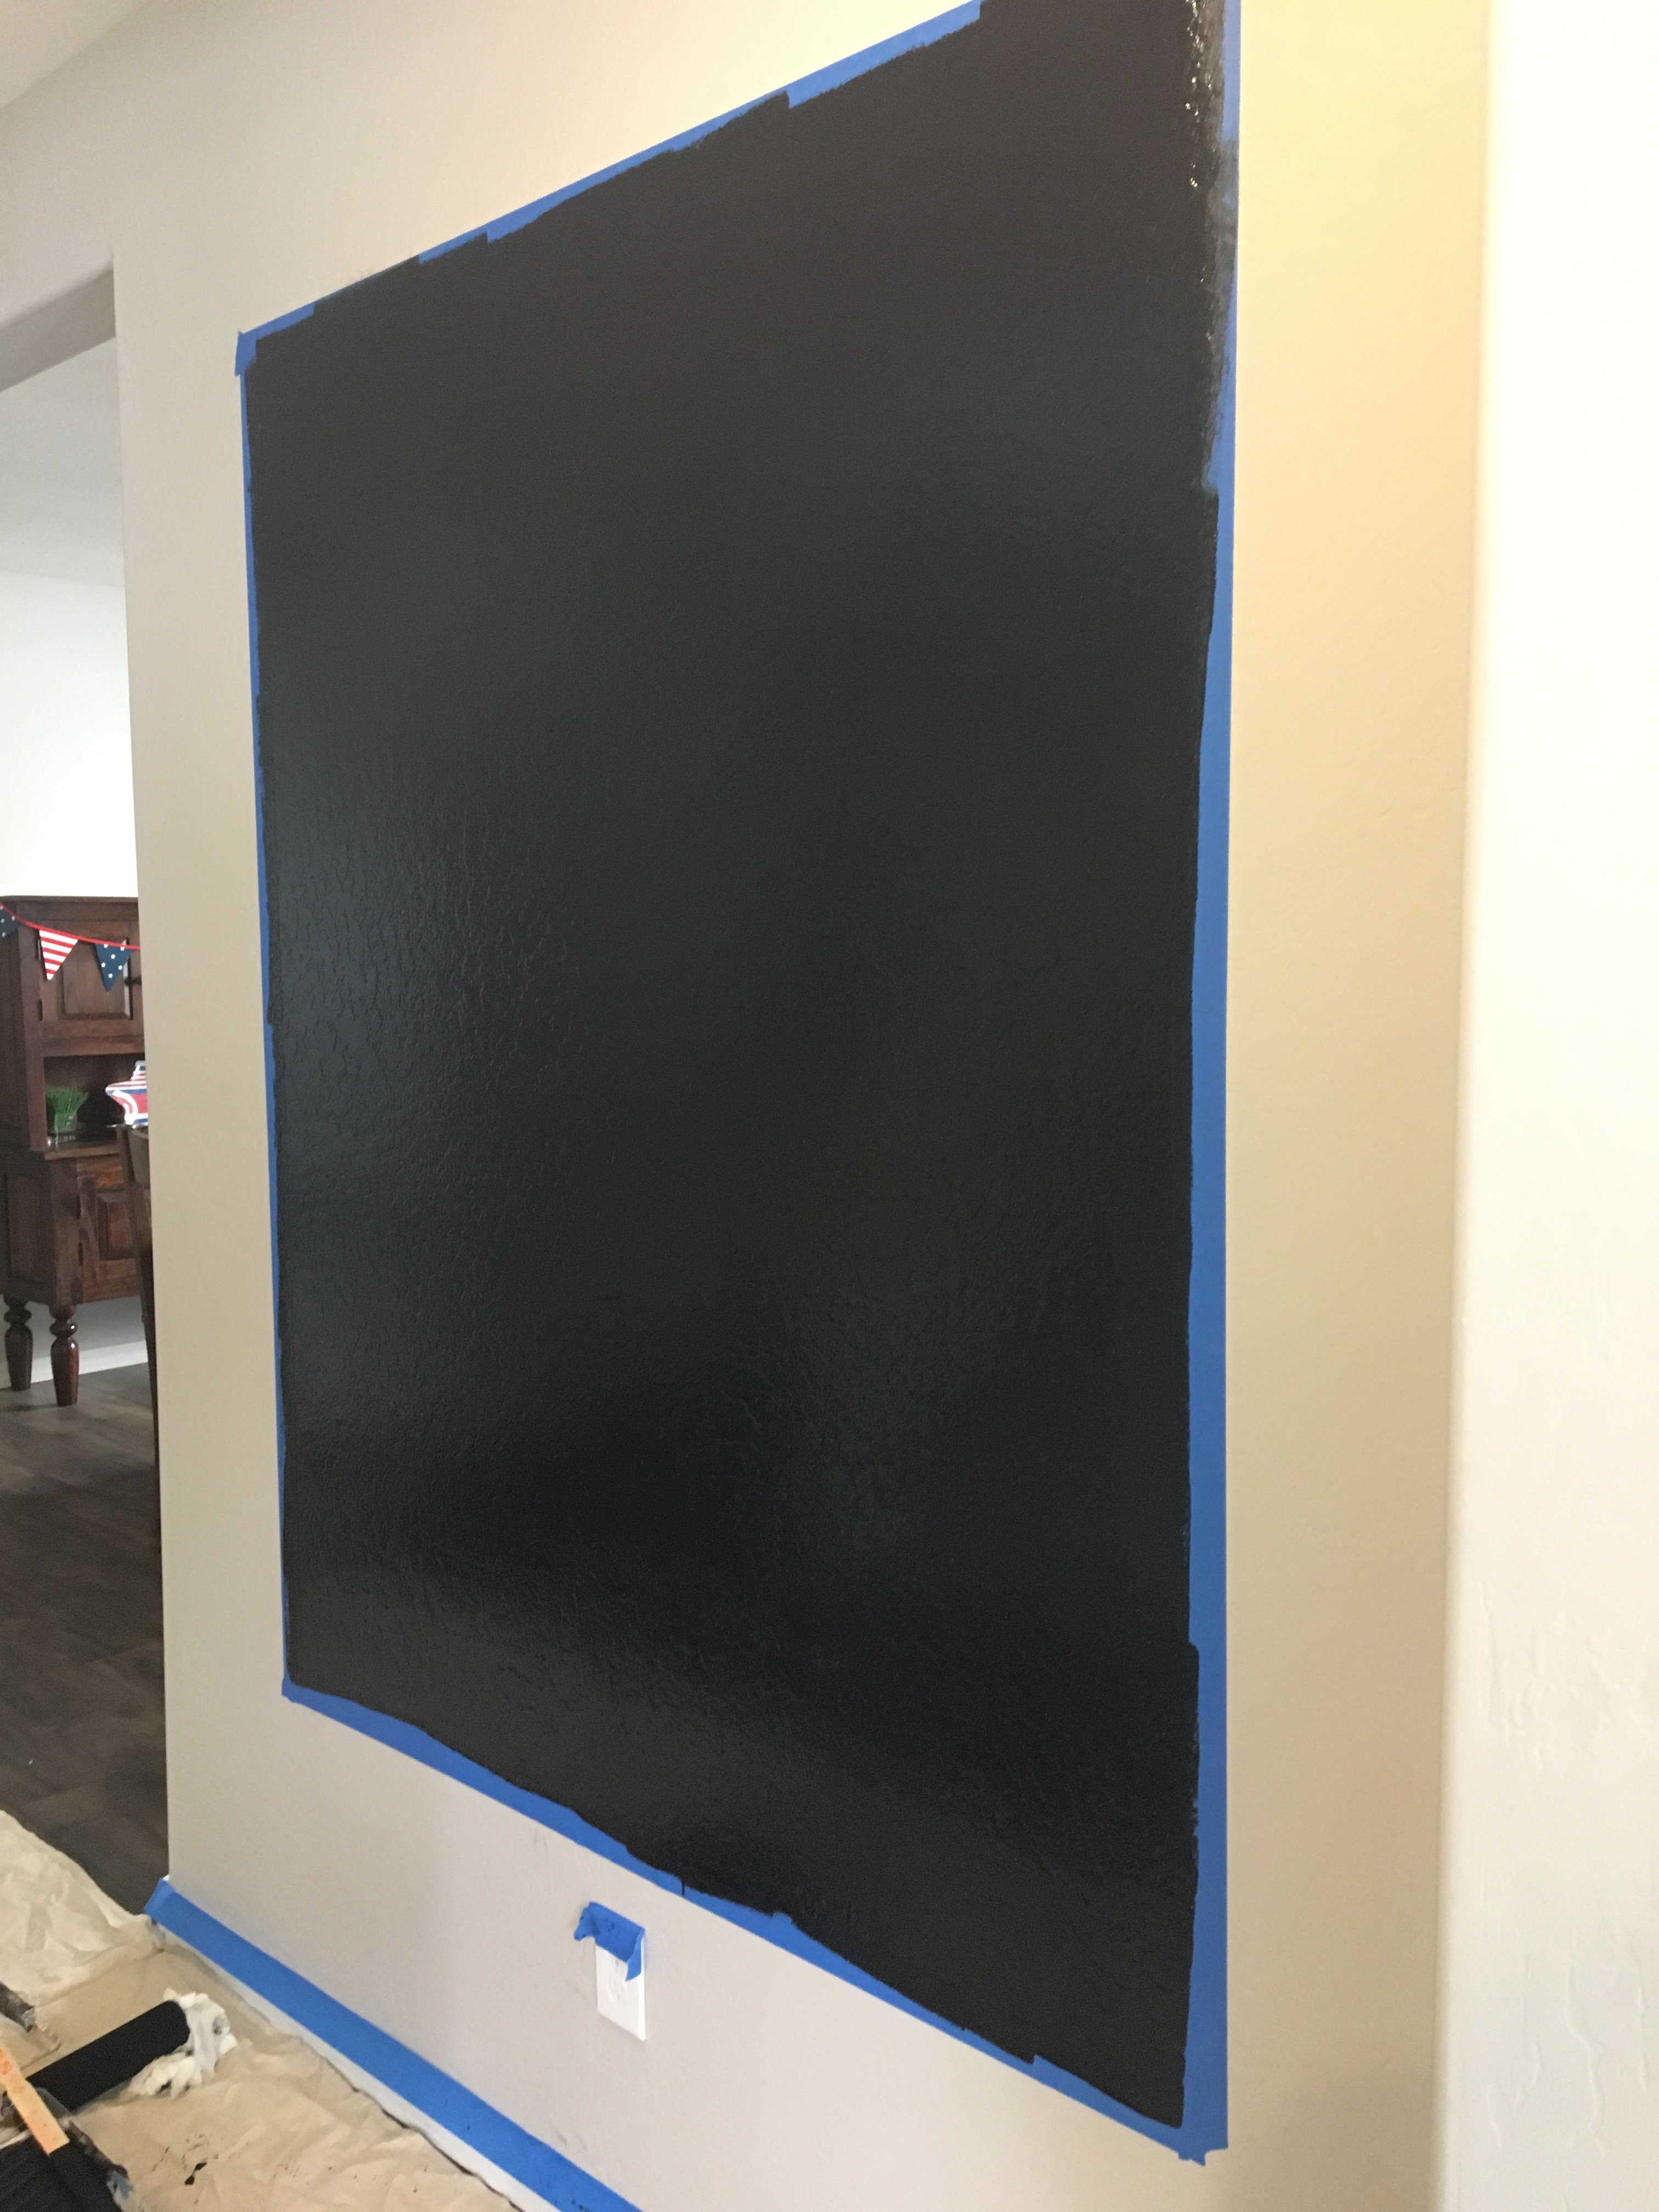
We used two coats of the chalkboard paint you see below, applied with a foam roller, and we let it dry a few hours between each coat. 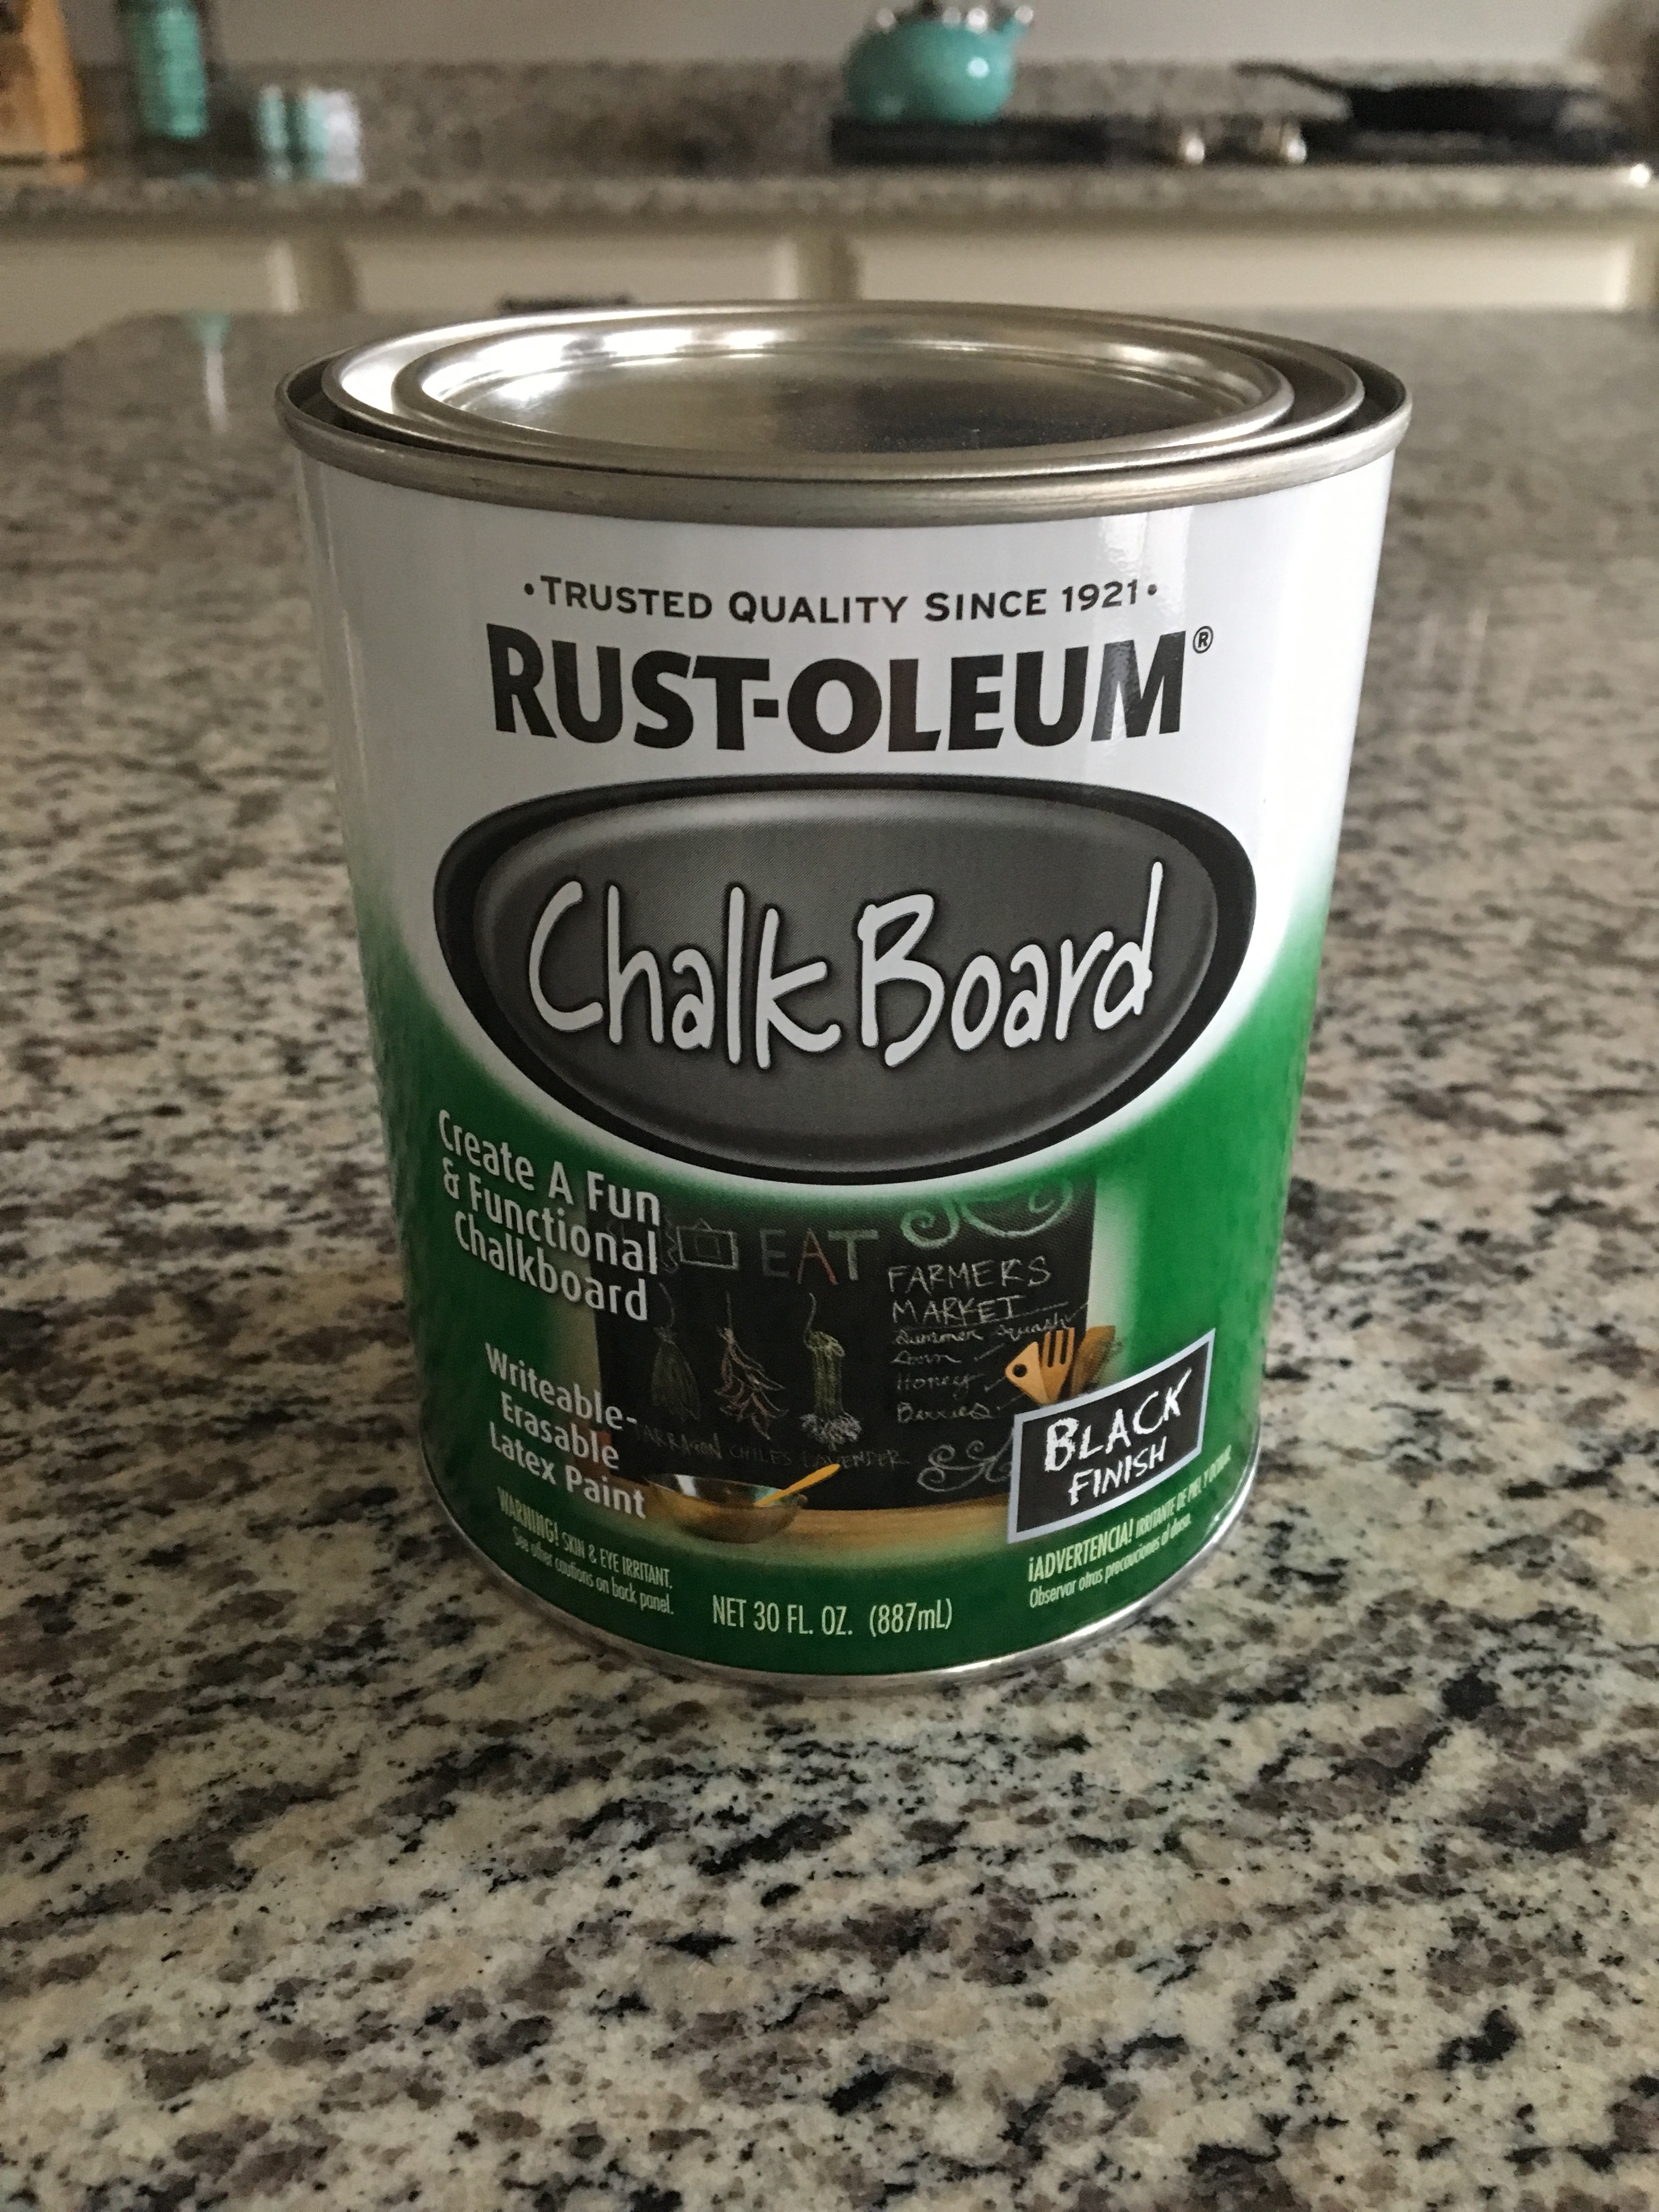
We gave the side boards a coat of white paint before hanging them on the wall to make it easier. I knew I would still need to make touch ups after they were hung up. 
When the chalkboard paint was all dry, and the side boards, we hung up our boards. If you have a nail gun you can totally use that but we just used a hammer and 2 inch finish nails. I held up the boards, one at a time of course, and kept them level why my husband hammered in the nails. When the nails were almost hammered in he used the ball side of the hammer to tap them in all the way. We did the bottom, two sides, and then the top. We had one board that did not want to lay flat on the wall, even with nails, so we used a little wood glue to help hold it in place. After that my husband used a hammer and a nail setter to push all the nails in further. Then I used wood putty to cover up the nail holes and to smooth out the seams where the boards came together. Just make sure you use wood putty that is sandable and paintable. 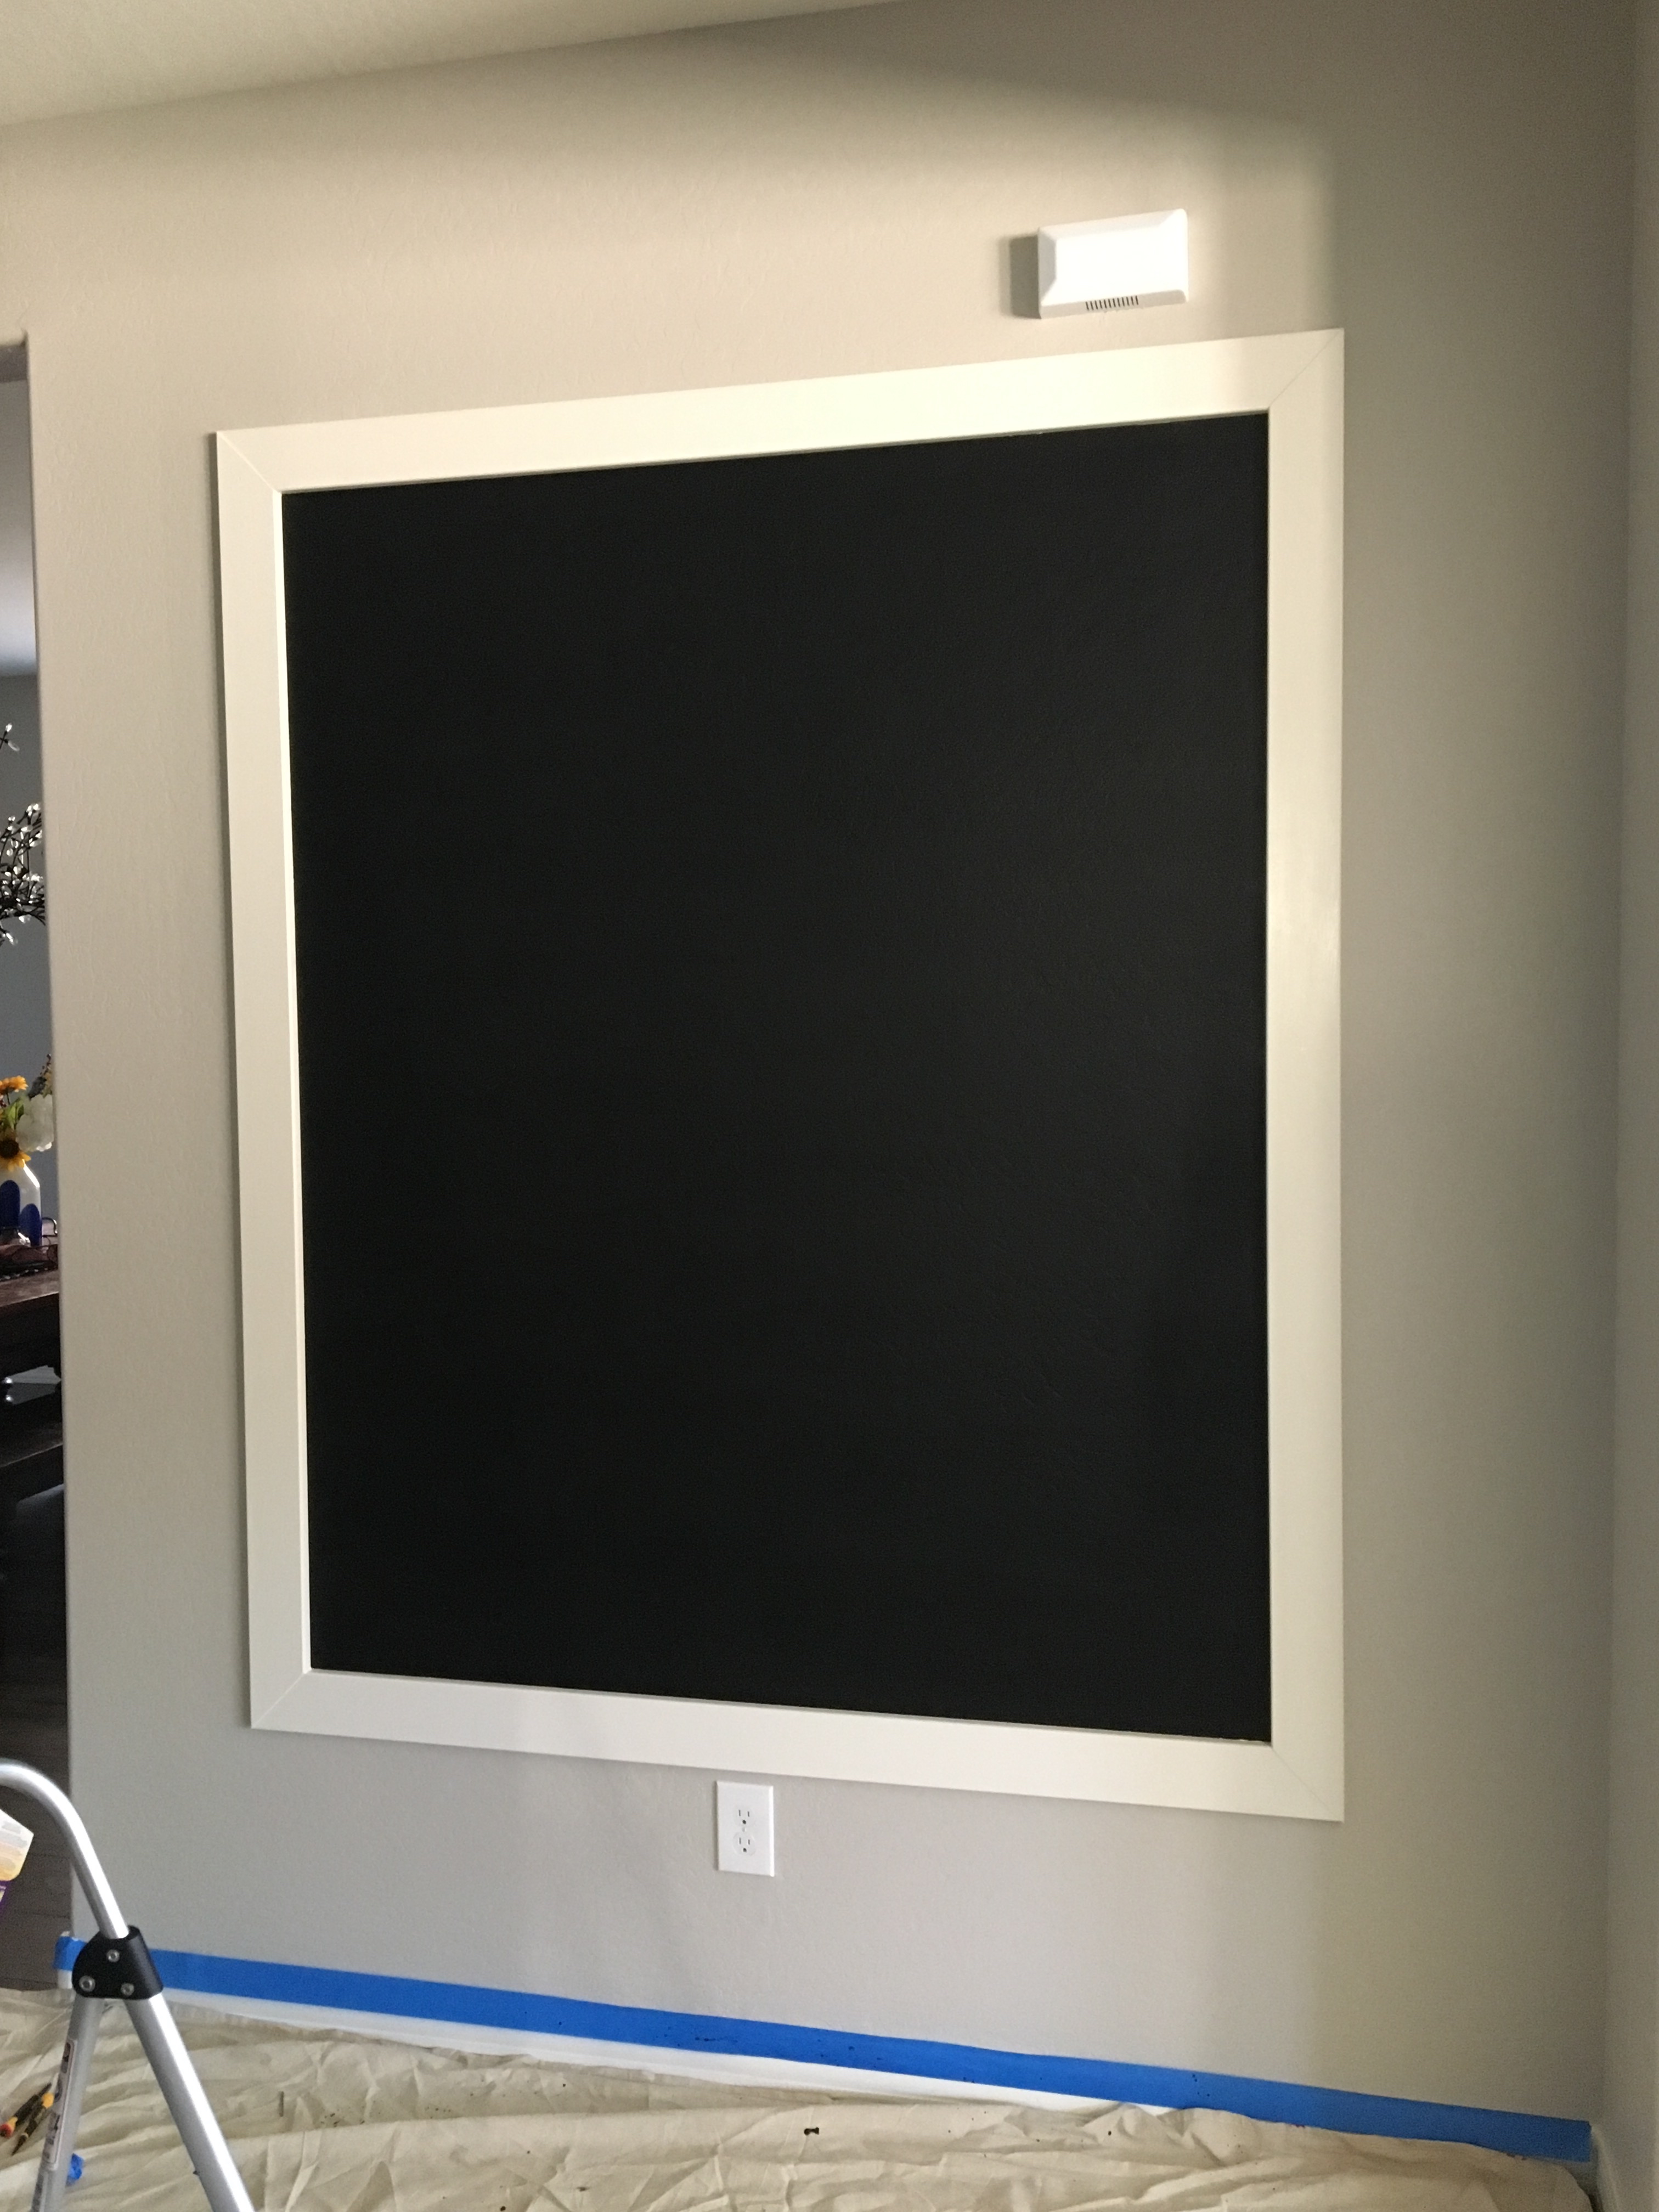
When the wood putty was dry I sanded over the nail holes and the seams with a really fine grain sandpaper and then added another coat of white paint over those areas.
The final step is to season your chalkboard after letting the paint dry for at least 3 days. Otherwise you will have an image that won’t fully erase and will stay there forever. This is really simple. To season your chalkboard you just take the side of a piece of chalk and chalk completely over the board, first going vertically and then horizontally. Then wipe it all off with a cloth to remove the excess dust. And that is it! I have to say this process was a little difficult for me as we just did the chalkboard paint right over our textured walls. It was hard to get the chalk into all the texture so I just did the best I could!
View from coming down the stairs.
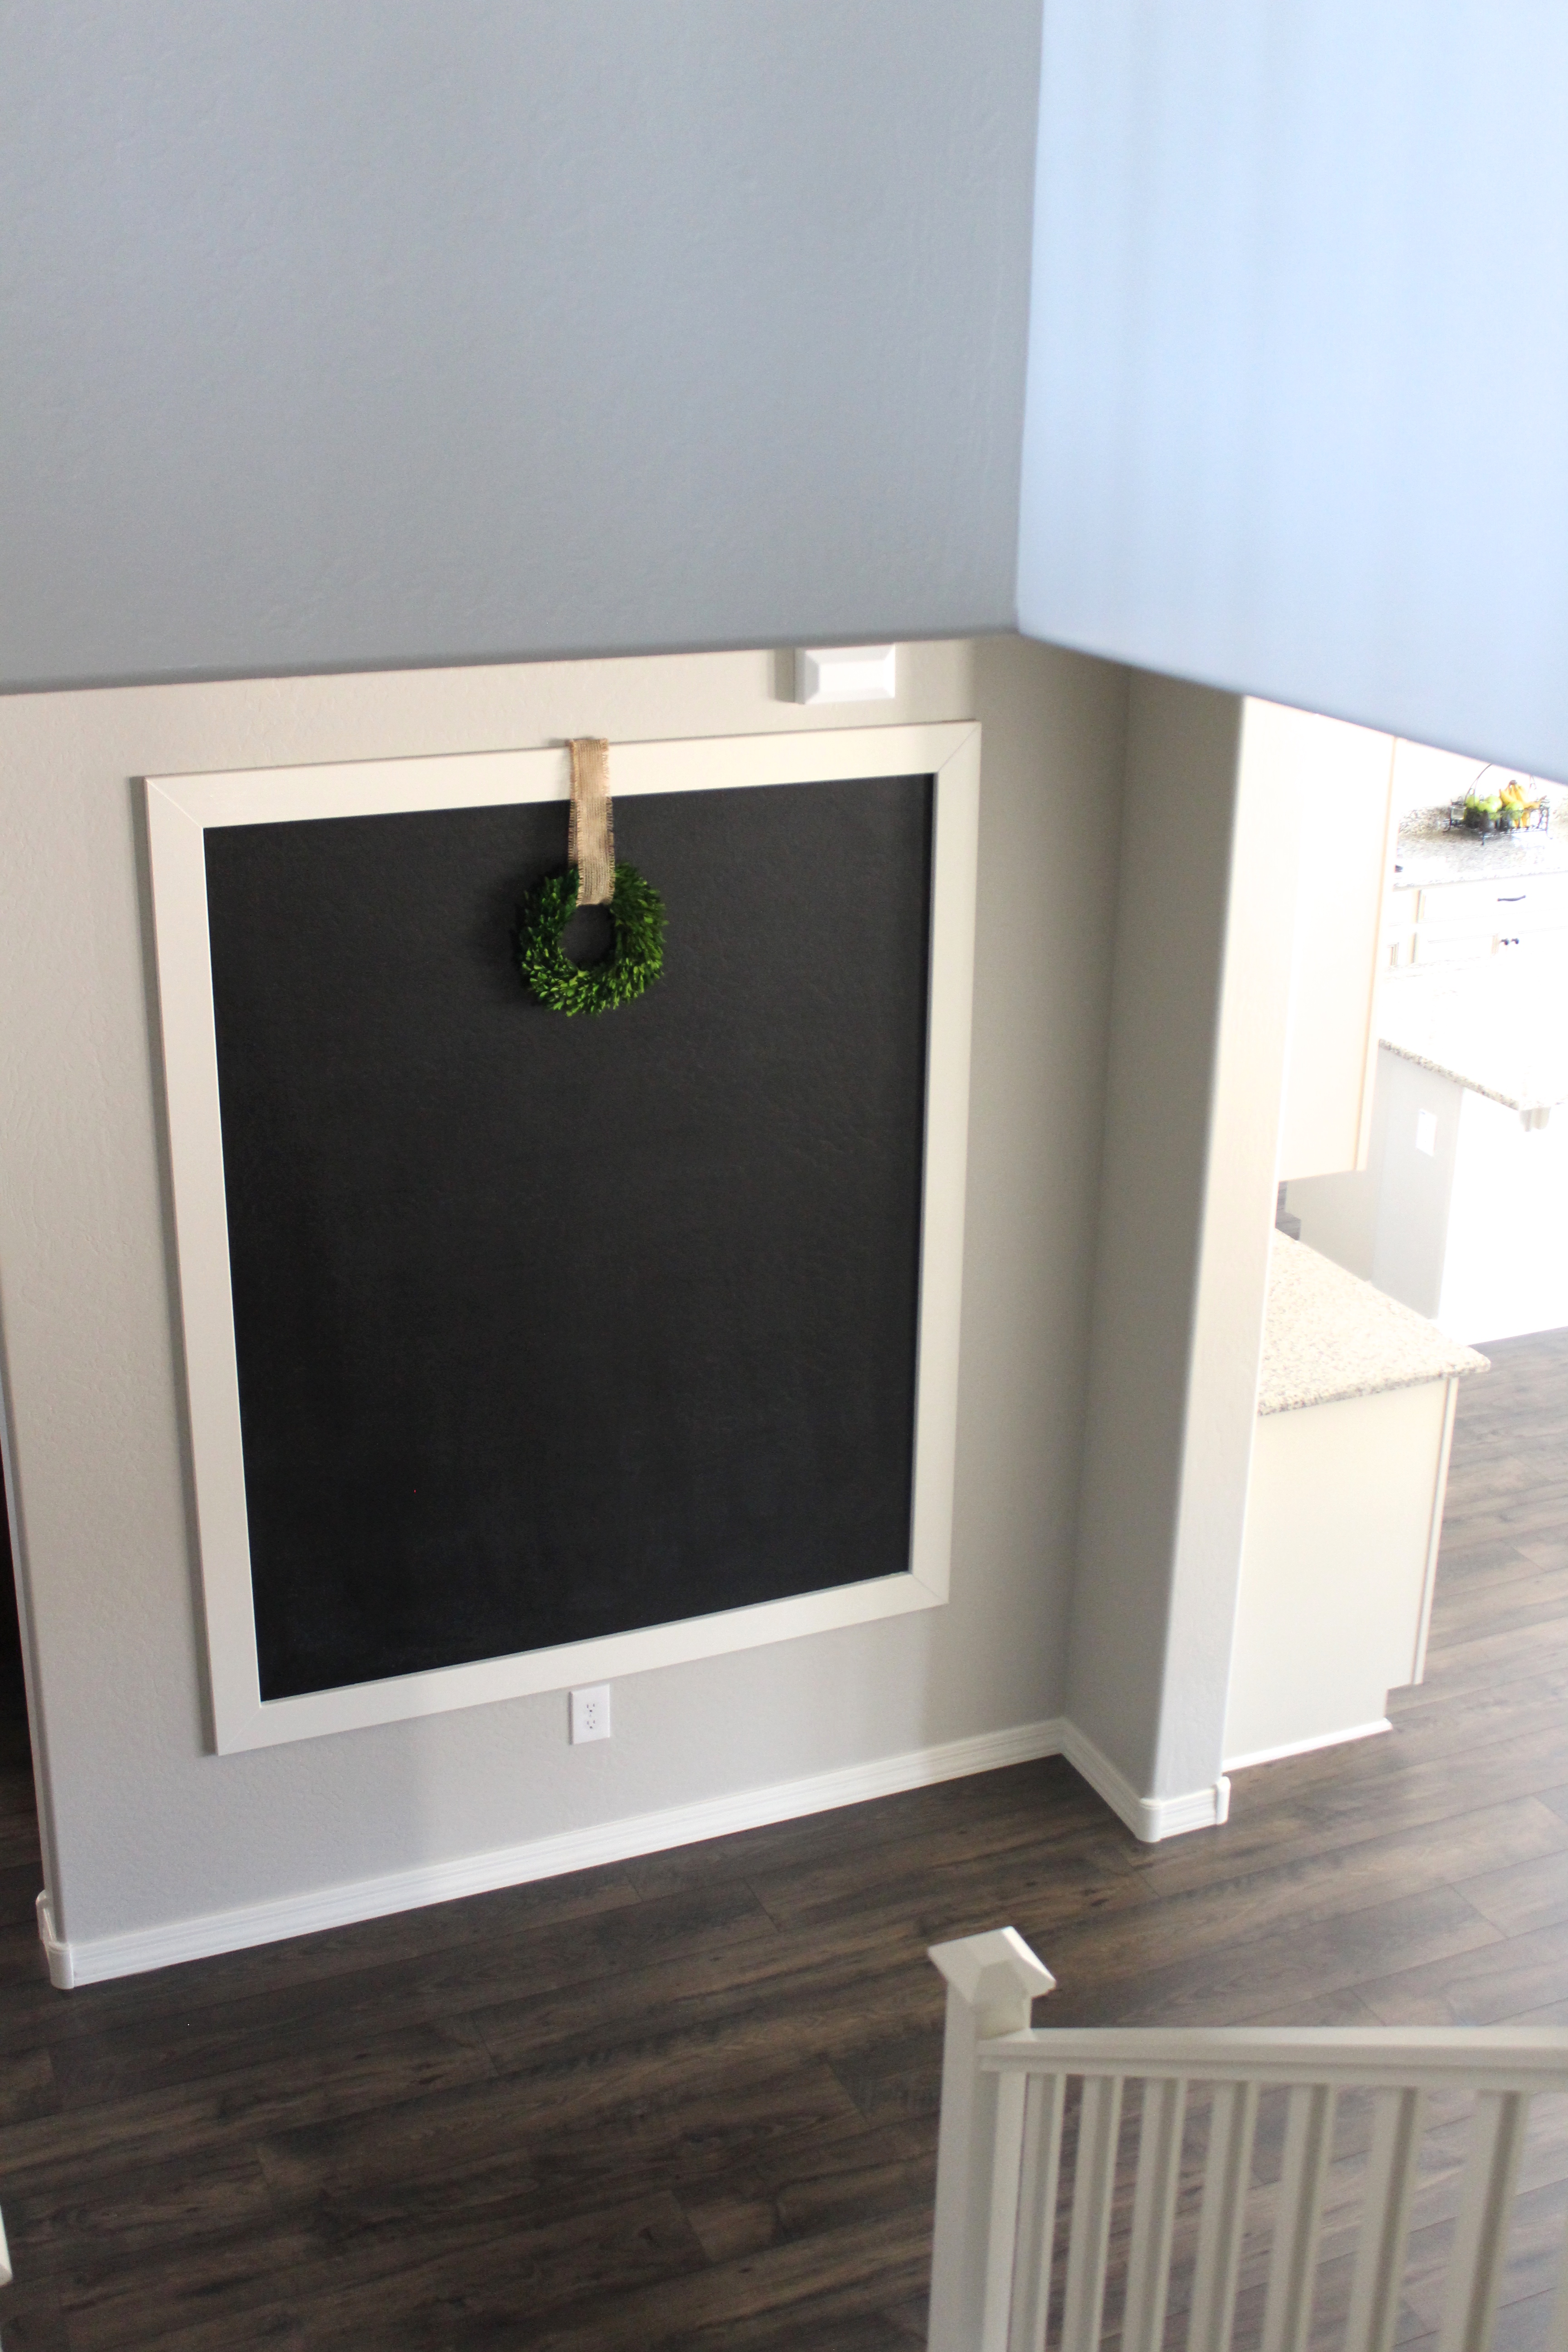
I thought it would be fun to add a boxwood wreath to hang from the top and I love the idea of changing it out for the different seasons. 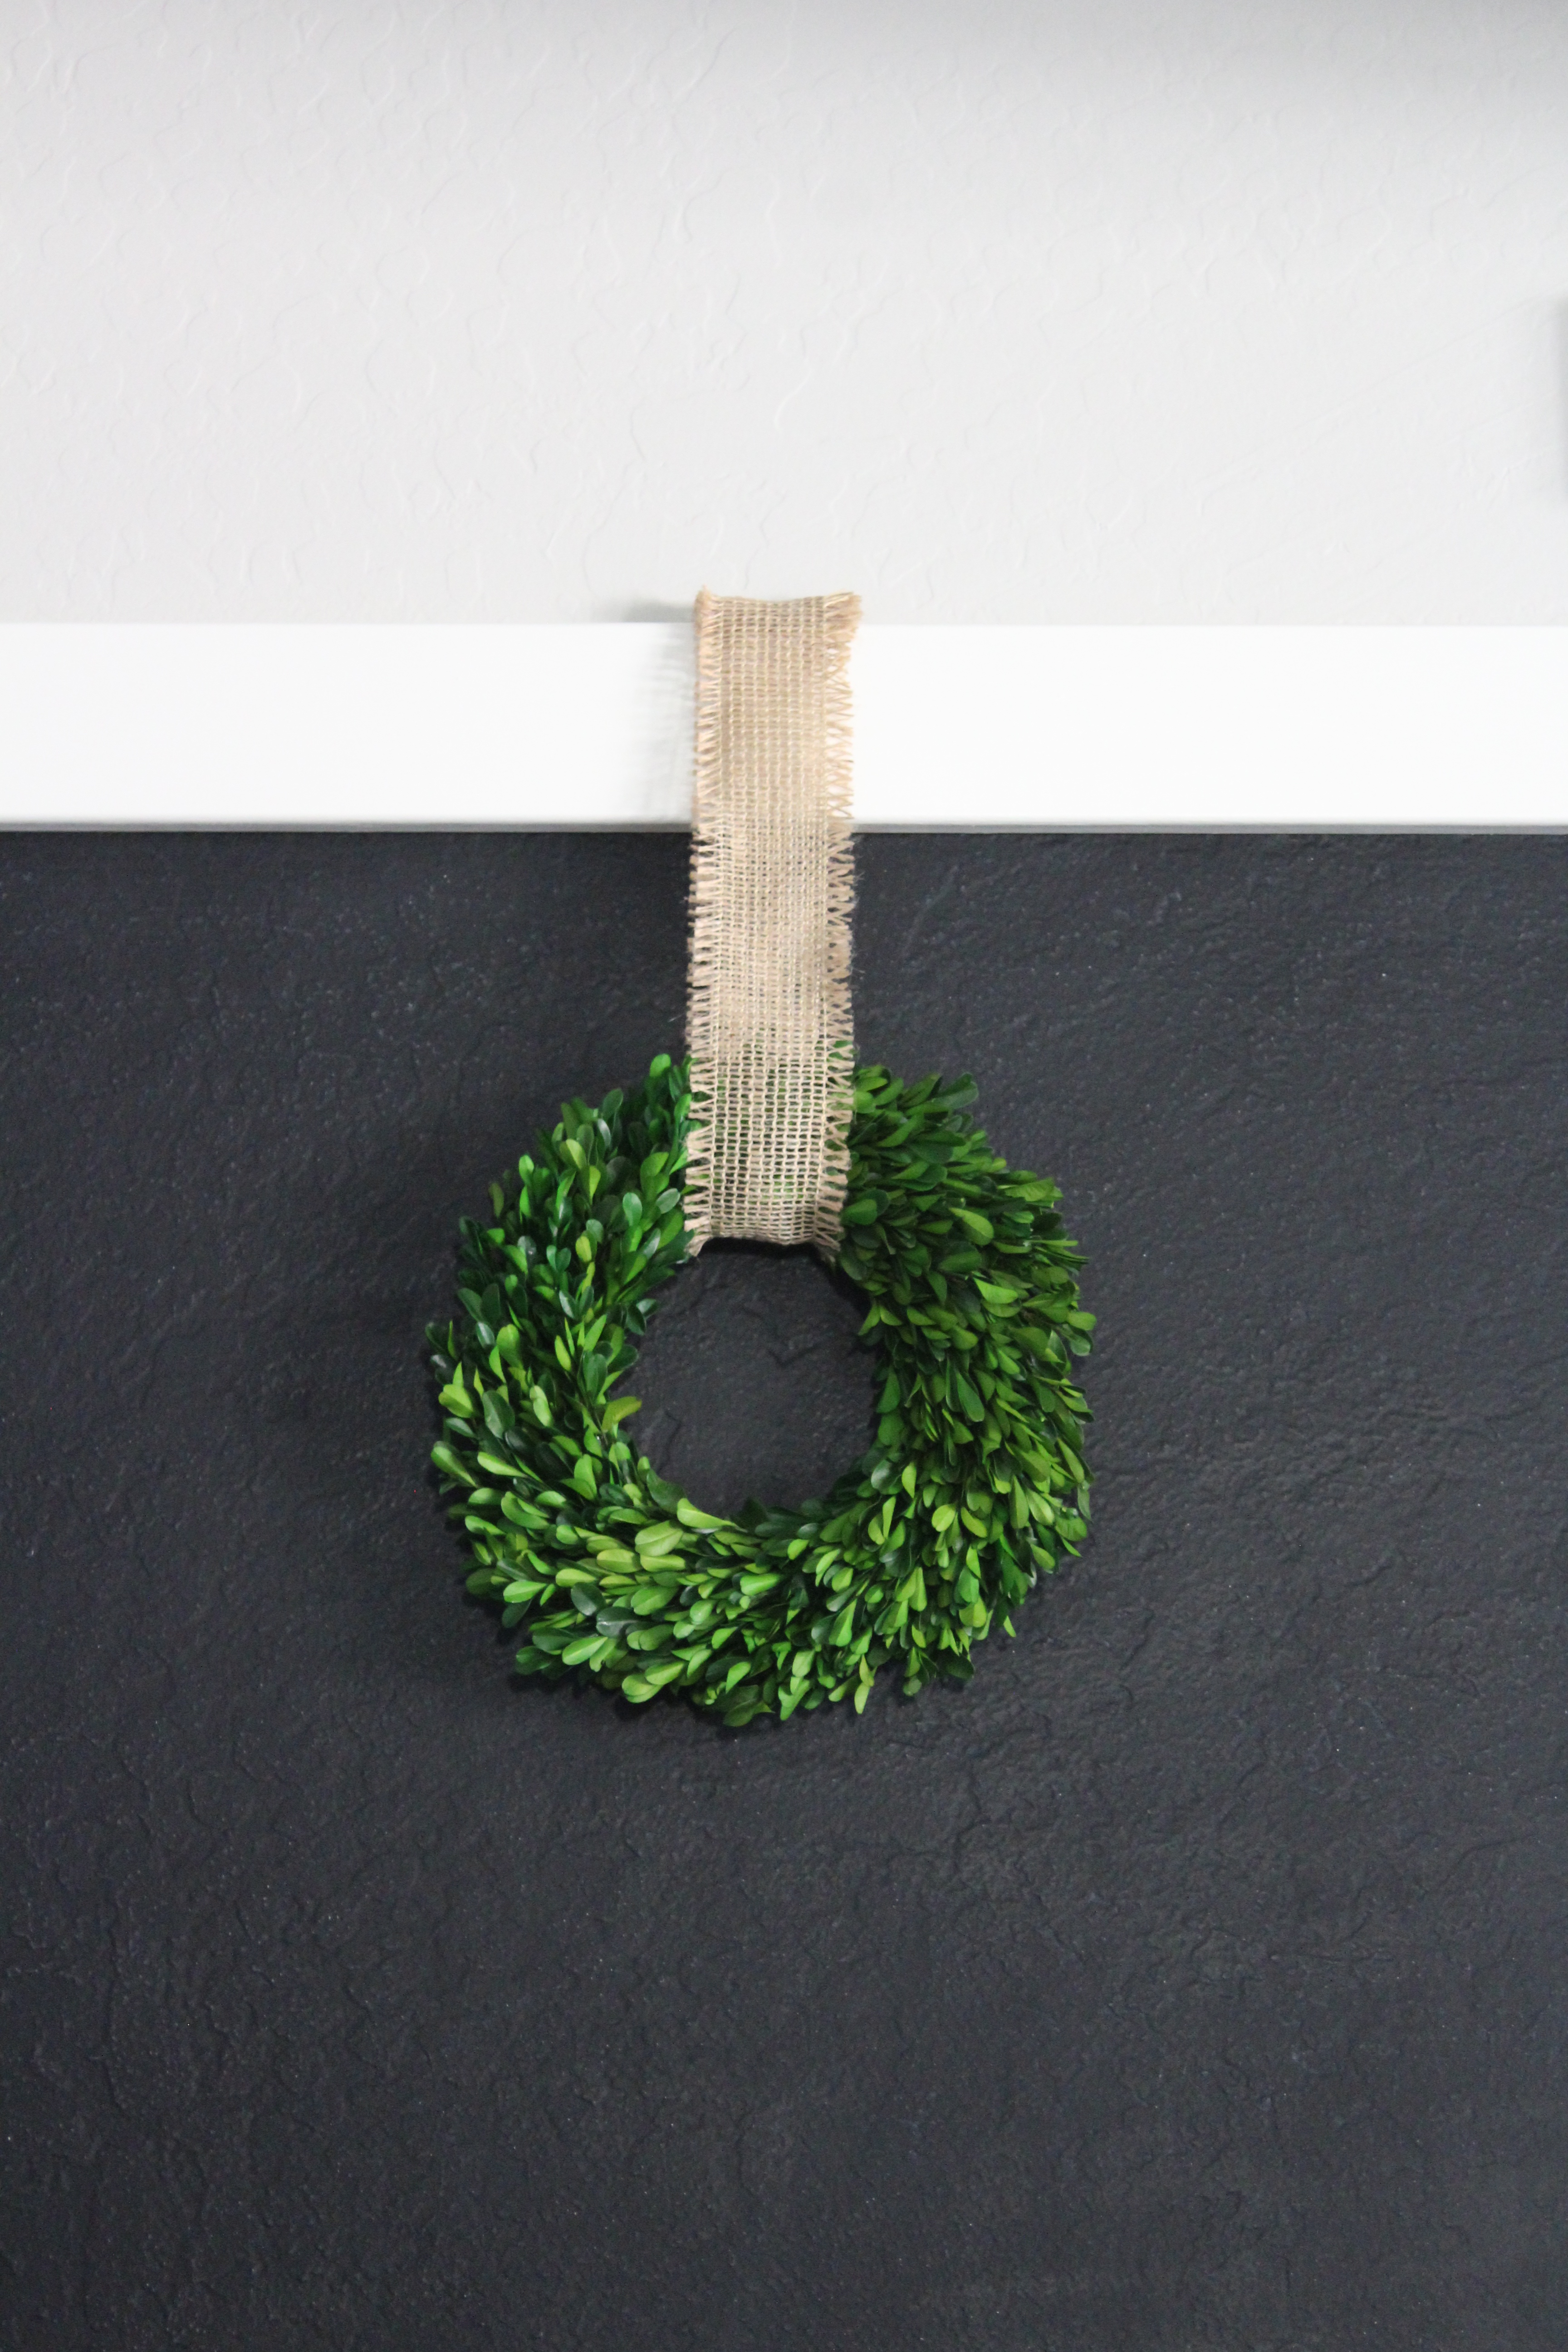


That is such a neat idea! We don’t really have a walkway/entrance way or I might try something like this in our house.
Thank you! Any wall space will do really and you can customize the size to work for you!
Looks awesome! Thanks for sharing with us at the To Grandma’s house we go link party!
Thank you!
Question – how has the chalk wall held up against a textured wall? I was planning on doing this for my daughters room but it’s textured so i was afraid it wouldn’t work. Let me know. Thanks!
We did end up sanding the wall down a bit with an electric sander. It is not totally flat but it helped to bring the texture down a little bit. Also make sure you don’t use a low dust chalk and it works great!