A few weeks ago my church had a mom’s night out and we made this beautiful wooden advent tree for our activity. I did not come up with this idea but I thought it was too cute not to share! December is still a couple of days away so you still have time to get it ready for this year!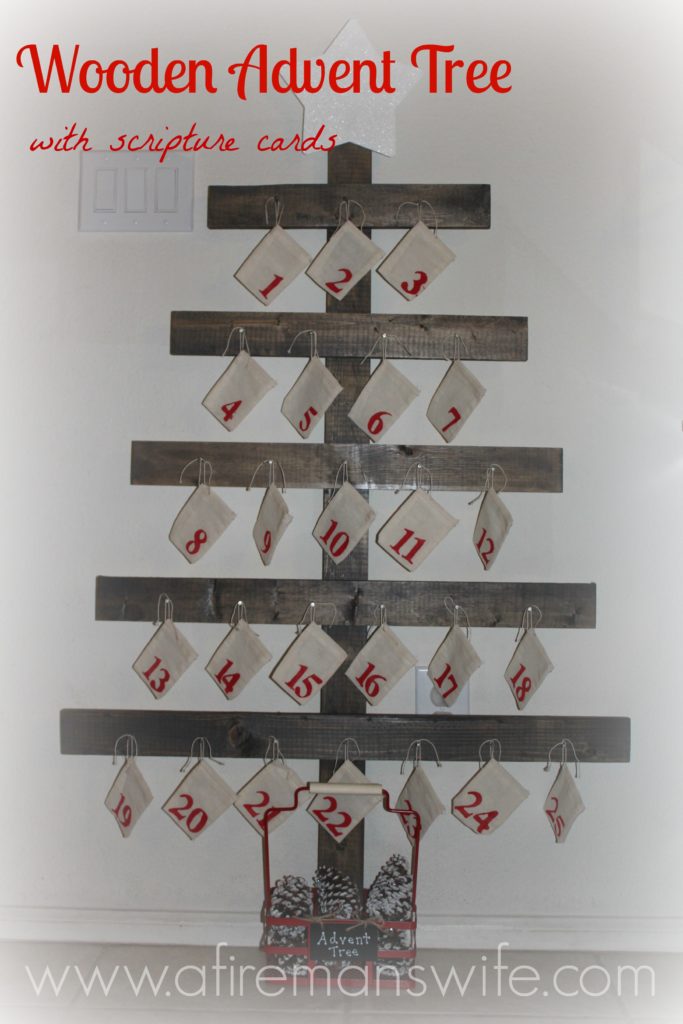
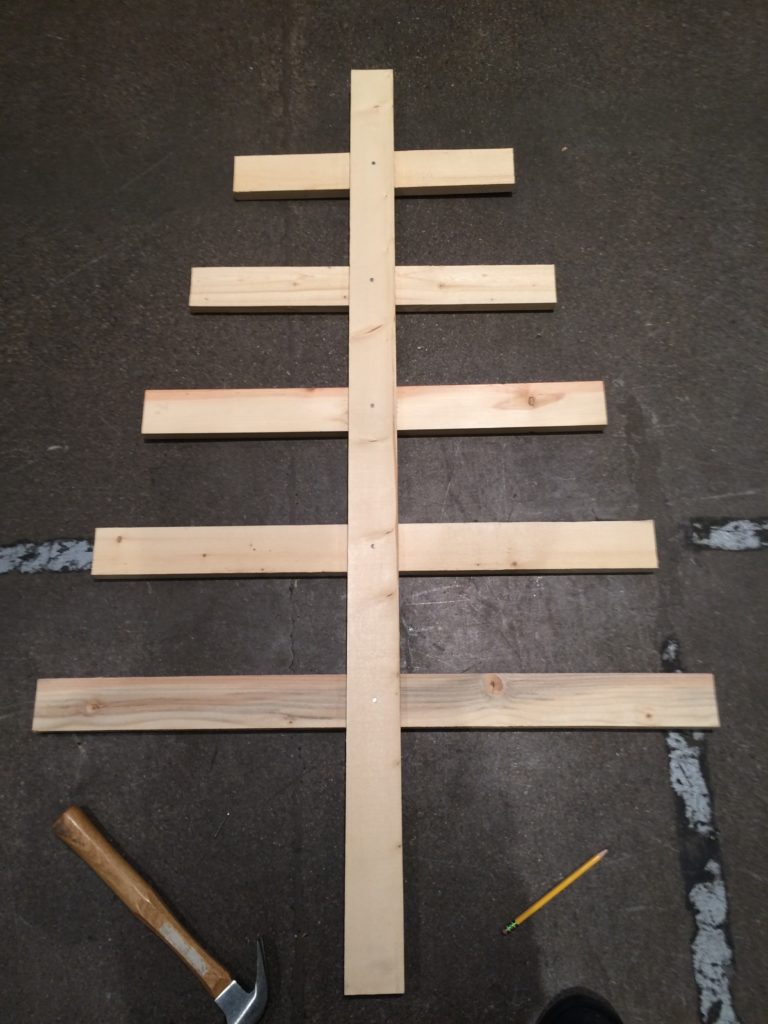
Here are the wood measurements for the tree. One of the moms went and had the wood cut from Home Depot for us so we were all ready to go that night.
3/4″ x 2 1/2″ x 48″
3/4″ x 2 1/2″ x 32″
3/4″ x 2 1/2″ x 28″
3/4″ x 2 1/2″ x 24″
3/4″ x 2 1/2″ x 20″
3/4″ x 2 1/2″ x 16″
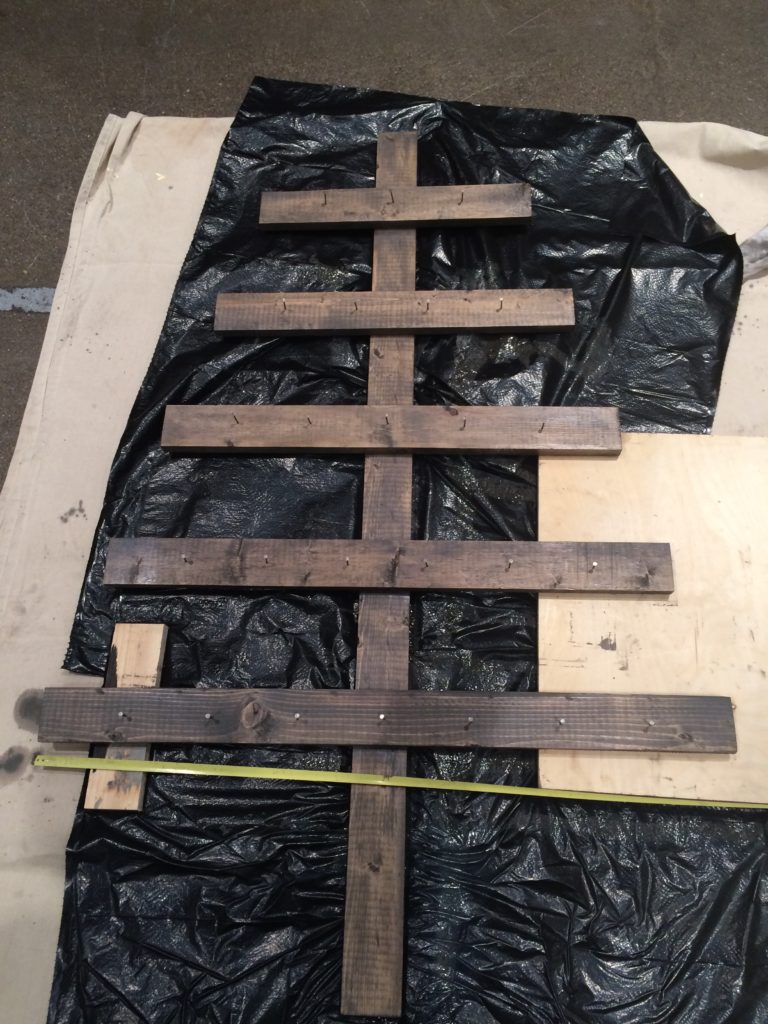
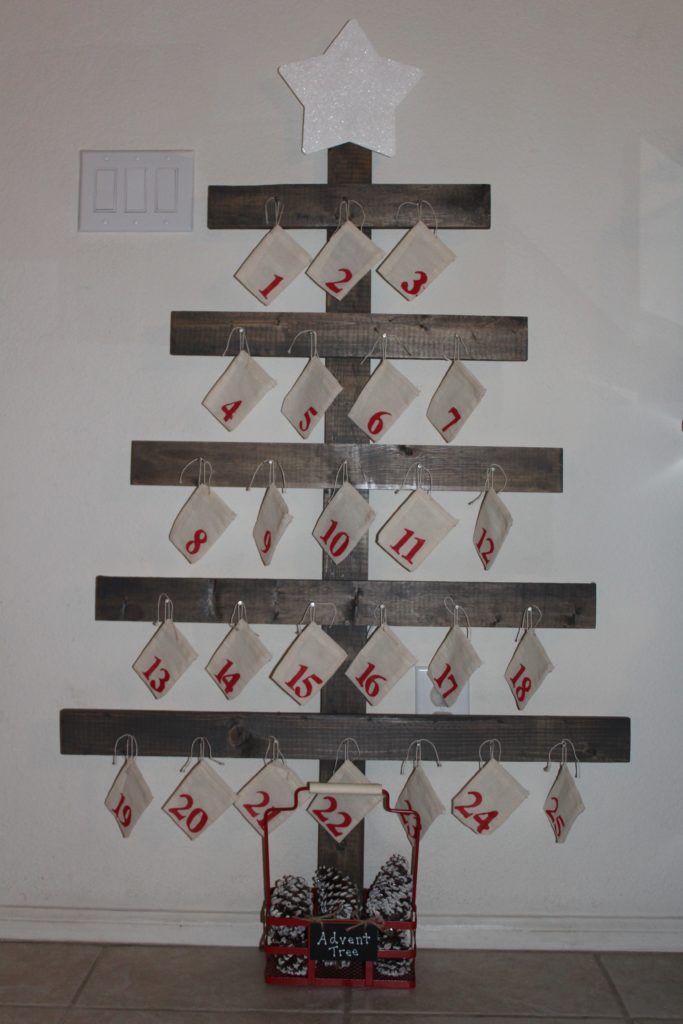
To assemble your tree put the smallest 5 slats down in a tree shape and the longest one down perpendicular on top as shown below. For the first tree slat I measured 5 inches down from the top with a tape measure, and found the center as best as I could, and I made a pencil mark on both the top slat to show how far down it needs to be, and the bottom slat to mark where it is centered. The wood slats tend to move around so it is good to make marks for when you go back to put your glue and nails in. After you measured your first slat, take your tape measure from the bottom of the first slat and measure 5 inches down and mark the next one. Keep going down until you have marked all 5. The next step is to remove the top perpendicular slat and put some wood glue in the center of the bottom slats. Then stick your top slat back on and make sure everything is all lined up from the markings you made earlier. Once everything is all lined up again take 5 nails and hammer 1 nail into each of the bottom slats, see below.
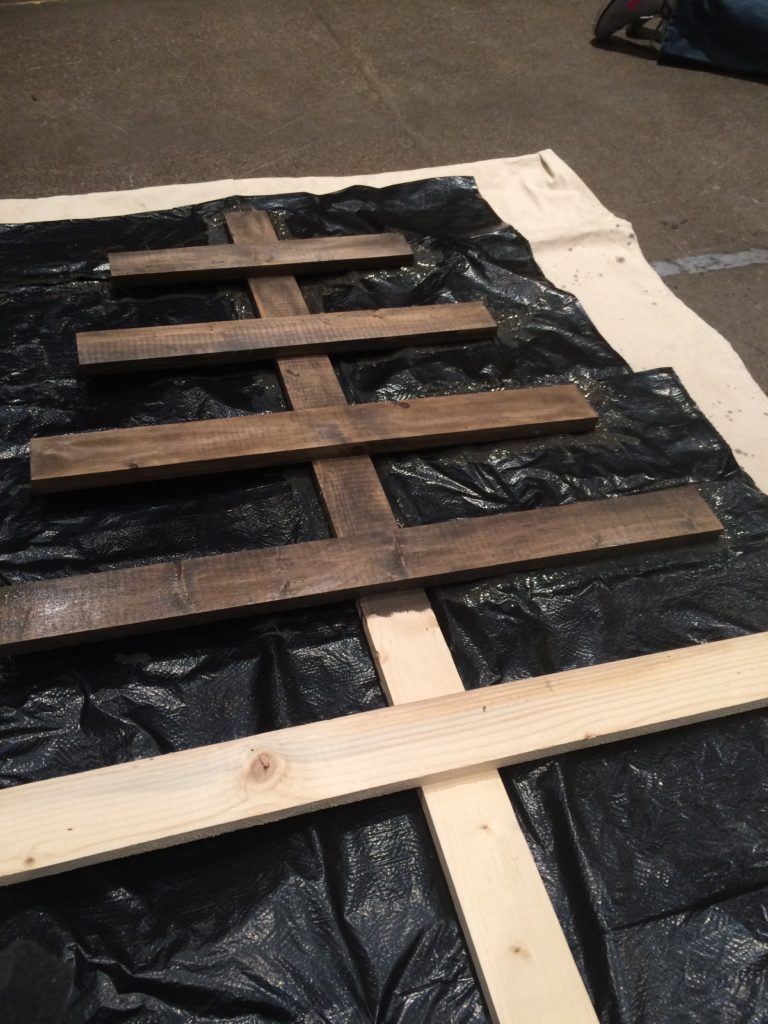
For the next step I laid down a tarp and a couple big trash bags. Now turn your tree over so the small slats are now on top, see below. Then choose a stain color for your tree. I chose a dark brown with a small amount of gray stain mixed in. I used a foam brush to apply my stain and I used a rag to blend it in.
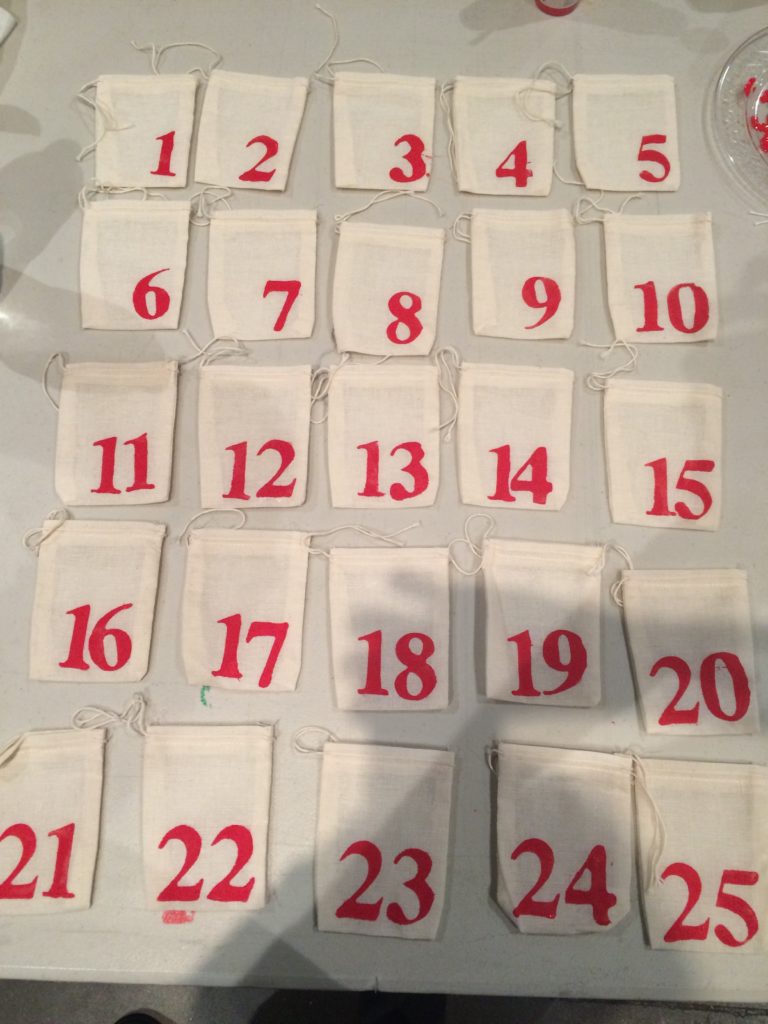
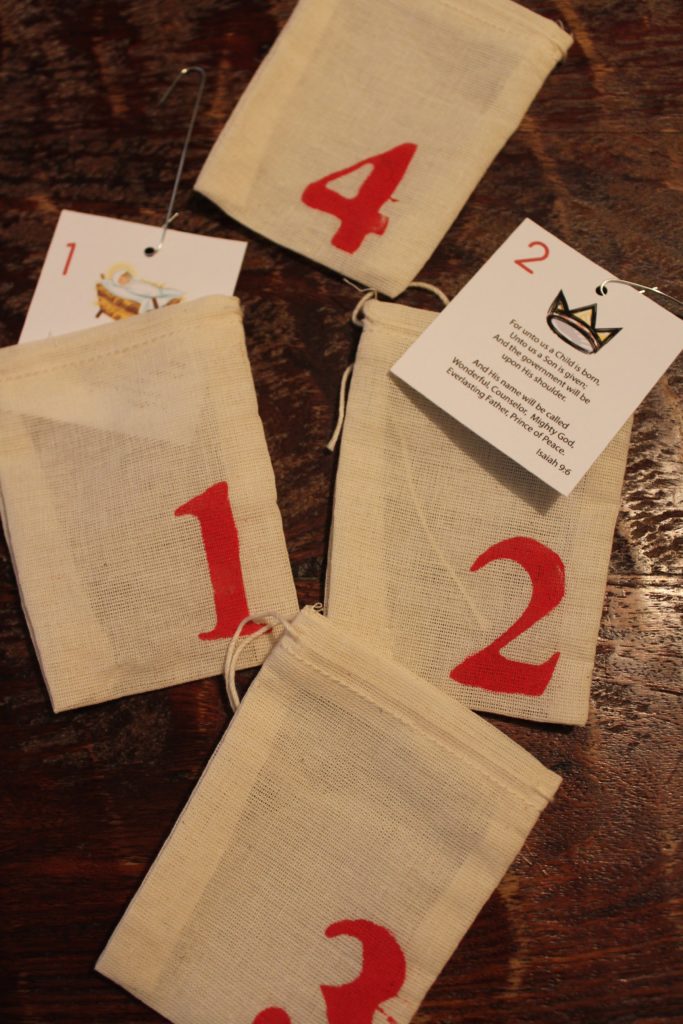
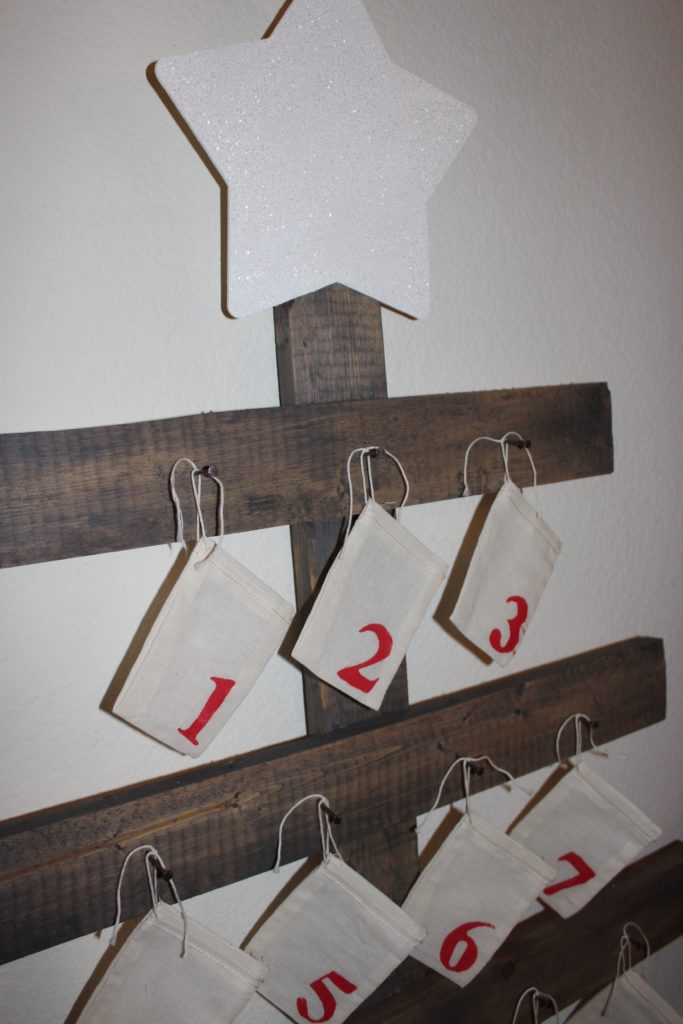
While the stain was drying I painted the numbers on my advent bags. You will need 25 muslin bags and we used number stamps instead of stencils. I think the number stamps were purchased at Hobby Lobby. I chose red paint for my numbers but some ladies used a red/green combination and some used black. Before you start painting your numbers put a piece of wax paper inside the bags so the paint from your numbers don’t run through to the other side.
After the bags were done and drying I went back to my tree to hammer in the nails to hold the bags. You will need 25 nails, a tape measure, and two scrap pieces of wood to keep your tree steady when hammering. This part was actually not as bad as I thought it would be. I started with the top smallest slat, put my scrap pieces of wood underneath on each side, and ran my tape measure across it. Then you just hammer in a nail ever 4 inches and it comes out perfect! You don’t need to hammer your nail in very far. Continue to do that with the remainder of the slats. See below.
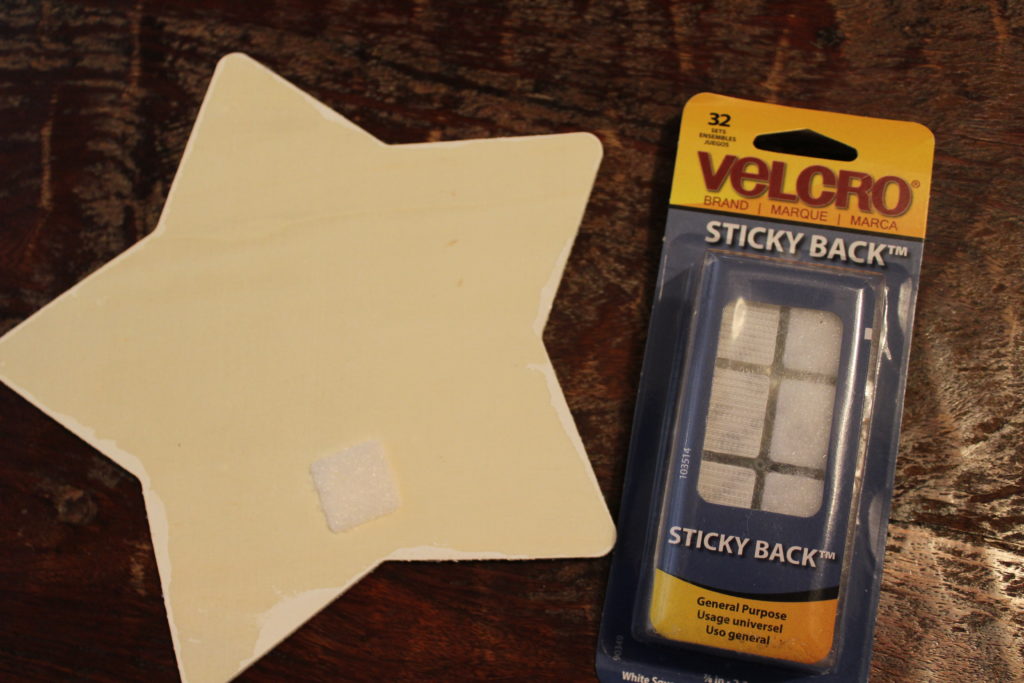
And that was it for the mom’s night out part of the tree. I left with a wooden stained tree and my painted muslin bags. My next steps at home were to create a star for the top of my tree and get my scripture ornament cards all ready. I found a pack of wooden stars at Hobby Lobby for my tree topper. I think the star is about 8-9 inches tall. I painted the star white with a foam brush and then sprinkled clear glitter on it.
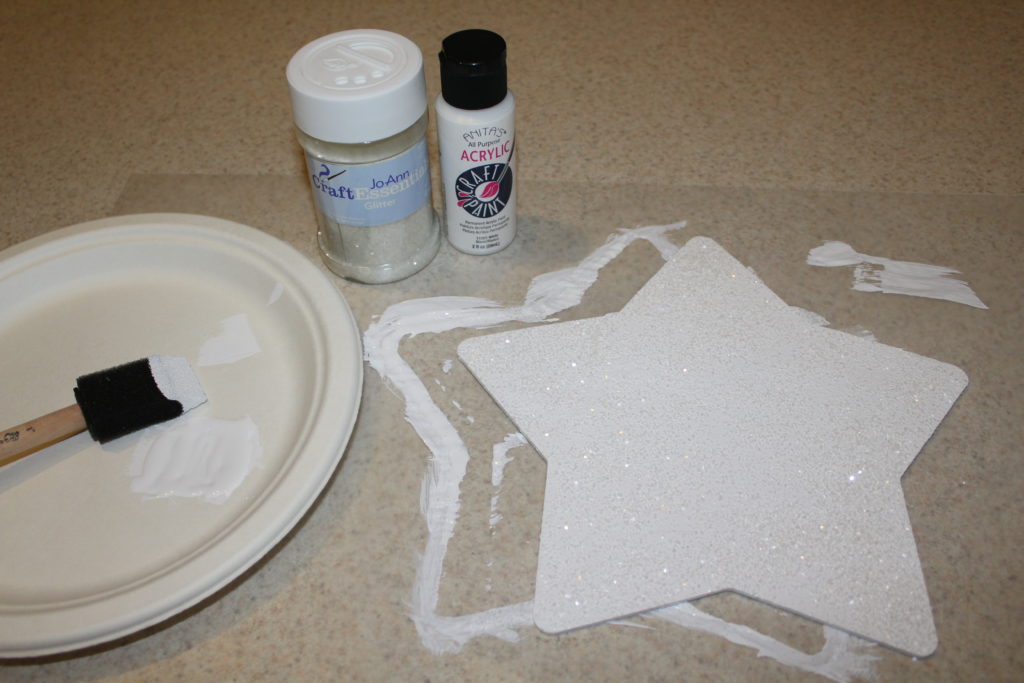
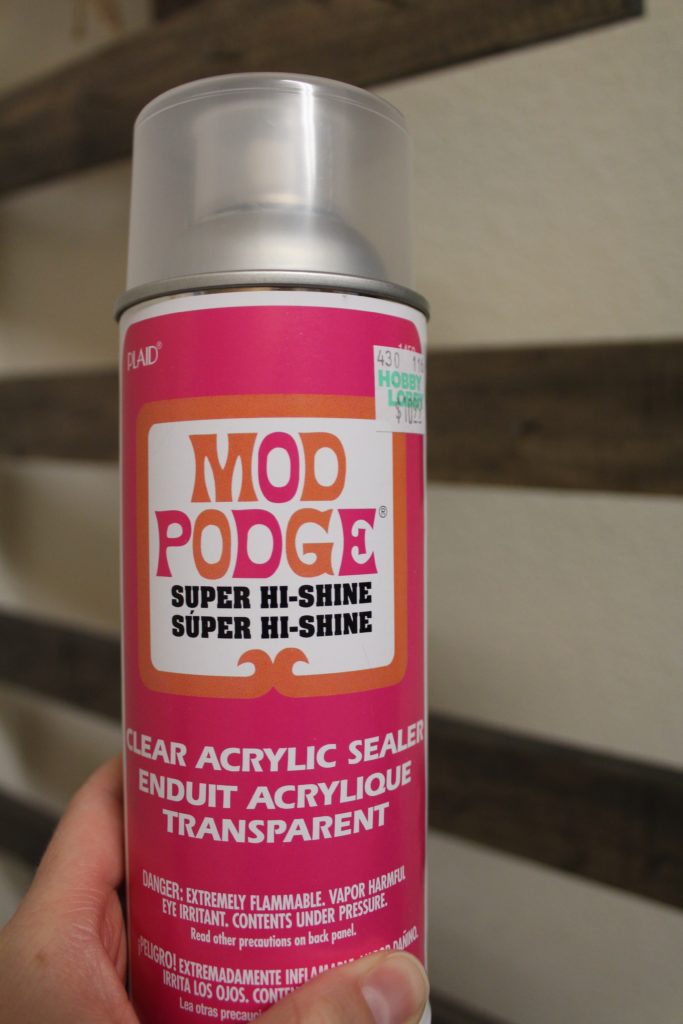
When my star was dry I went outside and took a can of spray Mod Podge to help seal in my glitter so it won’t just fall off everywhere. I did 3 coats and let that all dry for another day.
Next it was time to assemble my scripture cards and I found a few choices online. Here is the link for the ones pictured on the left, and here is the link for the ones on the right. I went for the ones on the right because it has 25 scripture verses, and the one on the left only has 24. You could still make that one work with putting a Merry Christmas card in the 25th one. I had to print my cards to a smaller scale so they will fit in my muslin bags.
*Note, since I photographed and made these just last week the scripture cards on the left have now been updated with cute pictures and go for 25 days!
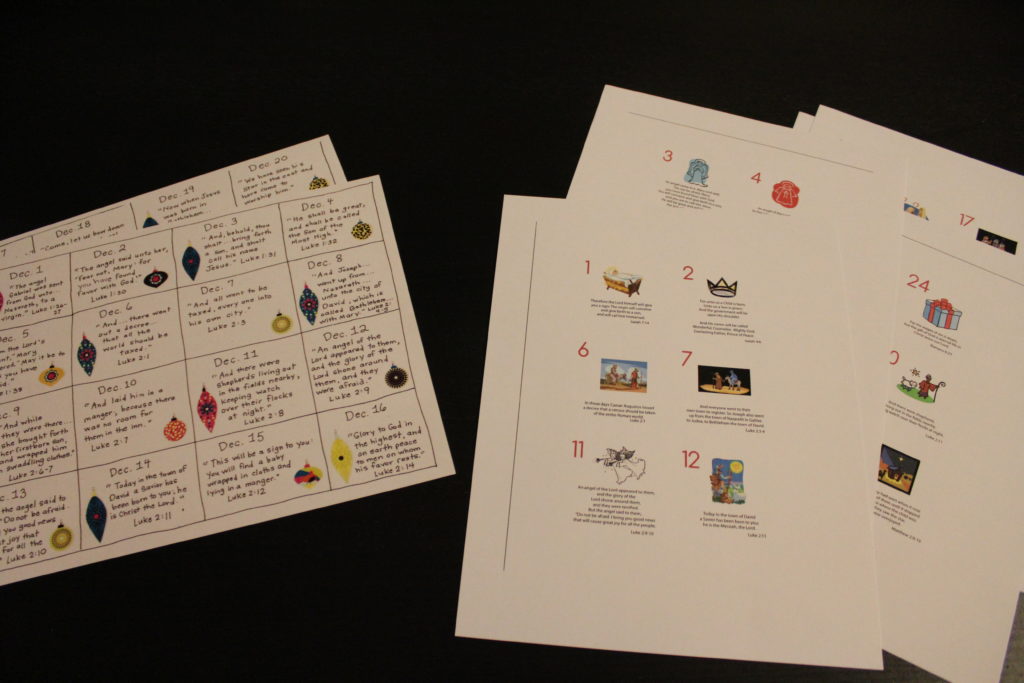
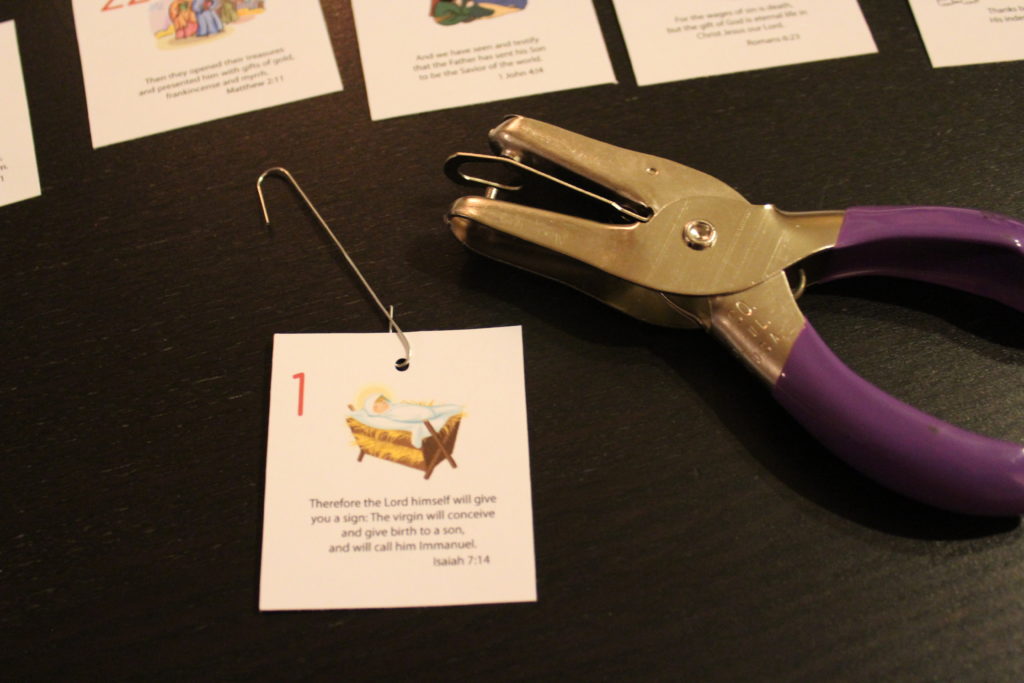
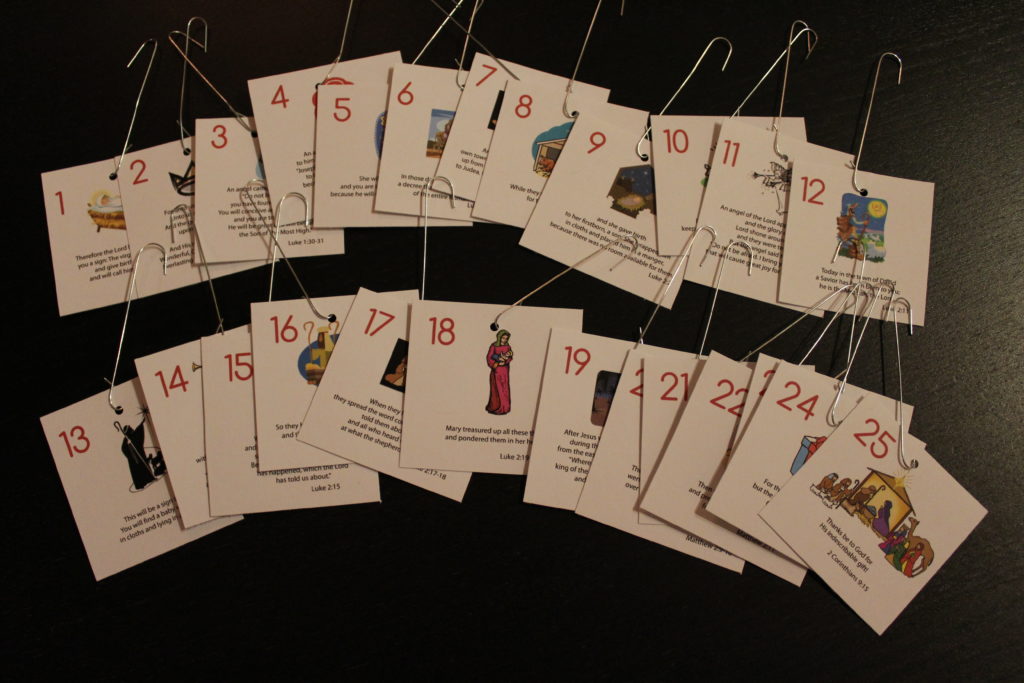
To make your scripture card ornaments you will need a paper cutter or scissors, a small hole punch, and ornament hooks.
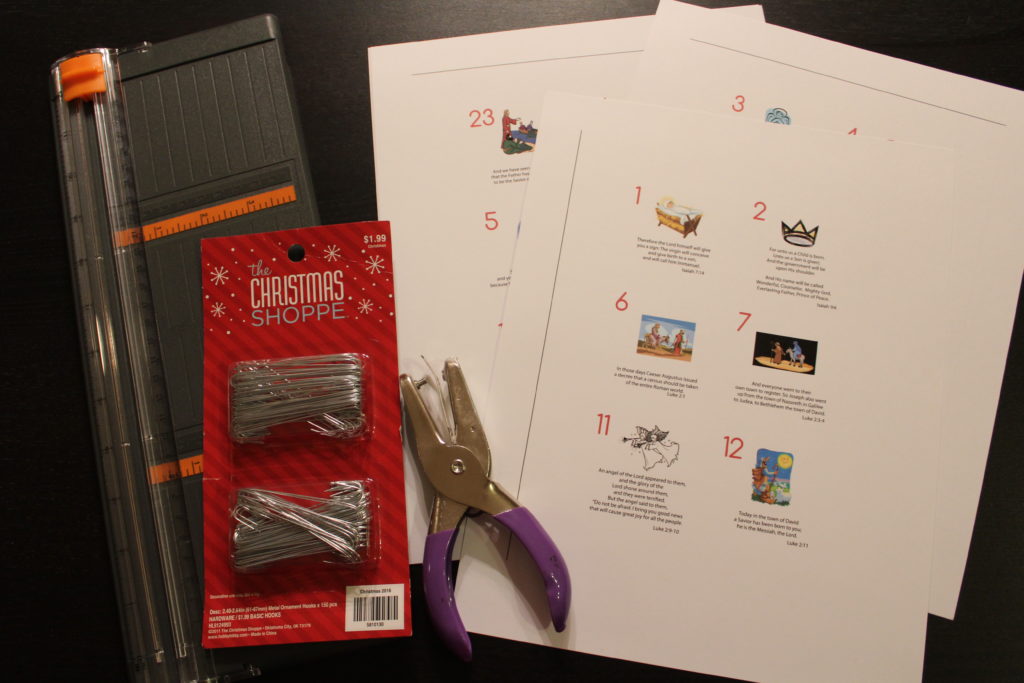
When your scripture cards are all cut out, punch a small hole in the top of your card and add your ornament hook.
When my star was all dry I attached it with sticky back velcro to my tree. I added one side of sticky back velcro to my star and then the other side to the top of the tree. You could glue your star on but I have other plans for my tree next fall, think thankful tree, so I need my star to be removable.
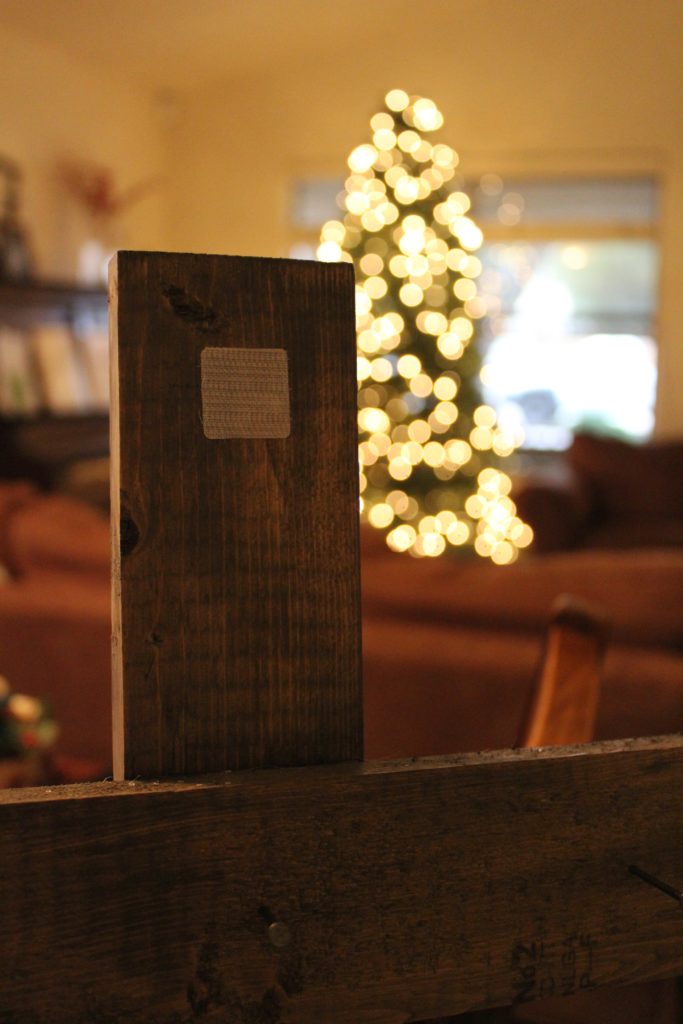
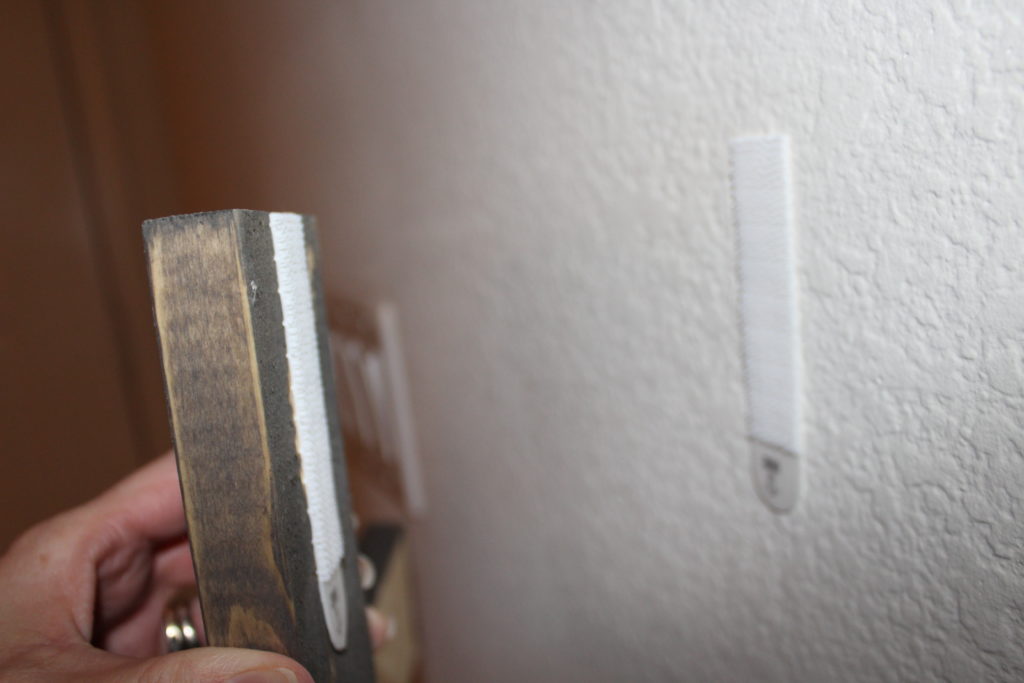
Next it is time to figure out where you want to put your tree. You could hang it on the wall, prop it up on something, or I chose to put it in a basket and lean it against the wall because it is pretty heavy and I really didn’t want to nail it to the wall for just the short time it is going to be up. To make it more sturdy, and so little hands won’t knock it over, I attached a command strip to the top to keep it in place. I got the large picture hanging strips. They would not be strong enough to hold up the whole tree but it seems like enough to keep it steady from falling over.
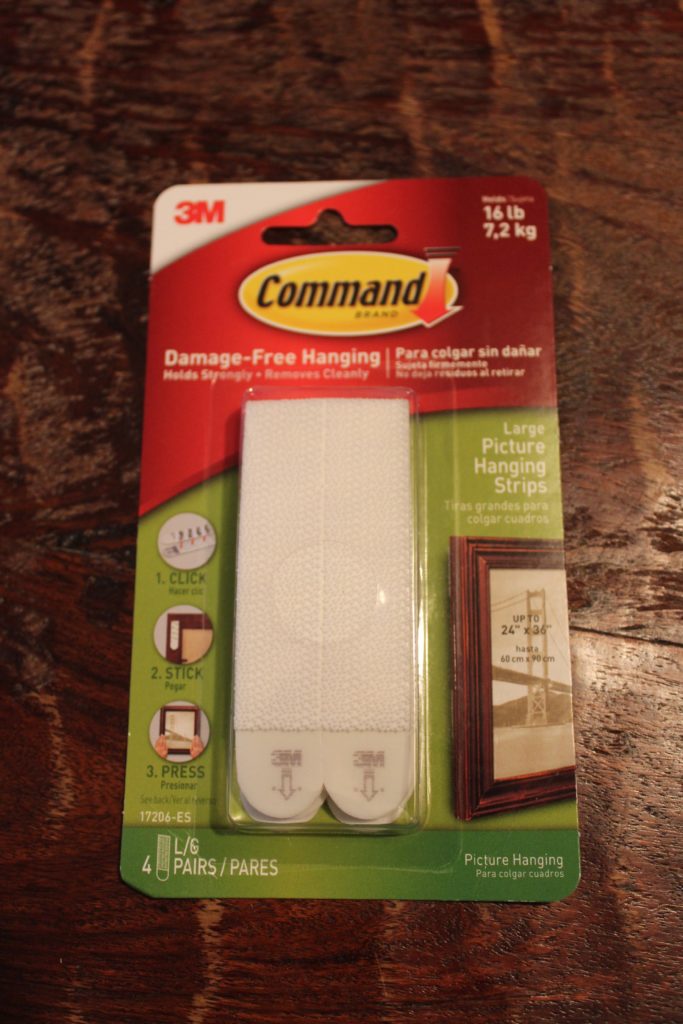
I put my tree in the basket that I was using and put it against the wall so I could mark where I wanted my command strip. Then I attached one strip to the wall and one to the top back of my tree and then you can just press them together like velcro. Since my tree is leaning against the wall it only hooks together at the top but so far it seems sturdy enough.
Next is the fun part of assembling and adding your bags. Put a scripture card in each bag and if you want you can add a fun treat on some days, a little ornament, or a little note about a Christmas family activity for the evening.
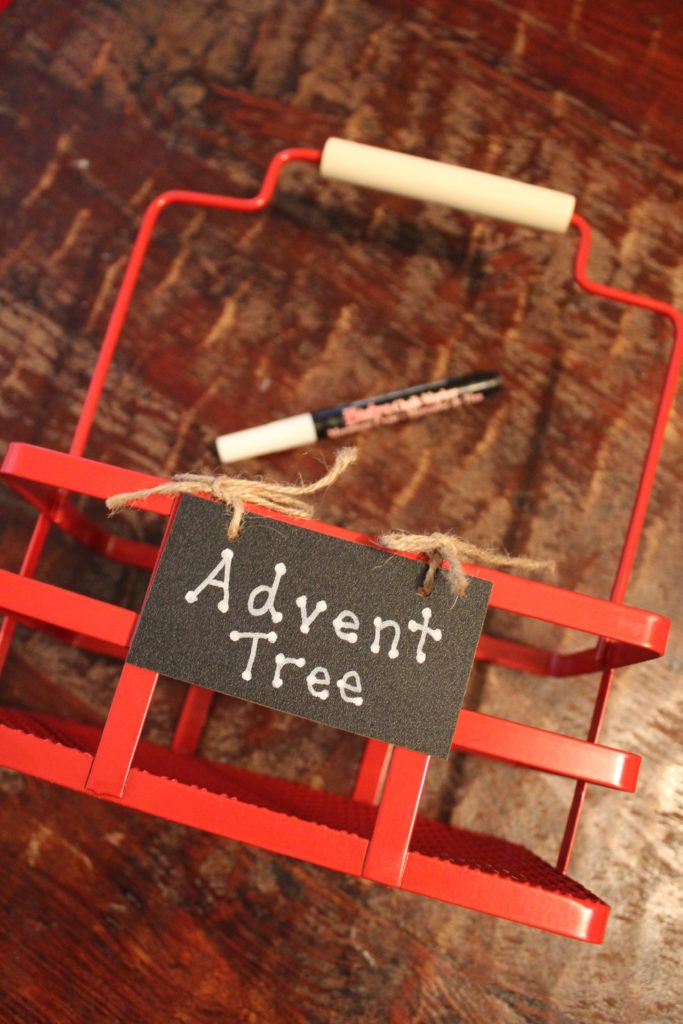
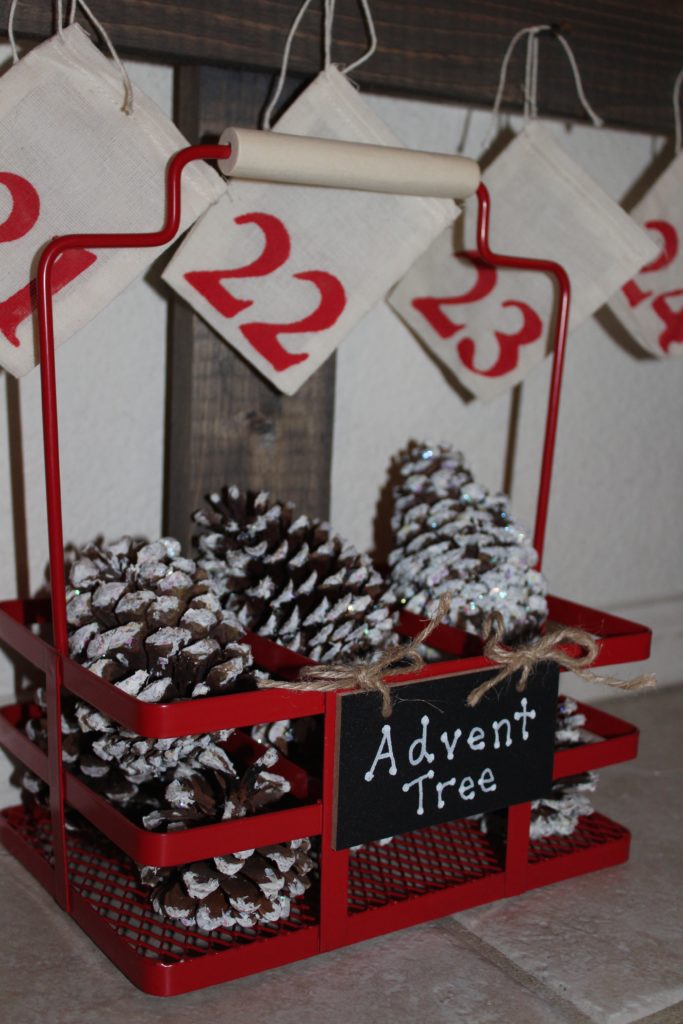
Here is my basket I found in the dollar section at Target. They called it a milk bottle basket and the bottom of the tree fit perfectly in one of the little sections. I used a chalk marker to write advent tree.

*I actually am choosing to wait to add my scripture card and treats to the bags until each night before. Otherwise it would just be too tempting to look at them all ahead of time! I will still leave all the bags up empty so the tree looks pretty. So far the kids seem to be leaving the tree, and the bags, alone! I have three kids that are old enough to pull stuff out of the bags, so they will rotate each morning who gets to open the bag so we can hopefully avoid them tackling each other to get to the tree!
I know this is a little time consuming up front but now I have a beautiful homemade advent tree that we can use year after year!
Post featured at: A Little Bird Told Me Link Party


Love it! This is super cute! Thank you so much for sharing the idea!
God bless,
Patty
This is so pretty. And I love the idea of being able to reuse it year after year.
What a cute DIY! I love that you put scripture cards inside each little bag. Just wanted to stop by to let you know that we’re featuring this at our weekly link party. http://www.thelifeofjenniferdawn.com/2016/12/rustic-christmas-farmhouse-decor-weekly.html
Thank you so much for featuring me on your link up!