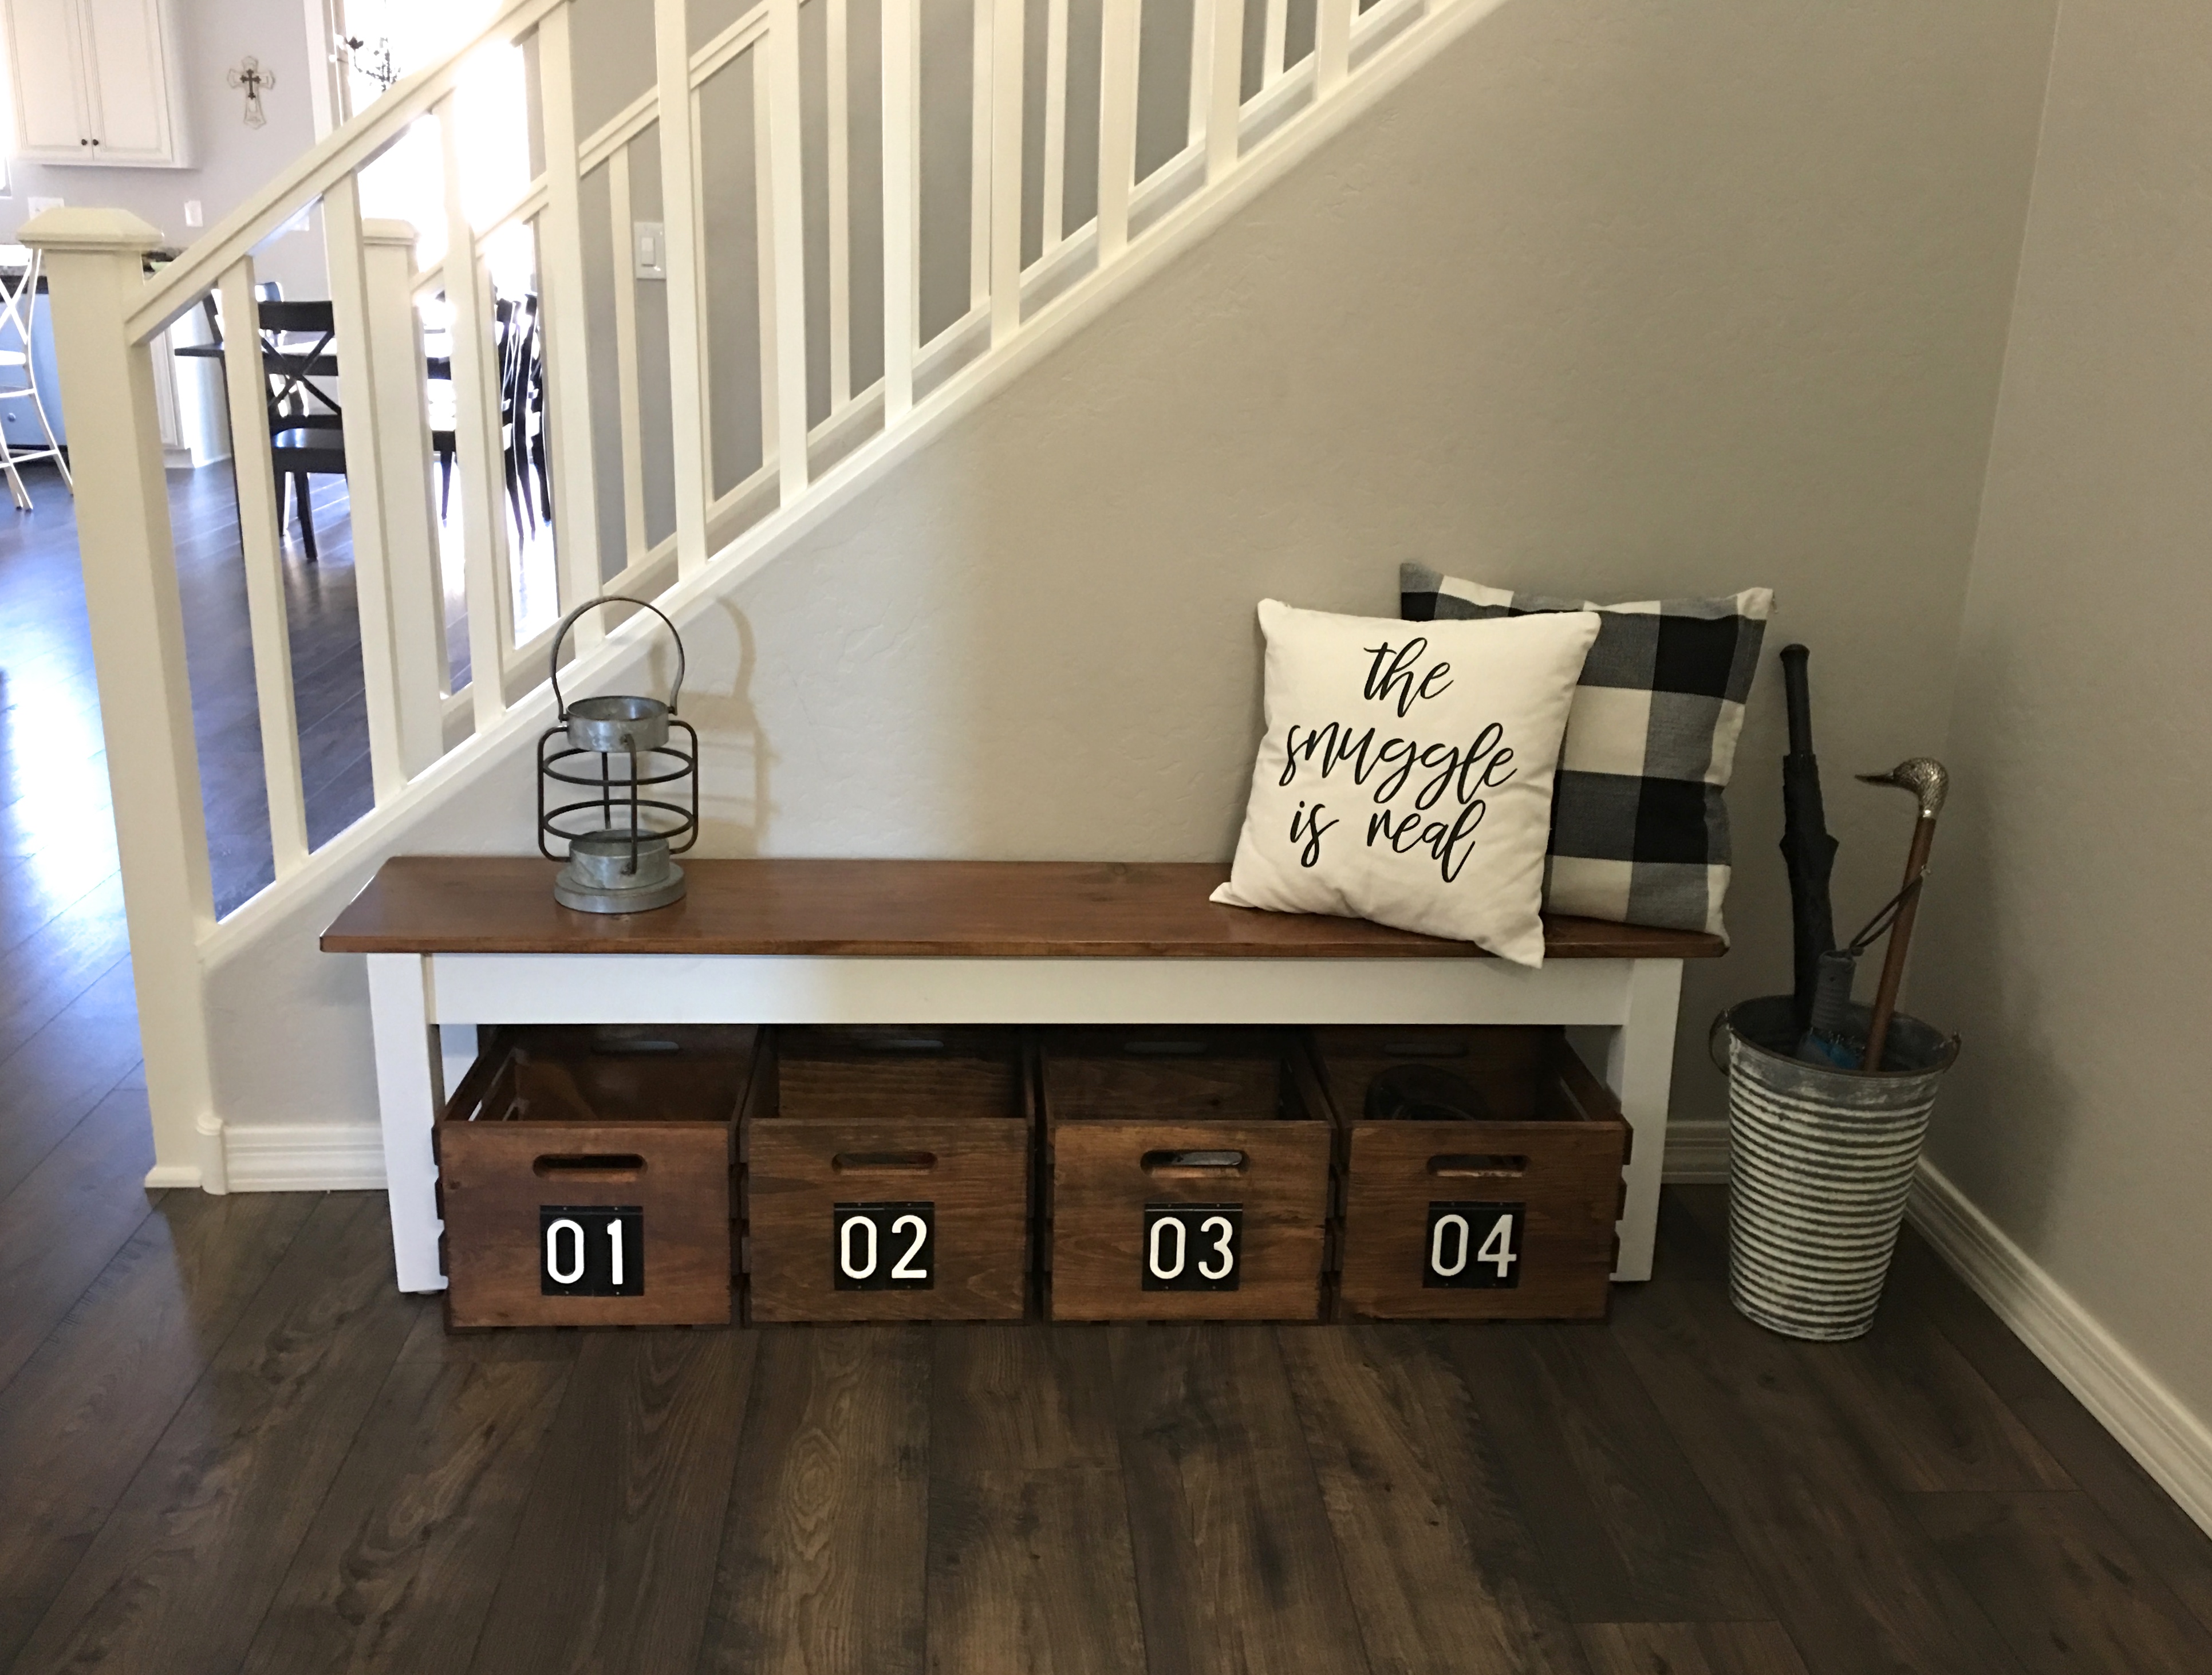
When we moved into our house so many of the shoes just kind of piled up by our garage-door entry. Naturally, that is where we are coming and going. Our garage entry is just around the corner from our main entry so all the shoes piling up was very well visible to everyone in the house, or to anyone who was coming over. I decided we needed some sort of entryway organization since we don’t have a laundry room, or mudroom, as a barrier before entering from the garage into the house. I found a cute little farmhouse bench and then thought crates would be perfect for underneath to store all the shoes! 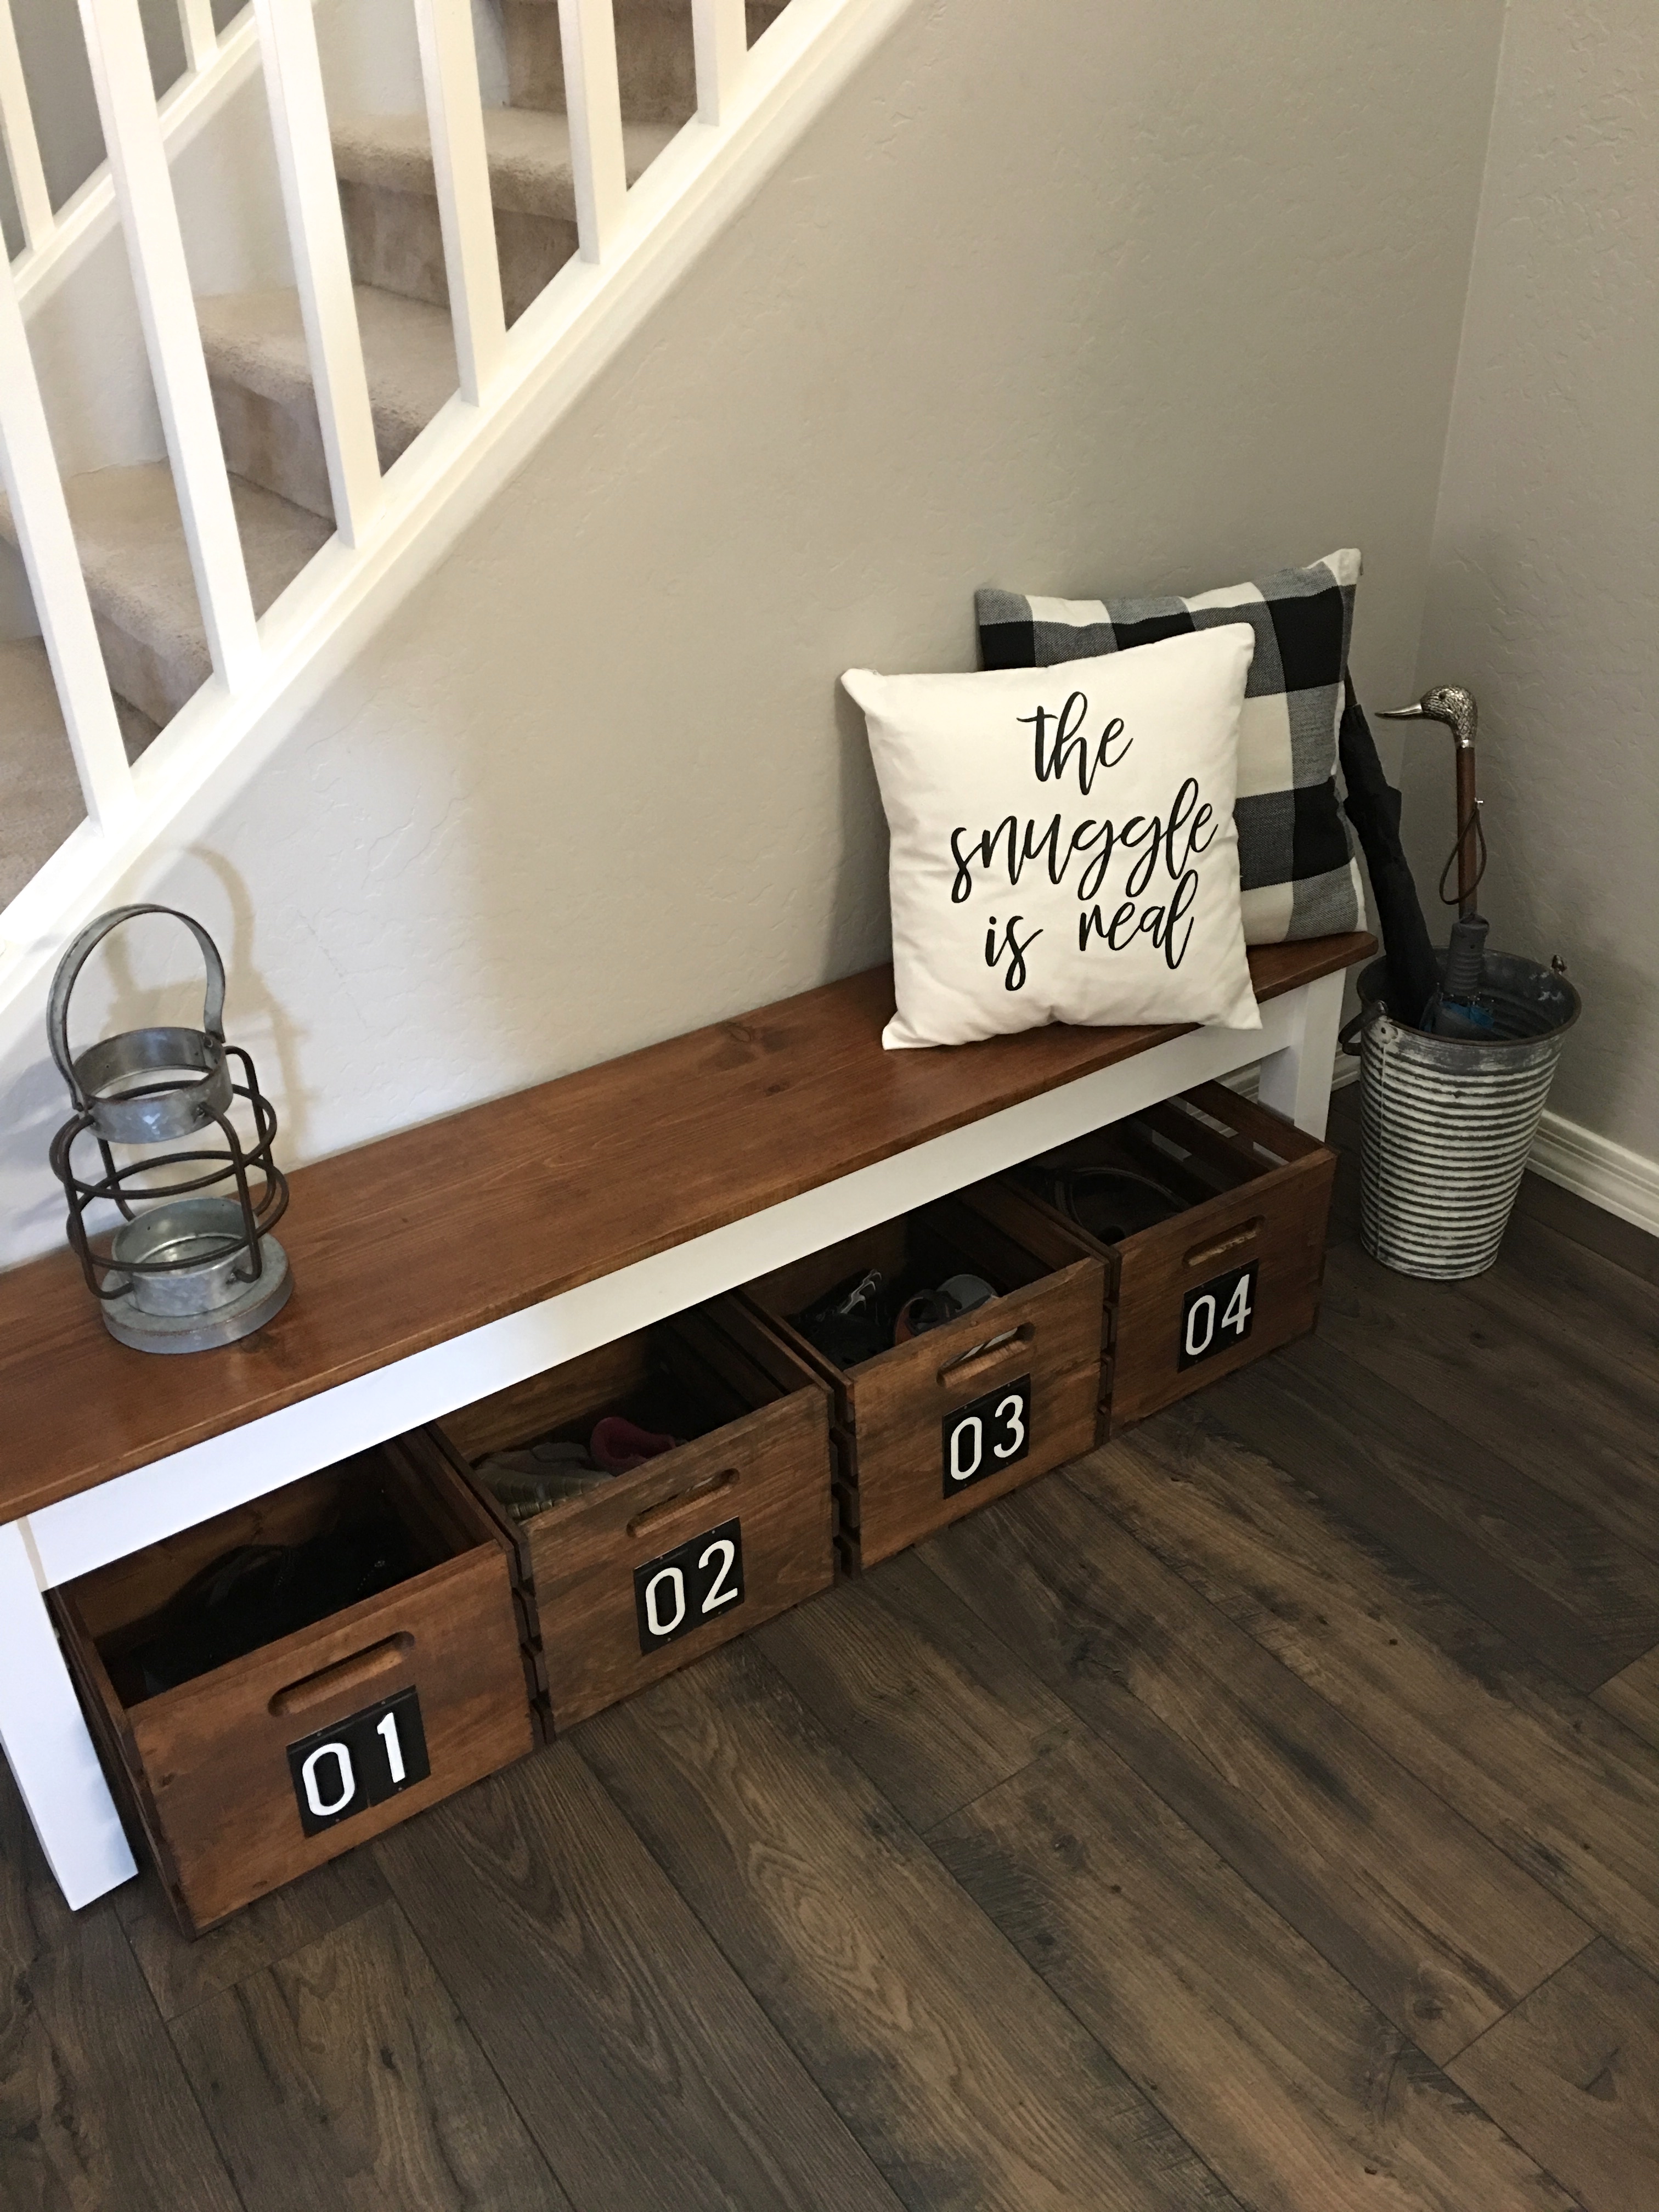
I like the crates because they are still open enough for the kids to use them, but closed off enough to hide all the shoe mess. Since the crates come as a light blond wood, my goal was to stain them to match the top of the bench as close as possible. They turned out slightly darker but I think it is close enough. Then I thought these cute little numbers were a perfect way to help everyone know which crate is theirs, and to keep all the shoes separate. 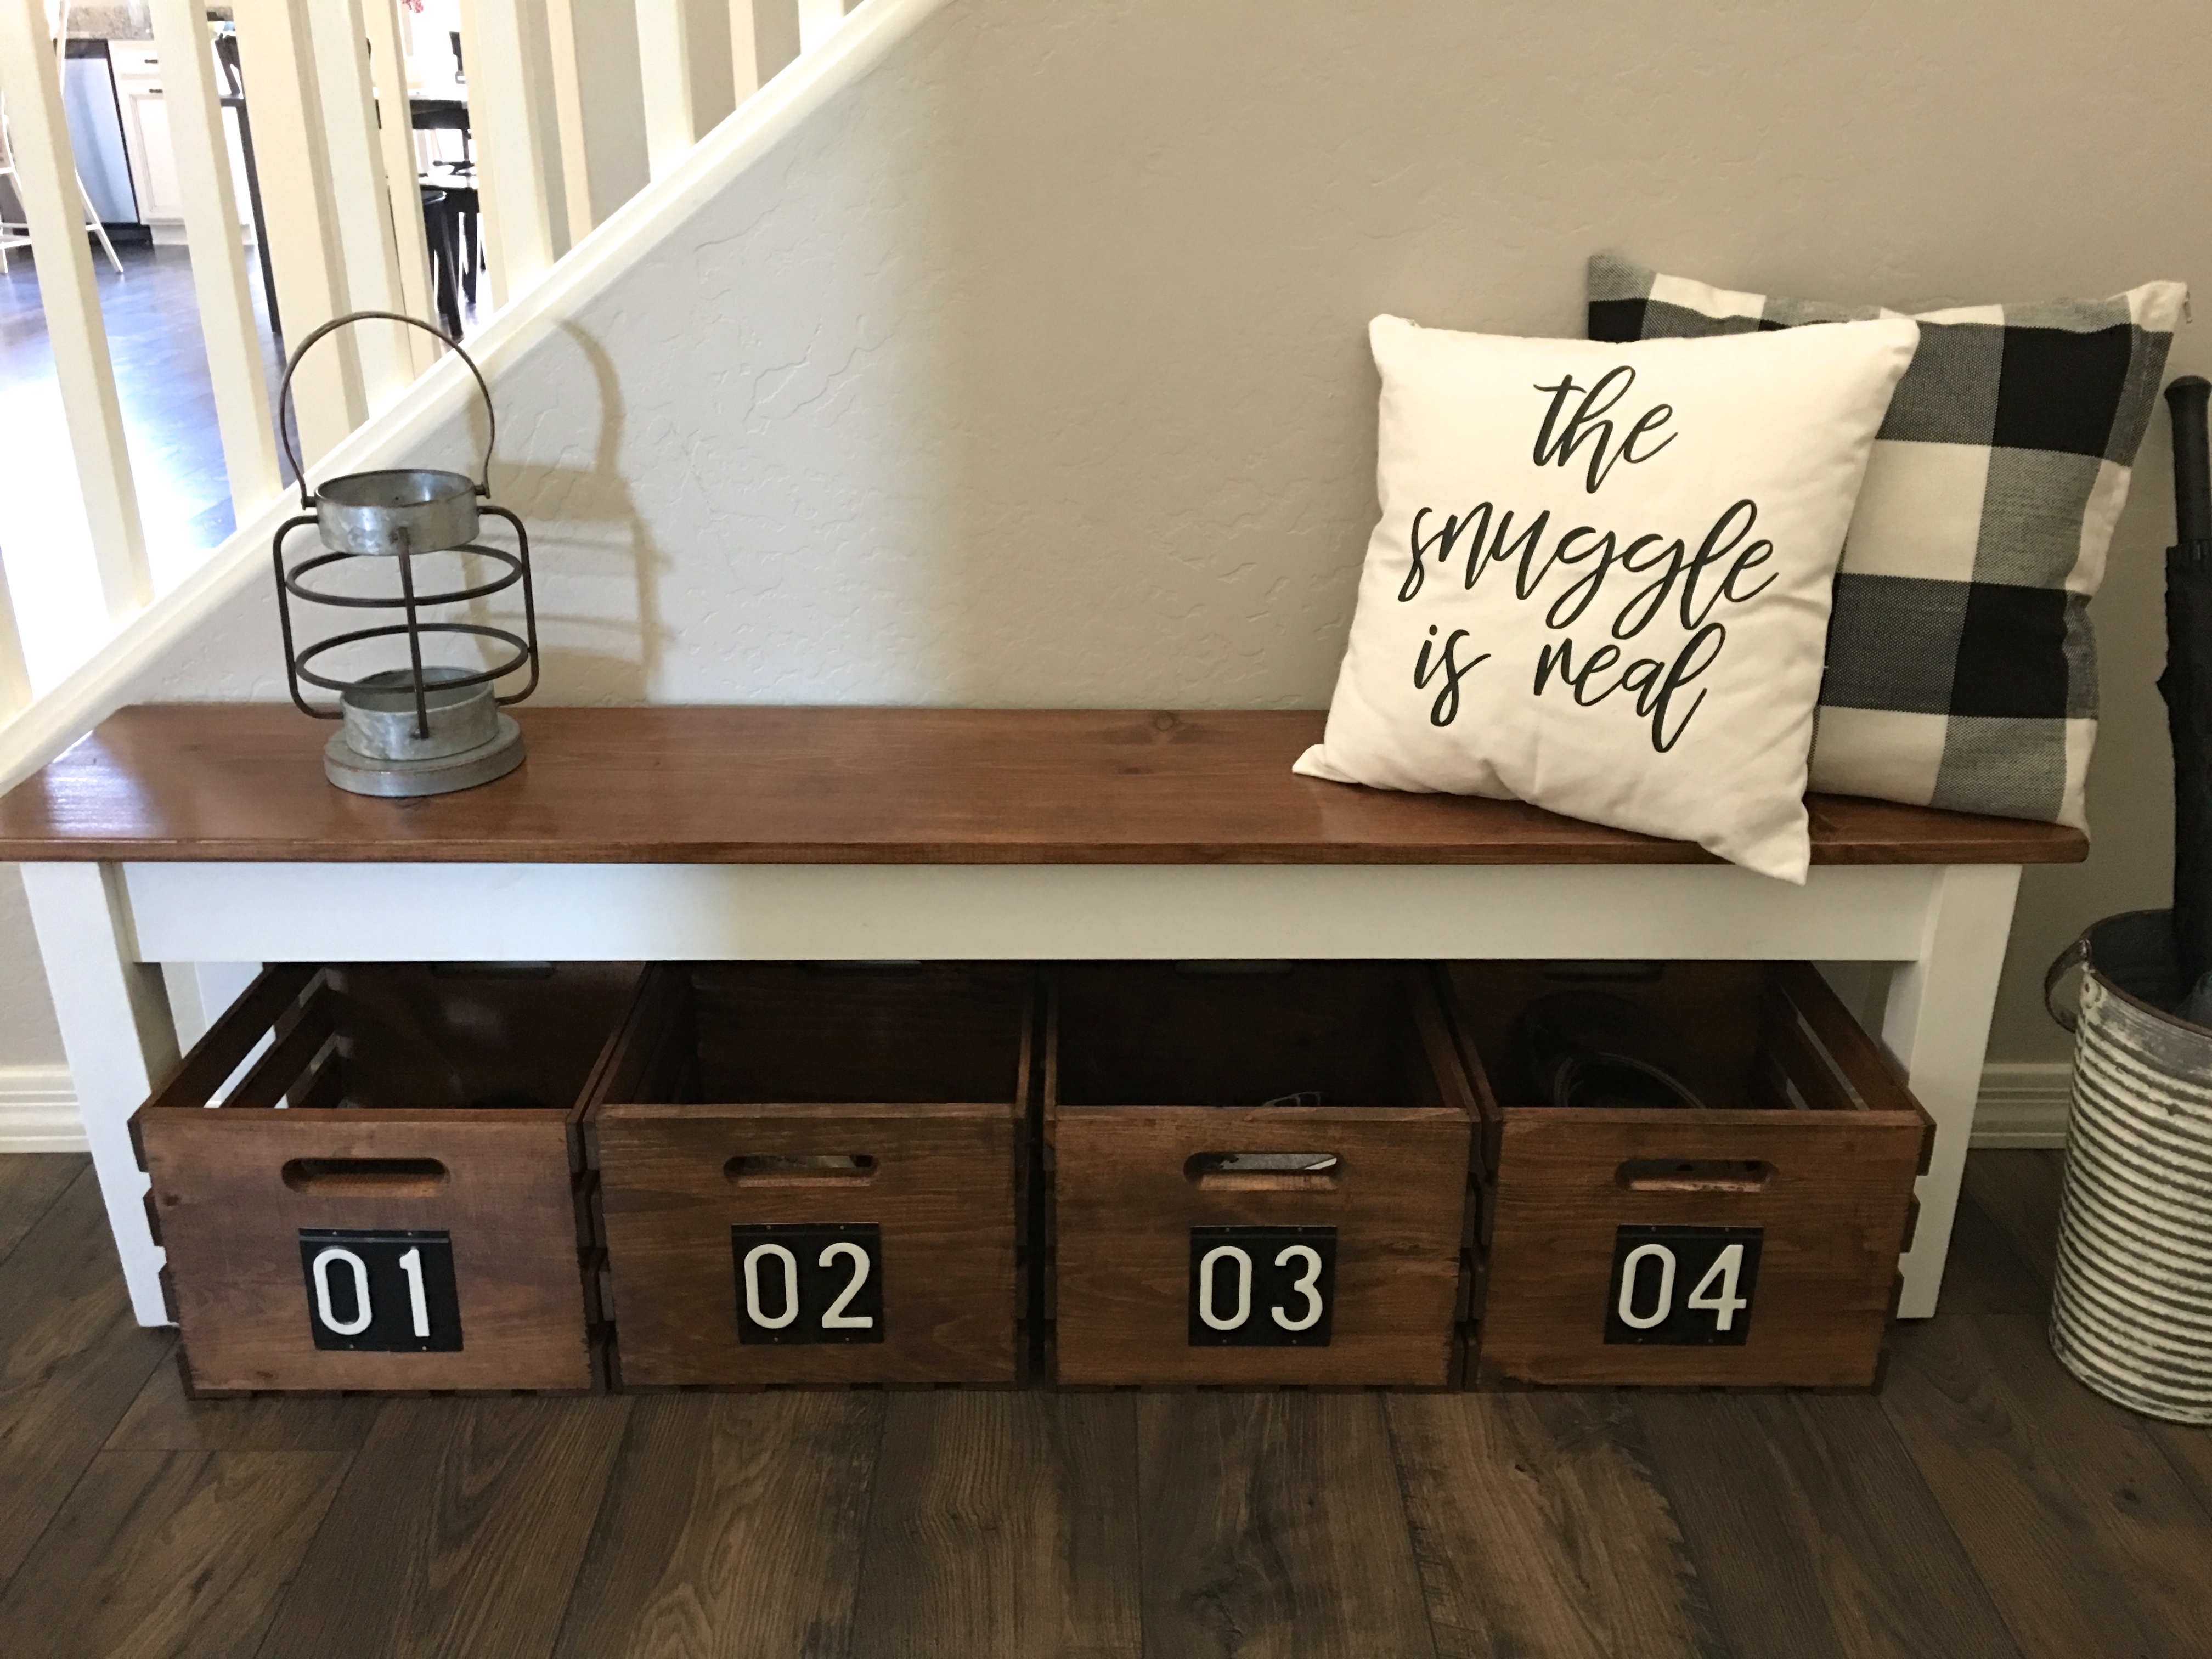
My bench is only 12 inches deep so at first I struggled to find the right size of crate. Most of the large crates measure 18 inches wide, which would have stuck out way too far. Most smaller crates are way too small and about half the height and you would hardly be able to fit any shoes. I found these perfect ones online as they look like a full size crate from the front but are only 13.5 inches wide! Here is what you need to make your crates…
Affiliate links are included for your convenience. If you click on a link and make a purchase, I’ll receive a small commission at no extra cost to you.
Supplies-
- Wooden crates
- Stain– I used Special Walnut
- foam brush
- lint free cloth
- sandpaper
- 3 inch reflective numbers
- 3/4 inch nails
- hammer
Directions-
Smooth out any rough spots on your crates if needed, if not skip this step. I only had a few spots on the bottom and side planks that needed a little sanding. Because I had to stain 4 crates it was faster for me to apply some stain with a foam brush in small sections at a time ,and then smooth it out and blend it in with the cloth. You could also just use the cloth for the whole thing. 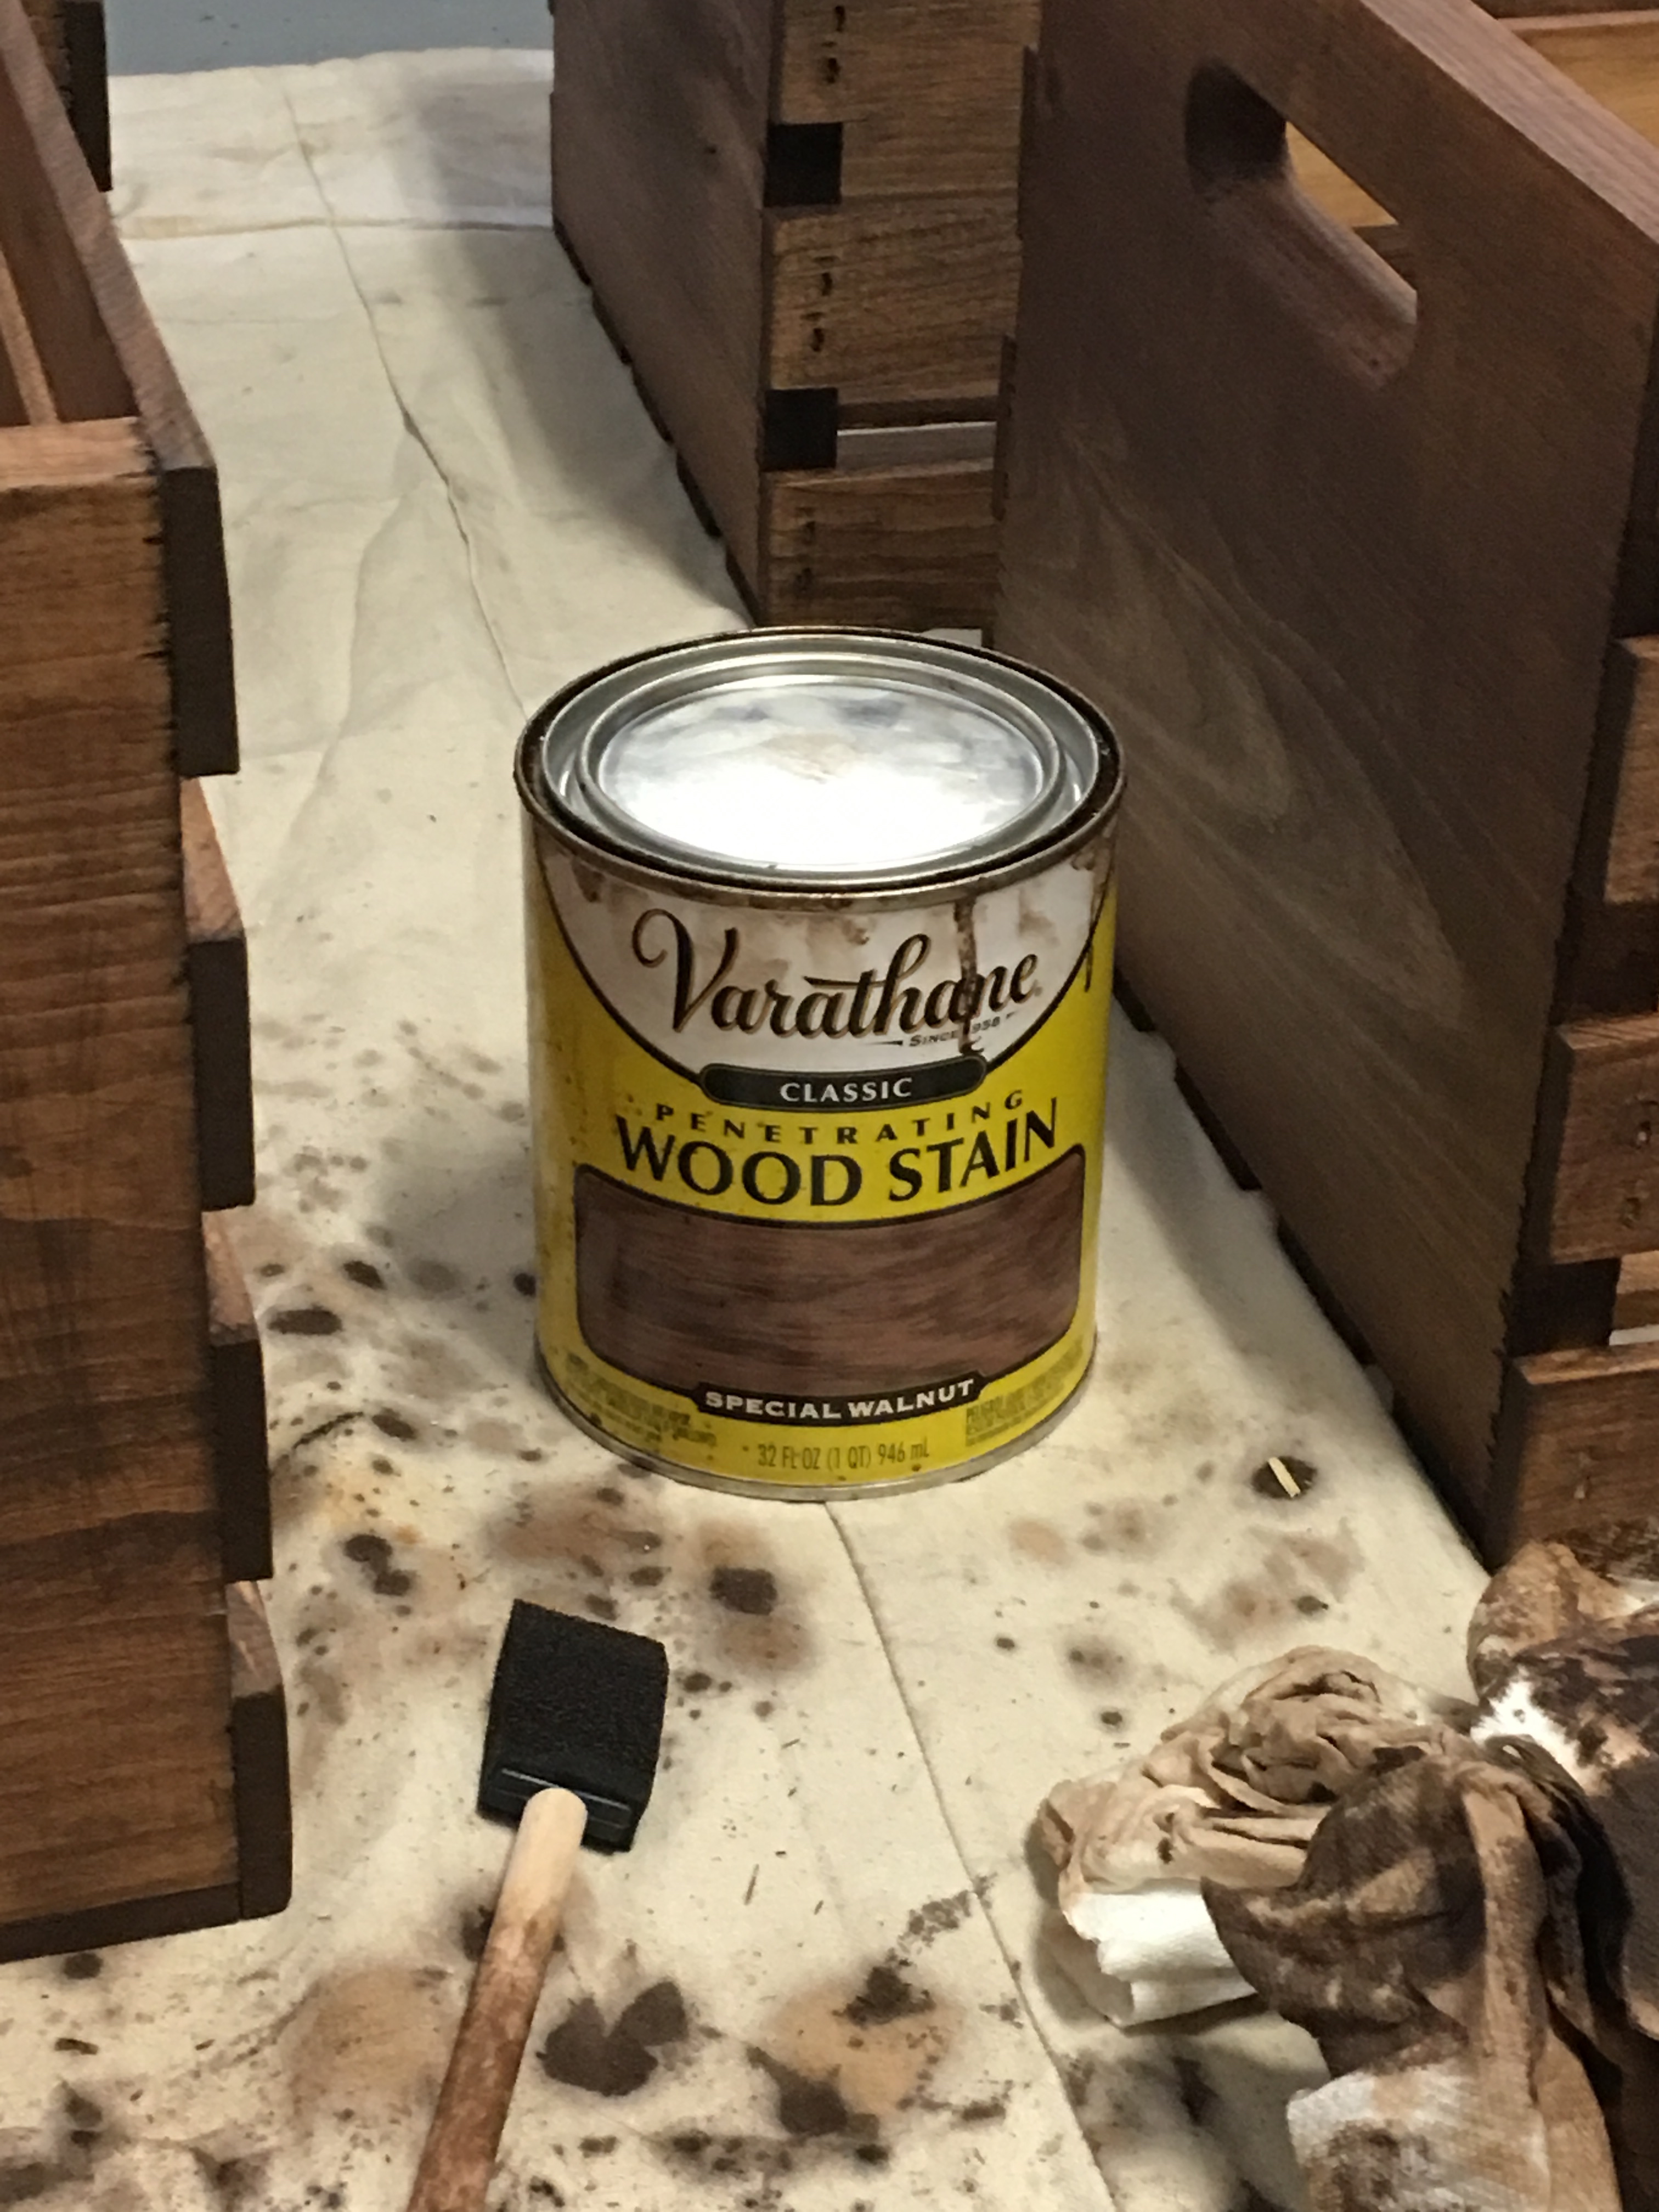
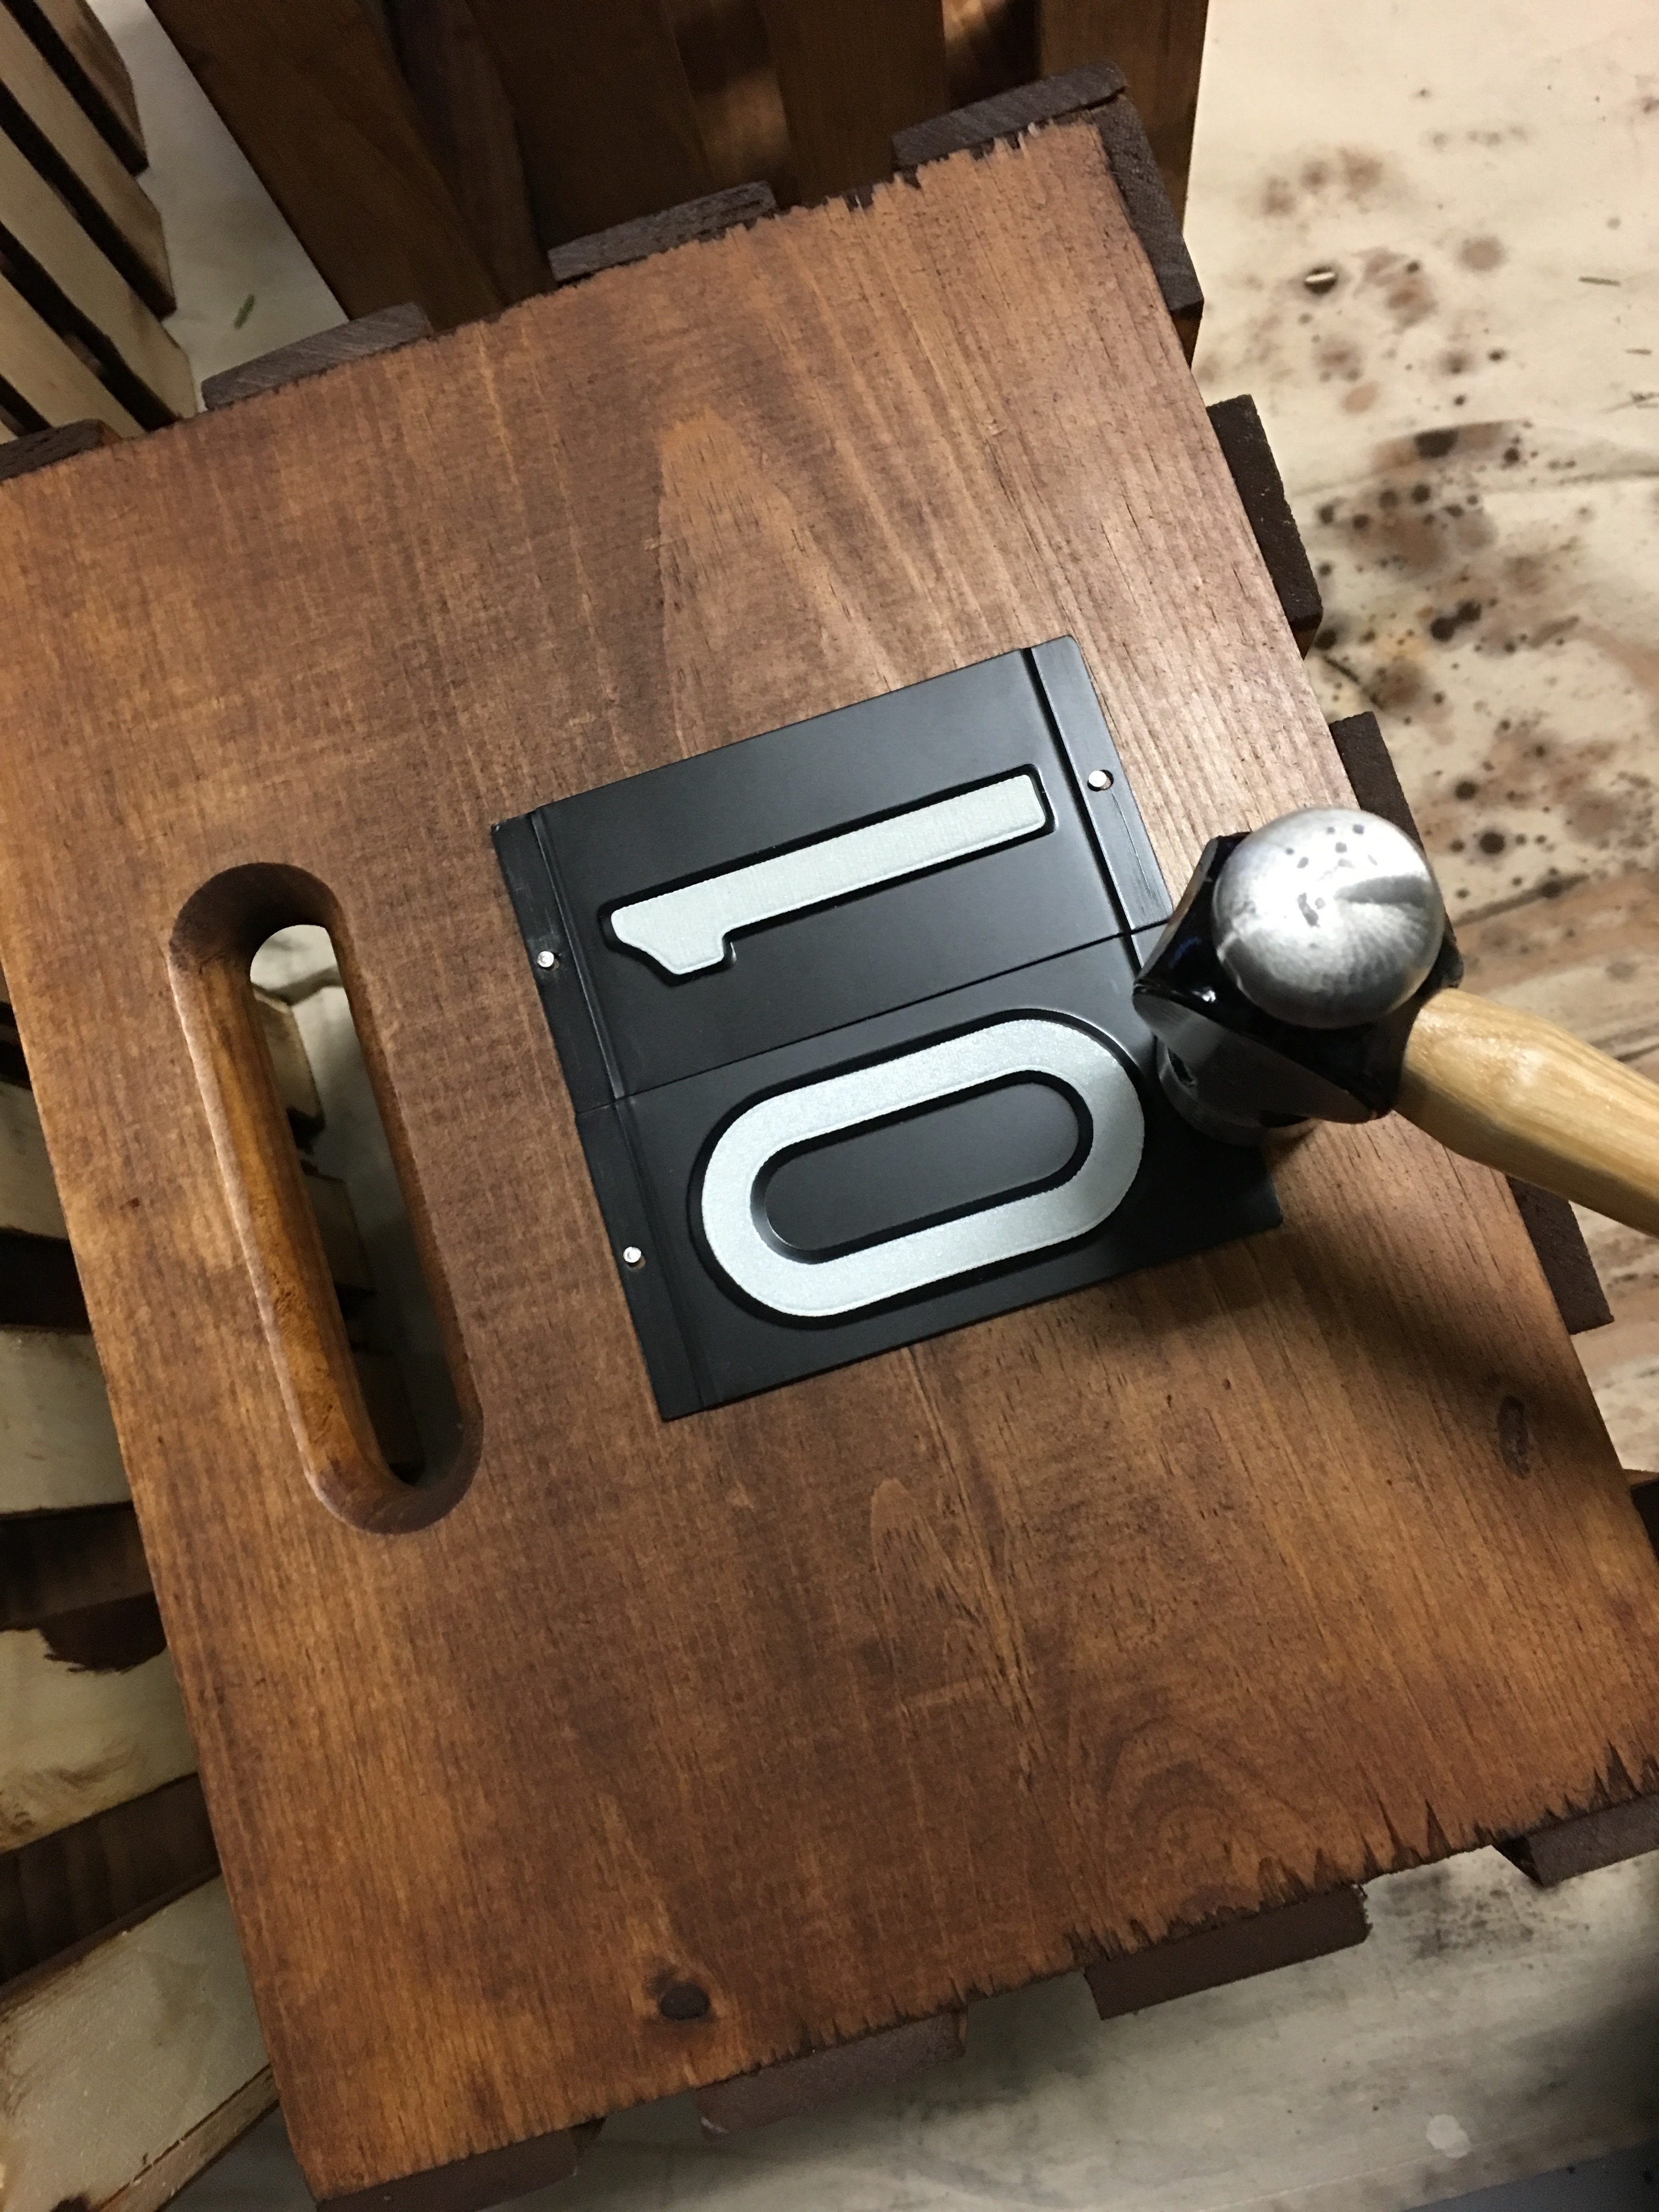
When your crates are all stained and dry it is time to add your numbers. I used these Hillman 3 inch reflective numbers in the 01, 02, 03, and 04 pattern. 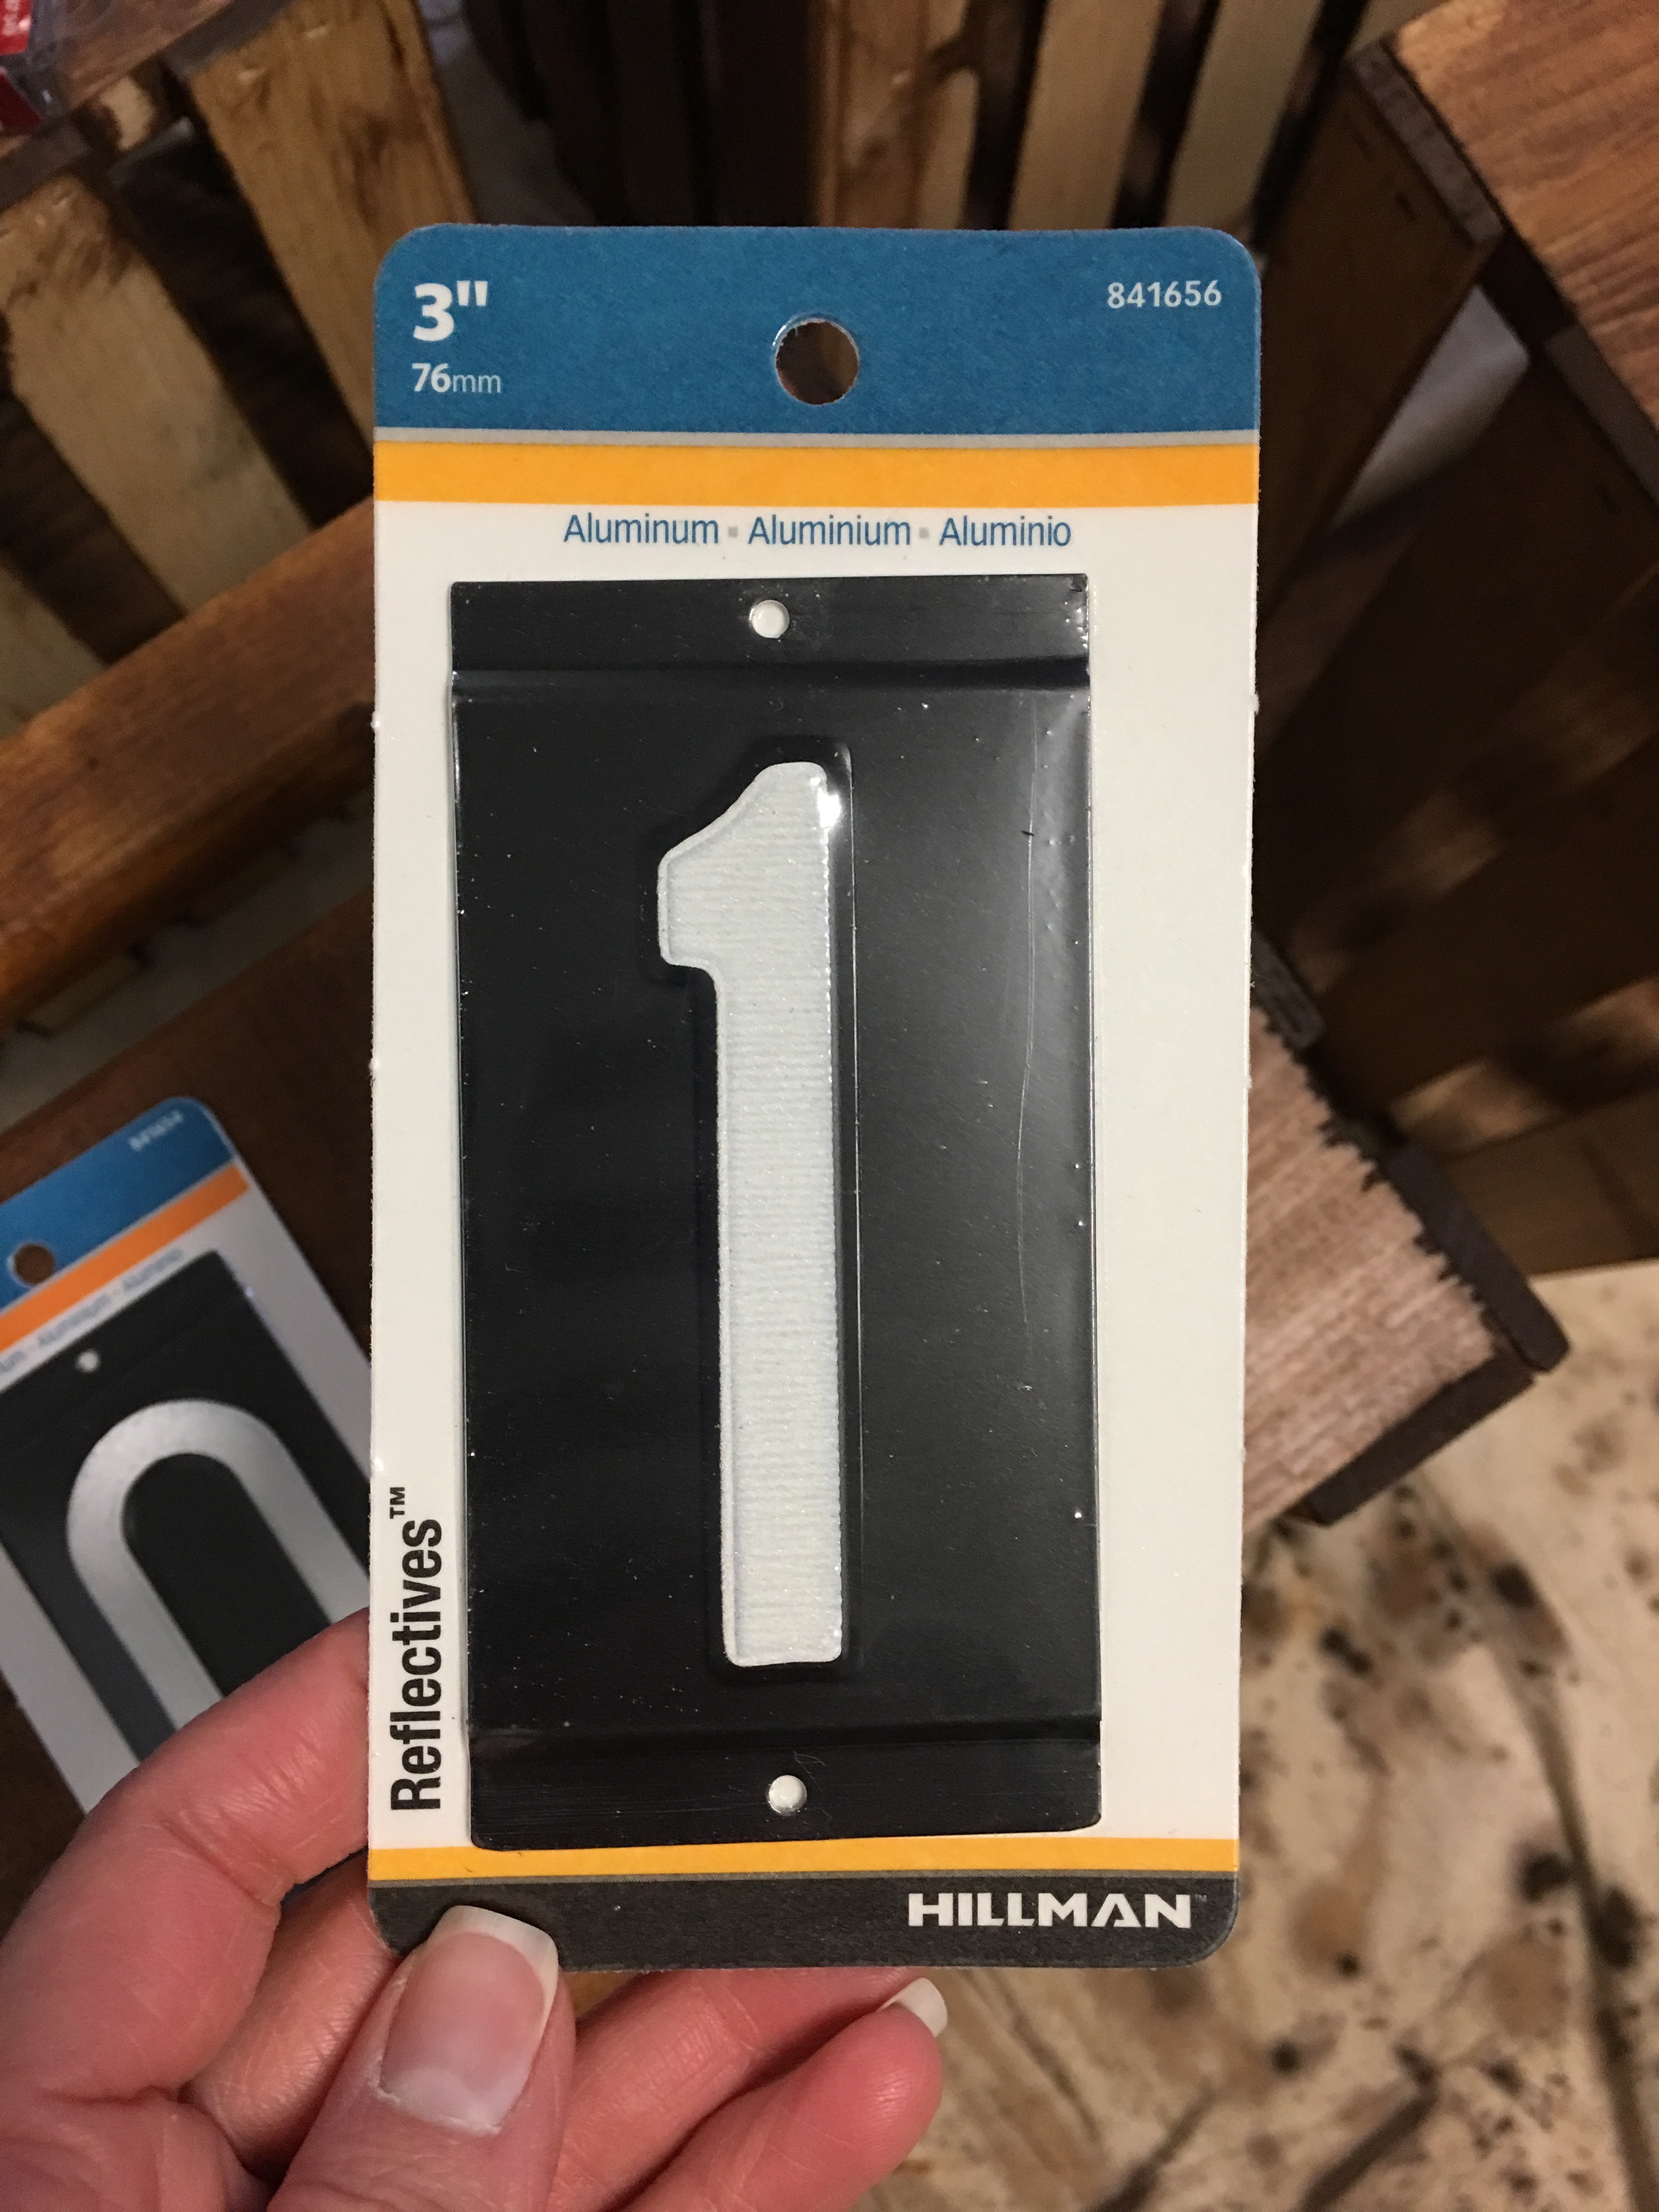
Line up your numbers and then hammer in the nails. The 3/4 inch nails were just wide enough on the nail head to hold on the numbers, and not too long to poke all the way through the back when hammered in. I was cutting it close but the numbers added a little thickness that when hammered in all the way mine were fine. Just check the side of your crate with your nails to see if you can hammer in the nails all the way or not. 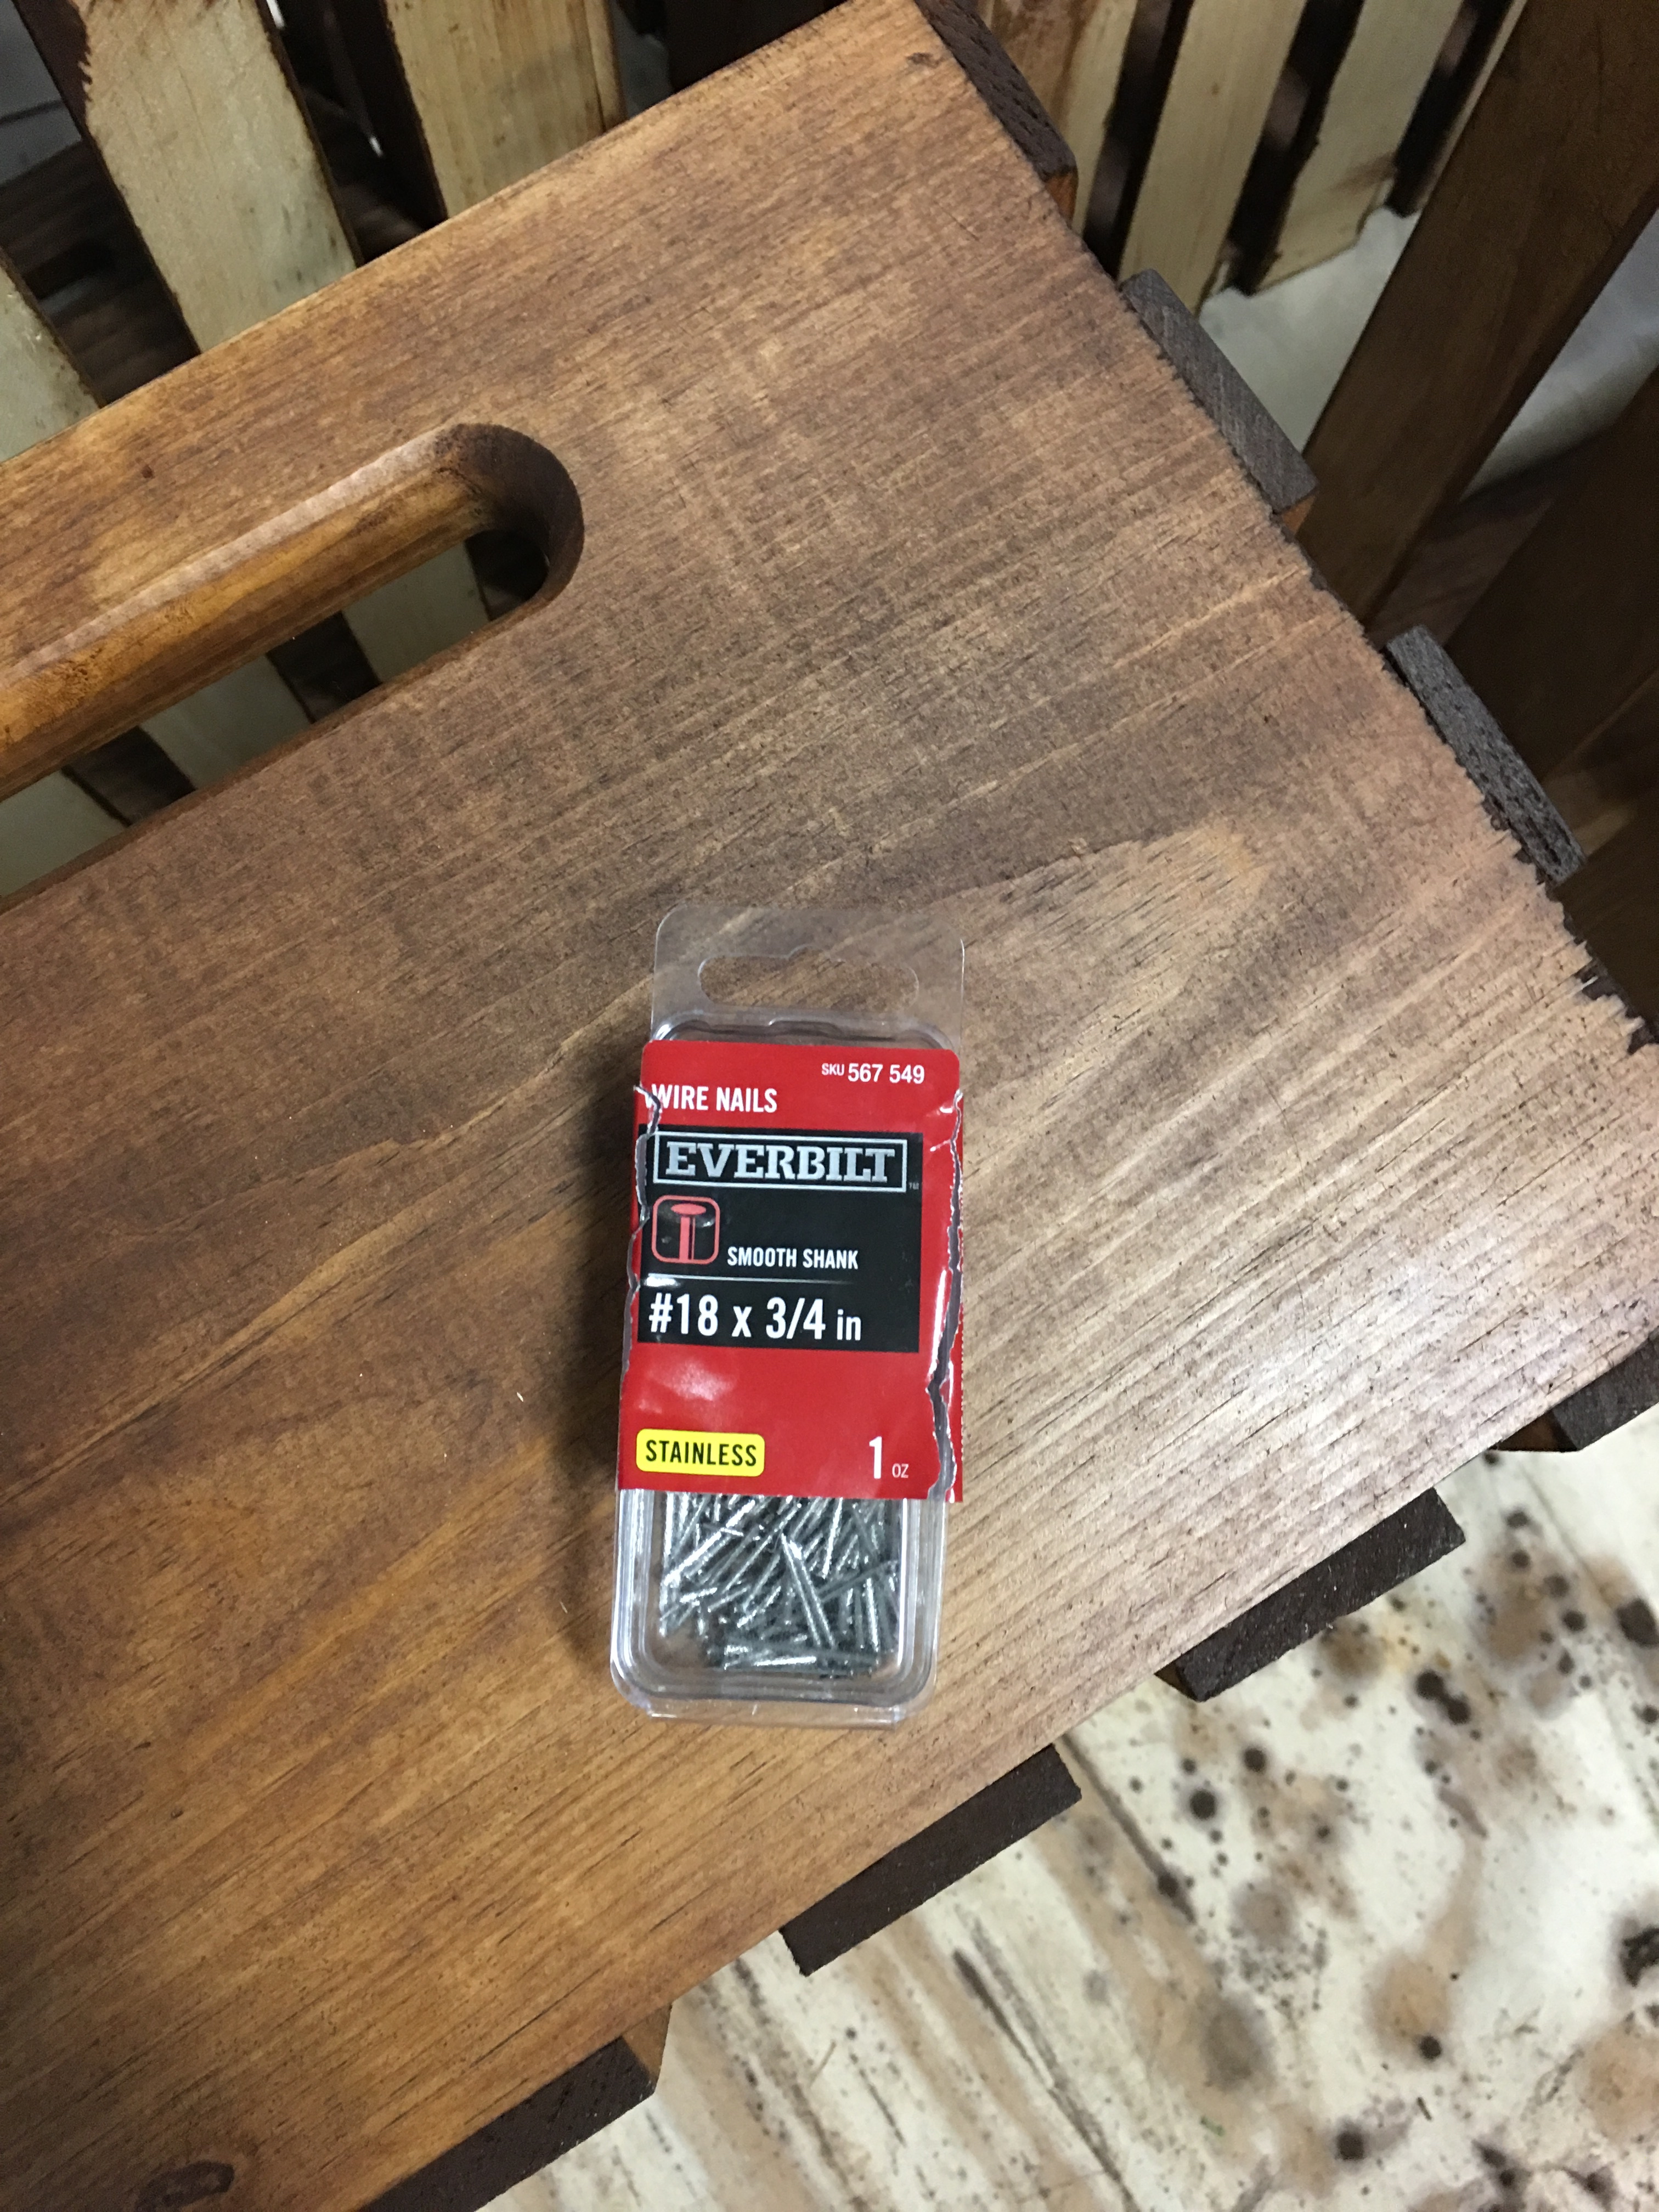
And there you have a simple DIY number crate! 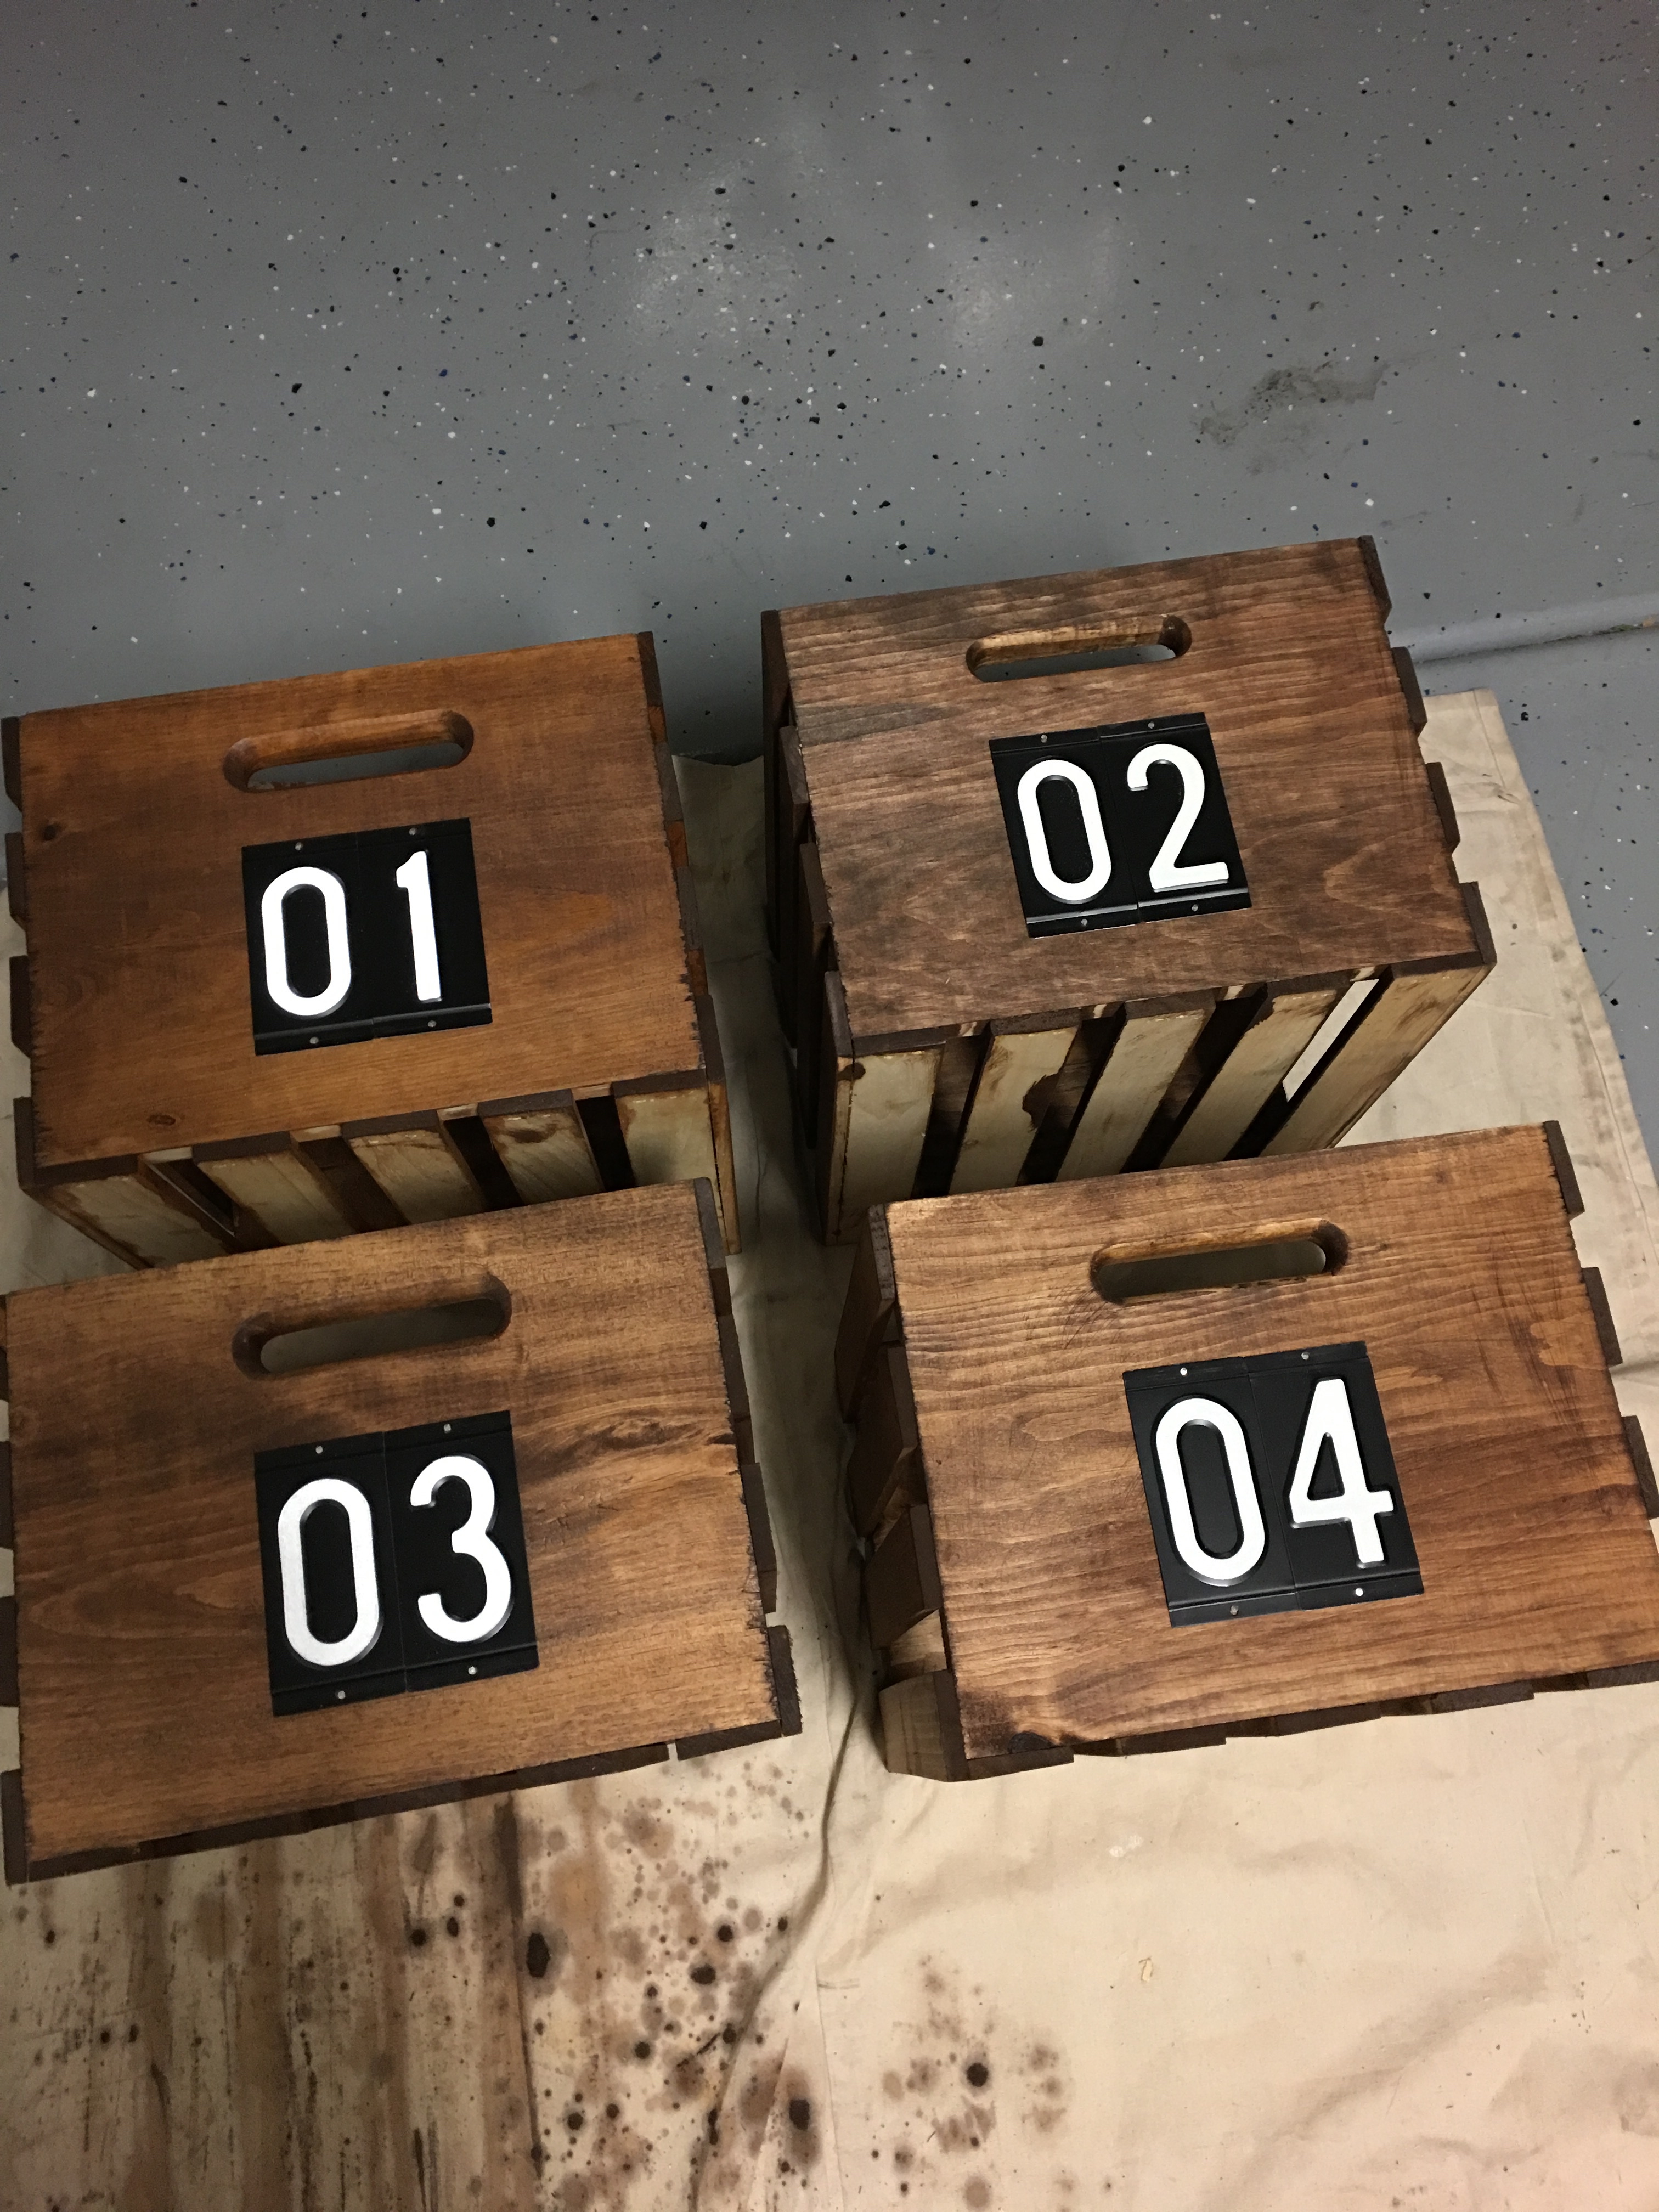
This was such a quick project that adds so much character to my entryway, and a perfect way to store our shoes! 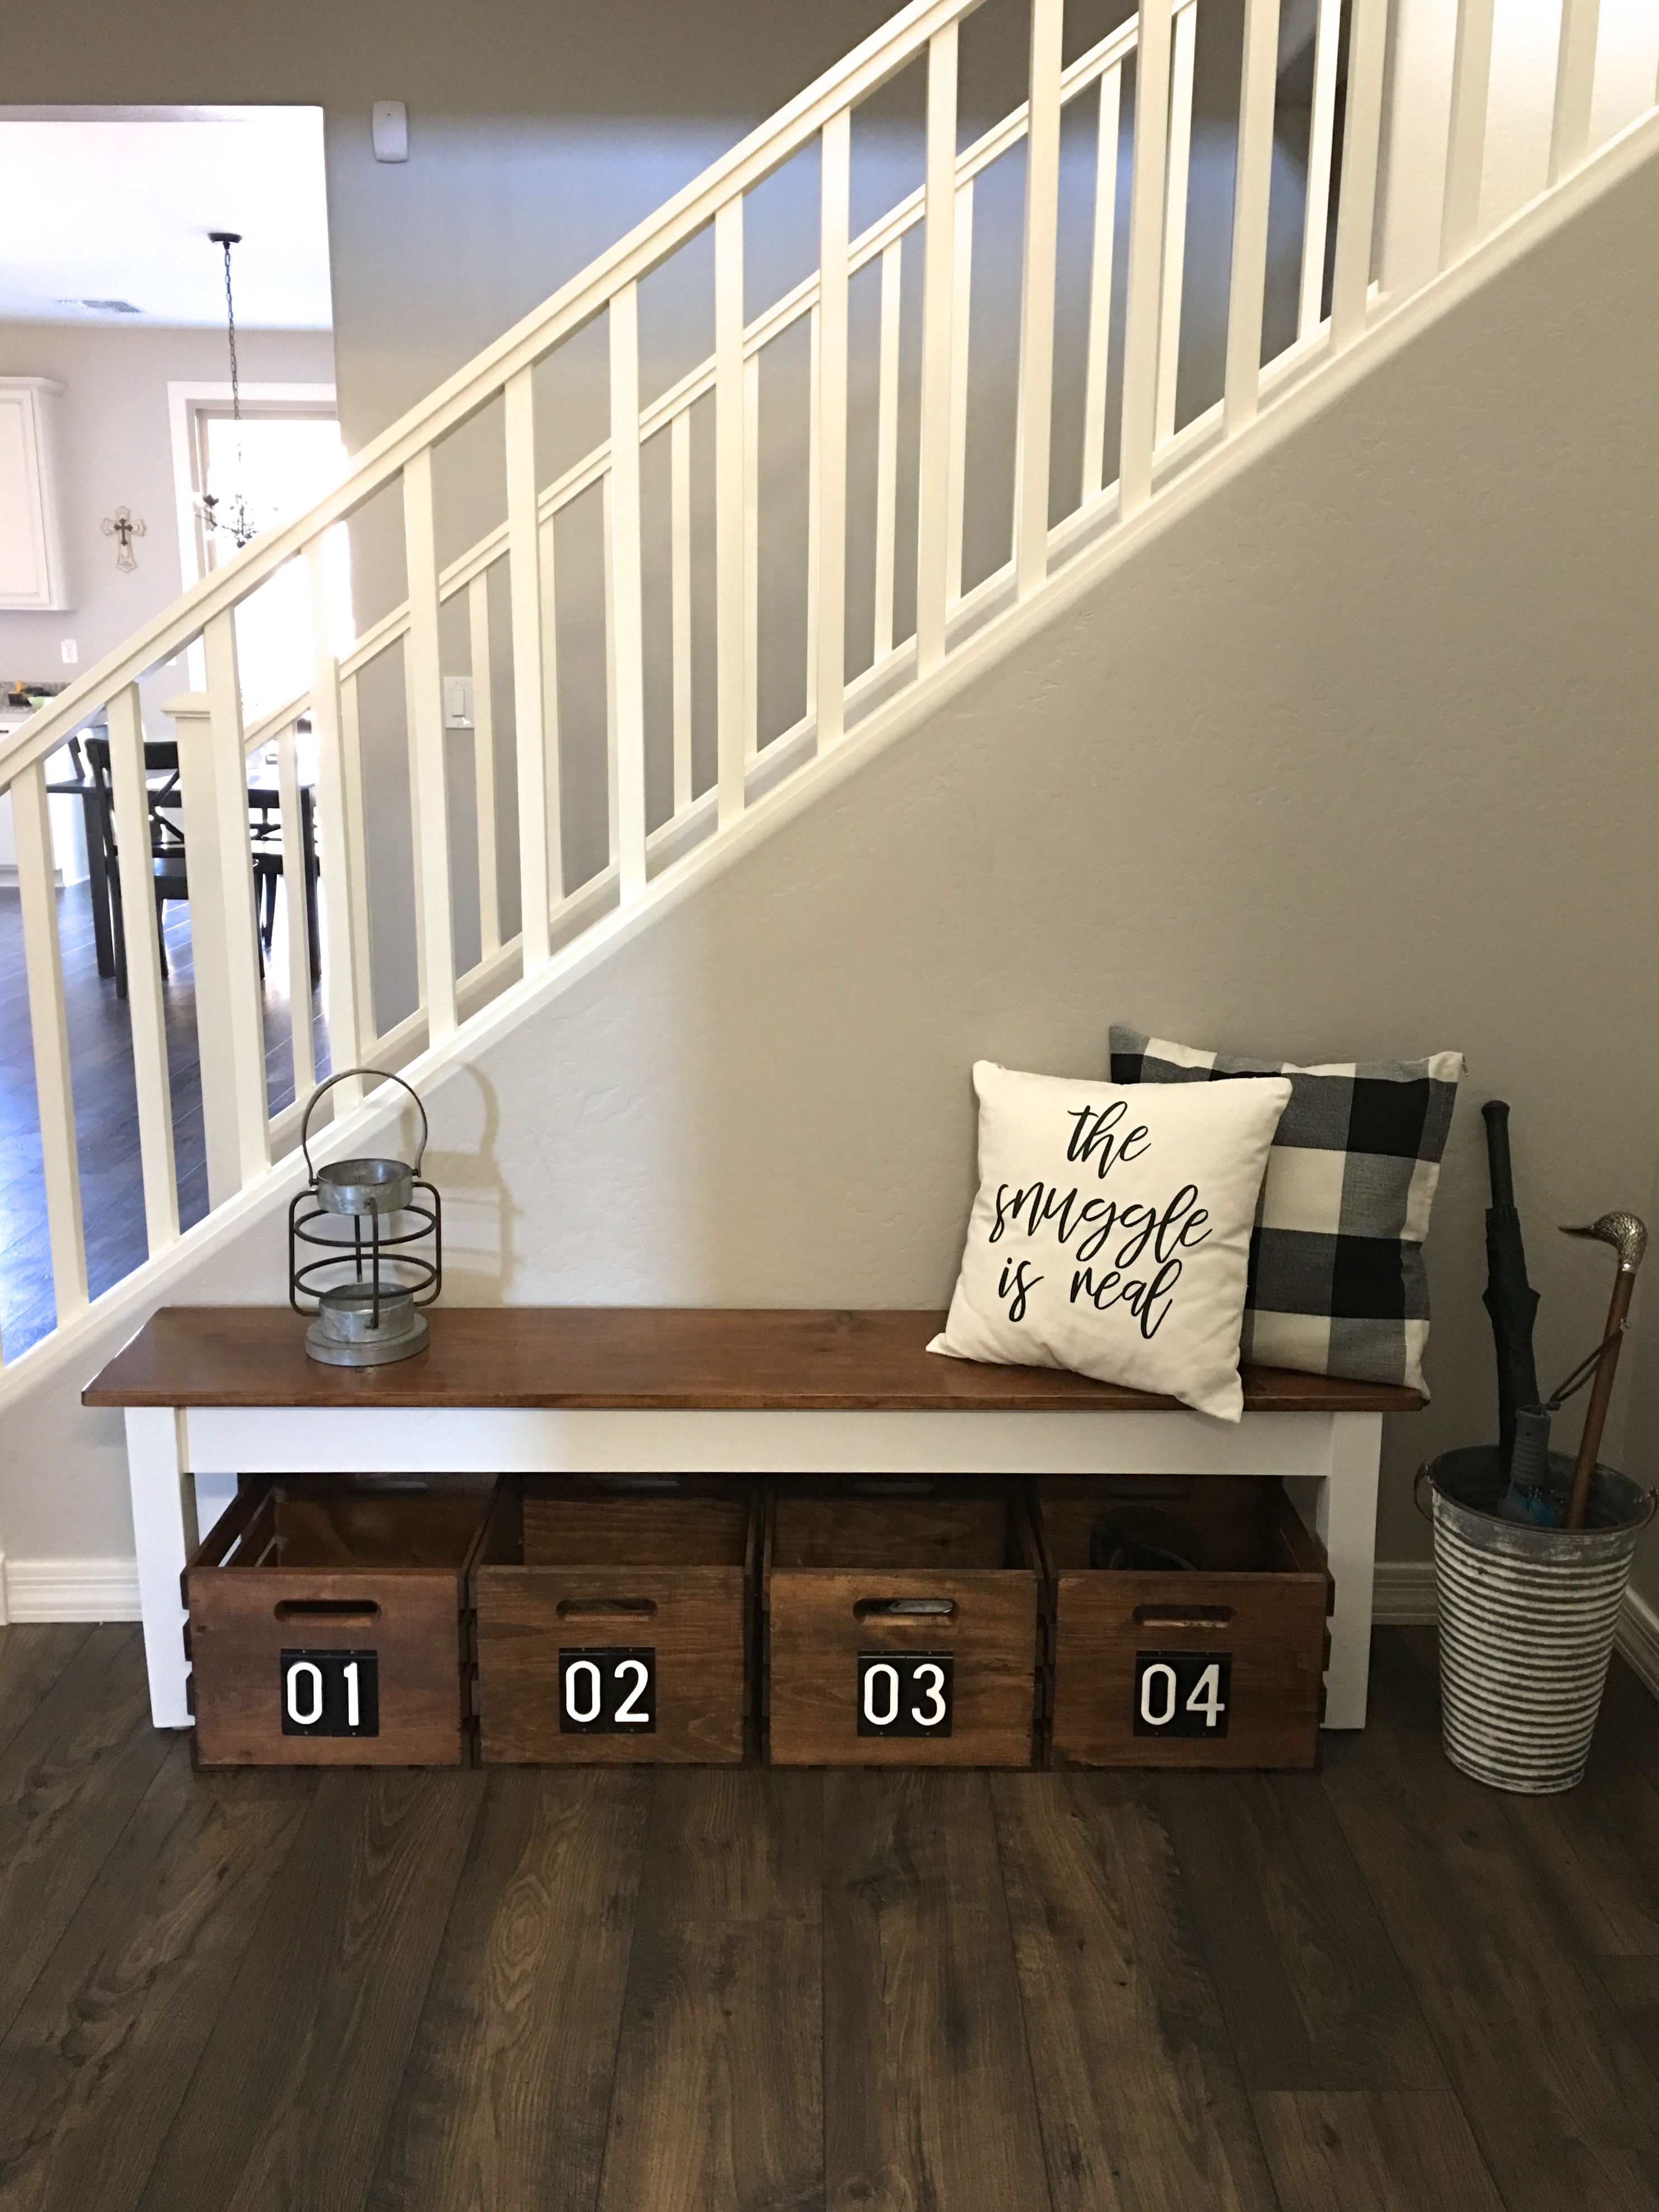
XOXO!!


I like how sturdy those numbers look. The nail holes make them even better.
Thank you so much! 🙂
I love all things organized and this is really cute. The crates are perfect under the bench and the numbers was just what they needed. Love it.
Thank you so much! Yes, I love things organized too! 🙂
I love your numbered crates. My grandchildren always take their shoes off and the entry way can become like an obstacle course! LOL Thanks for sharing and hosting. By the way, I always love to see your Instagram posts. They are always so eye catching.
Thank you so much for your sweet comment! I totally get that with the shoes, they used to be all over!! Have a wonderful weekend!